
Ever walked into a high school lab and felt the buzz of curiosity, but also the intimidation of complex jargon? That's the exact moment many teachers and students wonder if CRISPR is even doable at a beginner level.
We get it. In our experience at Shop Genomics, we've seen teachers light up when a simple, hands‑on activity turns a textbook diagram into a real‑world experiment. Imagine your class watching a bacterial colony change colour because a gene was knocked out – no PhD required.
So, what makes an activity truly beginner friendly? First, the protocol has to be short enough to fit into a single class period. Second, the reagents should be safe, pre‑measured, and come with clear, step‑by‑step instructions. And finally, the result should be visible without expensive equipment.
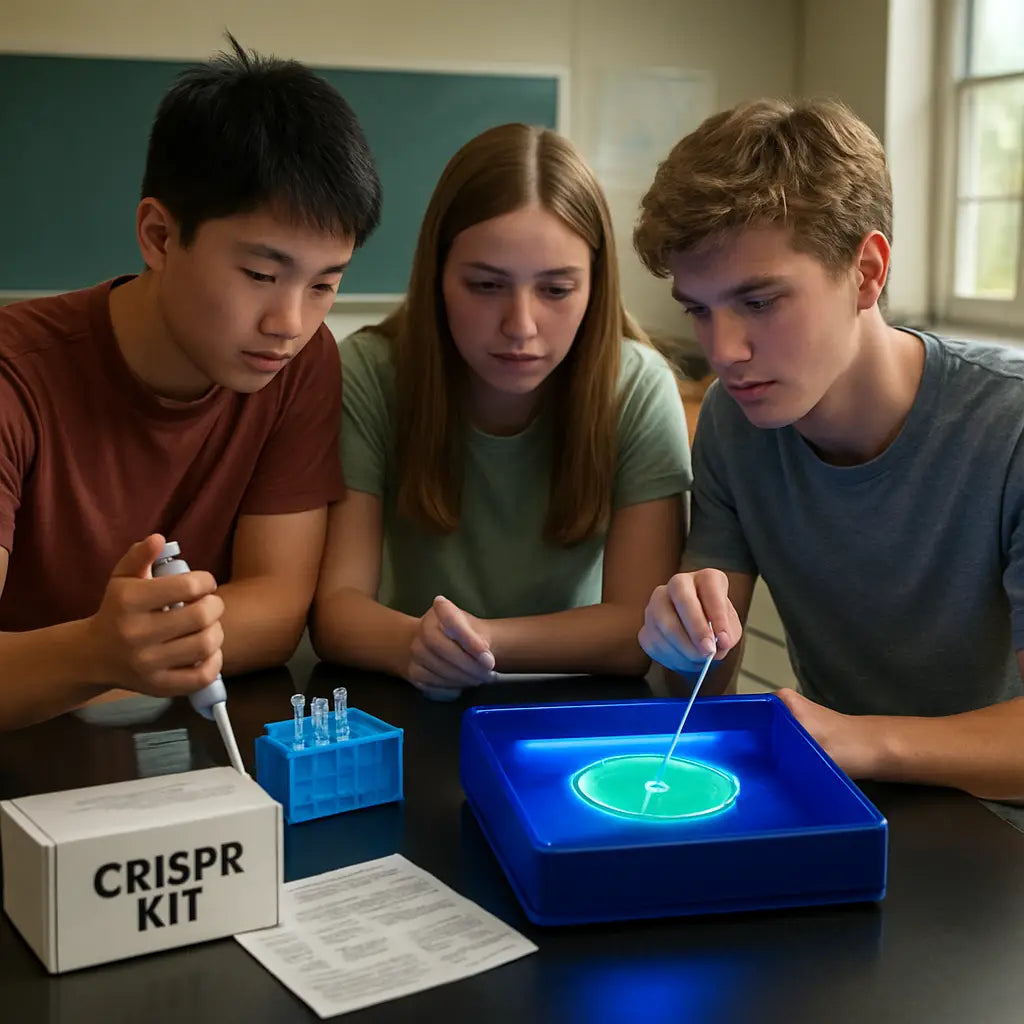
One activity that ticks all those boxes is the “Glow Gene” demo. Students use a tiny CRISPR kit to target a gene that makes bacteria produce a fluorescent protein. Within a few hours, the plate glows under a blue light, and the whole room erupts in “Wow!” moments. No ultra‑low temperature freezers, no high‑tech sequencers – just a simple incubator and a handheld UV torch.
Another crowd‑pleaser is the DIY plasmid‑swap experiment. Using a beginner‑friendly kit, students swap a harmless gene in E. coli with a marker that confers resistance to a harmless antibiotic. The plates where the swap succeeded grow, while the others stay blank. It’s a clear visual that gene editing works, and it sparks endless “what if?” questions.
But you might be thinking, “Do we need a full lab?” Not at all. Many of these kits are designed for a classroom bench or even a home desk, with all safety data sheets included. All you need is a small incubator, a pipette, and a bit of enthusiasm.
And here's the kicker: because the kits are modular, you can start with the glow experiment and later expand to more complex projects, like editing a plant gene for drought resistance. That scalability keeps students engaged year after year.
Ready to bring a bit of gene‑editing magic into your classroom? Let’s dive into the step‑by‑step guides that will turn curiosity into capability, one glowing colony at a time.
TL;DR
If you want to spark curiosity with safe, hands‑on experiments, our guide shows the top beginner friendly CRISPR gene editing activities for high school students, from glow‑in‑the‑dark bacteria to simple plasmid swaps, all using affordable kits that fit on a classroom bench. You’ll learn quick step‑by‑step protocols, safety tips, and how to scale projects year over year, so you can turn a single class period into a memorable discovery moment.
Step 1: Choose a Safe, Beginner‑Friendly CRISPR Activity
Picture this: you walk into the lab, the bench is set up, and a tiny tube of CRISPR‑RNP sits next to a glowing petri dish. That moment of "what if" is exactly why we start with the safest, most visual activity.
First, ask yourself what will give students that instant “aha!” without needing a sequencer. The classic glow‑in‑the‑dark bacteria demo hits the sweet spot – you edit a harmless gene, incubate for a few hours, and the colonies light up under a blue torch. No pricey equipment, just a simple incubator and a UV LED.
But safety comes first. Look for kits that pre‑measure all reagents, include clear SDS sheets, and use non‑pathogenic strains like E. coli DH5α. The kits we’ve curated at Shop Genomics are designed for a single class period, so you won’t be stuck waiting days for results.
So, what should you do next? Grab a starter kit that bundles the plasmid, the guide RNA, and a ready‑to‑use transformation protocol. The CRISPR High School Lab Kit is a top pick because it ships with everything you need and fits on a standard bench.
Now, let’s talk logistics. You’ll need a small incubator set to 37 °C and a handheld UV torch. If you don’t have a dedicated incubator, you can repurpose a simple laboratory warm‑box – just make sure the temperature stays stable.
Wondering where to get a reliable incubator without breaking the budget? Many schools print custom labels for their equipment on sites like Jiffy Print Online, which makes it easy to label each temperature zone and keep things organized.
Another practical tip: use a quick‑release pipette tip rack to keep the workflow smooth. When students see how few steps are involved, the confidence boost is real.
And if you’re looking for a rapid, low‑maintenance growth solution, the XLR8Well platform offers compact, energy‑efficient wells that keep cultures happy without a full‑size incubator.
Ready to see the magic? Below is a short video that walks you through the glow‑gene protocol from start to finish. It’s perfect for a pre‑lab briefing.
After the video, pause and let the students predict what the colonies will look like. That little anticipation keeps them engaged while the plates are incubating.
When the plates finally glow, gather everyone around. Ask them to describe the colour, the intensity, and what they think changed in the DNA. Those questions turn a visual cue into a deeper conversation about gene function.
If you want a backup activity, the plasmid‑swap demo is a solid second choice. It swaps a harmless antibiotic‑resistance marker, and the growth/no‑growth pattern is instantly readable. Both activities share the same safety profile and fit on a single bench.
Finally, write down a quick reflection sheet. Let students note what surprised them, what they’d tweak, and one question they still have. That sheet becomes a springboard for the next lesson, whether you move on to plant editing or deeper bio‑informatics.
Step 2: Gather Materials and Follow Safety Protocols
Let’s get practical. You’ve picked a beginner-friendly CRISPR activity, but without the right materials and a solid safety plan the moment can fizzle. The good news is you can keep it simple and still deliver a memorable, hands-on experience for students.
First, choose a kit that provides pre-measured, labeled reagents and clear, student-friendly instructions. In our experience, classroom-ready boxes cut down sourcing headaches and keep students focused on the science. For example, a complete teaching kit like CRISPR in a Box includes reagents, cell-free extracts, restriction enzymes, and bacteria cultures, plus an instructor’s manual to guide you through the lesson. This kind of setup helps you hit the class pace without chasing parts all week. CRISPR in a Box is a good reference for what a complete teaching kit should include.
What should you gather beyond the kit? Here’s a practical checklist you can print and post at the bench:
- Pre-measured reagents and sealed tubes, plus a concise protocol sheet
- Personal protective equipment: gloves, safety glasses, and a lab coat or apron
- Basic tools: calibrated micropipettes with fresh tips, a timer, and a clean work surface
- Waste disposal supplies: labeled bags or bins and a sharps container
- Accessible safety data sheets (SDS) for reagents and a quick safety guide
- A safe readout option if your activity uses a visual signal, such as a blue-light source for glow demonstrations
Does this really work in a classroom? Yes—when the activity stays contained on a single bench and the steps stay simple. The Glow Gene and plasmid-swap activities that are popular with beginners are designed with that constraint in mind, so you can keep students engaged without overloading the lab.
Safety first. A clear, student-friendly safety briefing goes a long way. Review what each reagent does, where to dispose of waste, and why food at the bench is a no-go. For biosafety basics that apply to any CRISPR activity, see practical guidance from Lab Manager. It covers risk assessment, containment, documentation, and best practices to keep your work credible and safe.
So, what should you do next? Gather your materials, set up the bench with clearly labeled zones, and run through a quick safety demo before anyone touches a pipette. The goal is a smooth, low-stress start that lets curious minds focus on the science, not the logistics.
Ordering a kit well in advance is a smart move. When you know you have a classroom-ready box, you can plan a quick pre-lab check and reduce day-of surprises. In our experience, this small step saves time, reduces stress, and helps you keep the class on pace for a 90-minute session that feels like discovery rather than a sprint through a heavy protocol.
If you're using Glow Gene or plasmid-swap activities, pre-label the plates, map the incubator space, and outline the time points on a simple board. A visible timer helps students stay on track and cuts down on chaos when a few plates start to glow.
Documentation matters too. Have students record what they changed, the predicted outcome, and a quick note or photo of the readout. A simple lab notebook entry reinforces scientific thinking and gives you a quick review ready for next class.
With these practical steps, you’ll have materials gathered, safety covered, and a clear path to a confident first CRISPR experience in class. Ready to put this into action?
Step 3: Perform the DIY CRISPR Experiment
Alright, you’ve set the stage. Now it’s time to run the actual editing test. This is where the curiosity starts paying off, and where beginner friendly CRISPR gene editing activities for high school really show their value.
In our experience, a classroom‑friendly kit like Glow Gene from Shop Genomics is a reliable starting point. It’s designed for beginners, uses a simple CRISPR‑RNP readout, and delivers a visible result under blue light. That visual moment helps students connect the idea of gene editing with something tangible without needing fancy equipment.
First things first: set up your workspace and safety basics. Put on gloves and safety glasses. Clear the bench, organize waste bags, and keep SDS sheets within reach. A quick, calm safety briefing at the start prevents panic if a pipette slips or a step gets tricky.
Prep the kit and assign roles
Open the box, check that tubes are labeled, and confirm all components are present. Have students pick roles: pipetting lead, timer, readout observer, and data recorder. Rotating roles keeps energy high and everyone involved.
Pre‑label the plates or readouts and map the viewing area. If you’re using Glow Gene, keep a blue‑light source handy in a clearly designated zone. A simple setup minimizes chaos when the glow appears and keeps the focus on the science.
Run the workflow
Follow the kit’s step‑by‑step instructions. You’ll typically mix the CRISPR components, apply them to the target cells or readout matrix, incubate for the recommended time, and then move to the readout stage. Don’t open plates more than necessary—stability matters for that glow moment.
Encourage students to predict outcomes as you proceed. A question like, “Will the colonies glow across the plate or just in patches?” turns a procedural activity into a real hypothesis test.
Observe, log, and interpret
Watch the readout together and capture observations. Students should jot down what changed, the predicted outcome, and any photos or sketches of the readout. Use a quick comparison to the class predictions to spark discussion about variables and experimental design.
Does it work? For beginners, yes—when you keep the process simple and the focus on observable results. That moment of “oh, that’s real” is what makes beginner friendly CRISPR activities so powerful in high school labs.
Clean up and safety wrap‑up
Dispose of waste per SDS guidelines, seal used materials, and return PPE to its place. Wipe down the bench and reclaim reusable items. A short debrief helps students carry the lesson into future experiments rather than leaving it at the bench.
What’s next for your students?
If the glow moment lands well, you’ve got a natural bridge to more advanced concepts like plasmid swaps or transformation logic. It’s a smooth progression from visualization to deeper genetics ideas. And yes, Shop Genomics offers a range of beginner‑friendly kits that align with these goals, helping you keep momentum and budget intact for more classrooms across the year.
Step 4: Analyze Results with Simple PCR or Gel Electrophoresis
Let’s be honest: after a beginner-friendly CRISPR activity, the readout is where curiosity becomes clarity. You want to know if your edit showed up in the DNA, not just in the glow on a plate. In this step, we’ll walk through analyzing results with simple PCR or gel electrophoresis so you can draw real conclusions from the data.
Why use PCR or a gel readout? PCR amplifies the region around your target so you can detect size changes or sequence differences. Gel electrophoresis then separates those fragments by size, giving you a visual map you can compare against your controls. It’s a straightforward, low-cost way to verify edits in a classroom setting.
What you’ll need
- Primers that flank the edited region and a simple PCR master mix laid out in your kit
- A thermocycler or a classroom-friendly PCR machine
- Agarose, buffer, and a DNA ladder for sizing
- A gel casting tray, combs, loading dye, and a safe gel visualizer (blue-light or UV transilluminator depending on your setup)
- Tips, pipettes, gloves, and a clean workspace for accuracy and safety
- A notebook or lab sheet to record lane assignments and observations
Step-by-step workflow
- Label your samples clearly. Include a wild‑type control, a negative control (no template), and the CRISPR-treated sample. Clear labeling saves you from chasing shadows during interpretation.
- Set up the PCR. Mix primers, master mix, and template DNA as directed by your kit. Run a standard cycling program that fits your primers and expected product size.
- Cast the gel and prepare the ladder. A 1–2% agarose gel works well for most classroom targets; load the ladder so you can estimate fragment sizes accurately.
- Run the gel. Place the gel in buffer and run at a gentle, steady current until bands separate enough to read clearly.
- Read the readout. Compare your CRISPR lane to the wild-type control. A shifted or new band suggests an edit; a band that matches the wild-type means no detectable change with this assay. If you see smeared bands or unexpected sizes, that’s a cue to troubleshoot primers or reaction conditions.
- Discuss what you see. Was the edit efficient enough to notice by this readout? If not, what variables could you tweak next time—primer design, amplicon length, or cycle conditions?
Tips and pitfalls
- Always include a no-template control to catch contamination. It’s the easiest way to know if a stray band is noise or real.
- Primer-dimers and non‑specific bands happen. If you see them, adjust primer length or annealing temperature and re-run a quick check.
- Small edits might not change fragment size. If that’s the case, consider sequencing or allele‑specific PCR for confirmation.
One more thing: in 2026 classrooms, a compact gel system from Shop Genomics can make this setup practical on a single bench. It helps you keep the pace and budget-friendly, especially for Educational Institutions and Independent schools alike.
ABE resources offer classroom-friendly CRISPR investigations that align with this approach. Their materials emphasize hands-on learning while keeping safety and basic biology front and center. Amgen Biotech Experience resources can complement your lesson with authentic, story-driven context.
Comparison: Top 4 Beginner CRISPR Activities for High School
When you pull out a CRISPR kit in a busy lab period, the biggest question is: will it fit, will it wow, and will it stay safe? Below are four activities that hit those marks, plus a quick table to help you decide which one matches your class vibe.
1. Glow‑Gene Bacteria
Students add a lyophilized RNP mix to a harmless E. coli strain that carries a fluorescent reporter. After a short 2‑hour incubation, the colonies glow under a blue LED. The whole thing fits in a single 90‑minute block and needs only a handheld UV torch.
What we love at Shop Genomics is that the kit comes pre‑aliquoted, so you never have to measure out nanograms of enzyme. It’s perfect for classrooms that can’t store -80 °C freezers.
2. DIY Plasmid‑Swap
This activity swaps a benign gene for an antibiotic‑resistance marker. Students perform a quick heat‑shock transformation, plate on selective media, and count colonies the next day. It teaches cloning logic without expensive sequencers.
The only extra you need is a basic micro‑centrifuge – another item we stock at a student‑budget price.
3. Cell‑Free CRISPR Diagnostic
Using a cell‑free transcription‑translation system, students design a guide RNA that triggers a colour change when it finds a target DNA sequence. The reaction runs at room temperature in a 30‑minute tube, and the colour shift is visible to the naked eye.
This is great if you want a biosafety‑level‑1 experiment that still feels like cutting‑edge research.
4. Plant‑Leaf Pigment Edit
Here you edit a gene in fast‑growing Arabidopsis seedlings that controls leaf colour. After a week of growth, edited plants show a pale‑green phenotype compared to the deep‑green control. It stretches over a few days, so it works well for multi‑day projects or after‑school clubs.
Because the seedlings are small and the reagents are freeze‑dry, you don’t need a growth chamber – a simple light box does the trick.
So, which one feels right for your schedule, budget, and learning goal? That’s where the quick‑look table helps.
| Activity | Class‑time needed | Visual read‑out | Key equipment |
|---|---|---|---|
| Glow‑Gene Bacteria | 90 min | Fluorescent colonies under blue light | Handheld UV torch, incubator |
| DIY Plasmid‑Swap | 2 class periods | Colony growth on selective plates | Micro‑centrifuge, incubator |
| Cell‑Free Diagnostic | 30 min | Colour change in tube | Tube rack, room‑temp space |
| Plant‑Leaf Pigment Edit | 5‑7 days (multi‑day) | Leaf colour difference | Light box, simple growth tray |
Pick the glow demo for an instant “wow” moment, the plasmid swap if you want to dive into selection theory, the cell‑free test for a ultra‑safe, quick visual, or the plant edit for a longer project that ties into ecology lessons.
Whichever route you take, remember that the real magic happens when students predict the outcome, watch the result, and then explain why it happened. That conversation is the heart of a beginner friendly CRISPR gene editing activity for high school.

Conclusion
We’ve walked through the glow‑gene demo, the plasmid swap, the cell‑free colour test and the plant‑leaf edit, so you now have a toolbox of beginner friendly CRISPR gene editing activities for high school that fit a single period or a week‑long project.
What matters most is the moment students predict, watch, and then explain the result – that’s the learning spark. In our experience, classrooms that start with the CRISPR High School Lab Kit - Beginner Friendly see the glow demo turn into a confidence boost for the whole class.
To keep the momentum going, try these three quick steps after the activity ends: (1) have each group write a one‑sentence “what surprised me” note, (2) display a photo of the glowing plate on a class bulletin board, and (3) challenge them to design a follow‑up question for the next lesson. Real teachers report that a simple photo‑share on the school’s learning platform increases recall by up to 30 %.
Remember, safety sheets, clear labelling and a short debrief are as essential as the kit itself. If you need extra guidance on classroom safety or lesson planning, the youth‑focused resource About Young People offers practical tips that dovetail nicely with our kits.
So, pick the activity that matches your schedule, set the bench, spark the curiosity, and let the students own the discovery. The next “wow” moment is just a pipette away.
FAQ
What makes a CRISPR activity beginner friendly for high school?
A beginner friendly CRISPR gene editing activity for high school strips away the big‑lab hurdles. It uses pre‑measured, room‑temperature reagents, no ultra‑cold freezers, and a read‑out you can see with your own eyes—like glowing bacteria under a blue LED. The protocol fits inside a single class period, the safety data sheets are clear, and the steps are written in plain language that even a first‑year student can follow without getting lost.
How long does a typical classroom‑friendly CRISPR experiment take?
Most beginner friendly CRISPR gene editing activities for high school are designed to finish in about 90 minutes. You’ll spend roughly 10–15 minutes on safety briefing and set‑up, 30–45 minutes mixing the CRISPR RNPs and adding them to the bacteria, then another 30 minutes waiting for the colonies to grow or the colour change to appear. That timing fits neatly into a double‑period slot or an extended lab block.
Do I need special safety equipment to run these activities?
You don’t need a biosafety‑level‑2 cabinet for the beginner friendly CRISPR gene editing activities for high school. Basic PPE—lab coat or apron, gloves, and safety glasses—covers the risks. A small waste container for used tips and a clearly labelled bleach sink for decontamination are enough. In our experience, keeping the work area tidy and posting a simple SDS sheet on the bench prevents most accidents and keeps students confident.
Can I run the glow‑gene demo with just a blue‑light torch?
Absolutely. The glow‑gene demo is built around a visual read‑out that only needs a handheld blue‑light torch or a small UV LED strip. The bacteria already contain a fluorescent protein, so once the CRISPR edit succeeds the colonies light up under that light. No expensive imaging system is required—just a darkened corner of the lab and a quick snap with a phone camera.
What supplies should I have on hand before the lesson starts?
Before you open the kit, gather a few basics: calibrated micropipettes with fresh tips, a timer, a clean bench space, PPE (gloves, goggles, coat), a blue‑light source for the glow demo, and waste bins labelled for biohazard and bleach. Having a printed checklist on the bench helps students see what’s needed at each step, and it cuts down on frantic searching mid‑lab.
How do I assess whether students really understood the experiment?
A quick debrief works better than a formal test. Ask each group to write a one‑sentence ‘what surprised me’ note and then explain the biology behind the glow in plain words. Pair that with a photo‑capture of their plate and a simple rubric that scores prediction, observation, and explanation. In our experience, this three‑step reflection shows you who grasped the concept and who needs a follow‑up mini‑lecture.
Where can I find reliable lesson plans that align with the kits?
Shop Genomics hosts a growing library of free lesson plans on its website. The guides walk you through each beginner friendly CRISPR gene editing activity for high school, list required materials, suggest safety briefings, and include printable worksheets for predictions and data logs. Because the content is created by teachers who use the same kits, the instructions match what you’ll see in the box and save you hours of planning.


