
A lab freezer alarm that costs less than a coffee machine can save your samples. In the next few minutes you’ll see why cheap alarms matter and how to pick one that fits any budget.
Imagine a small university genetics lab that stored a week’s worth of DNA extracts in a -80 °C unit. A brief power glitch knocked the temp up by five degrees and the old alarm never rang, so the team lost weeks of work and grant money.
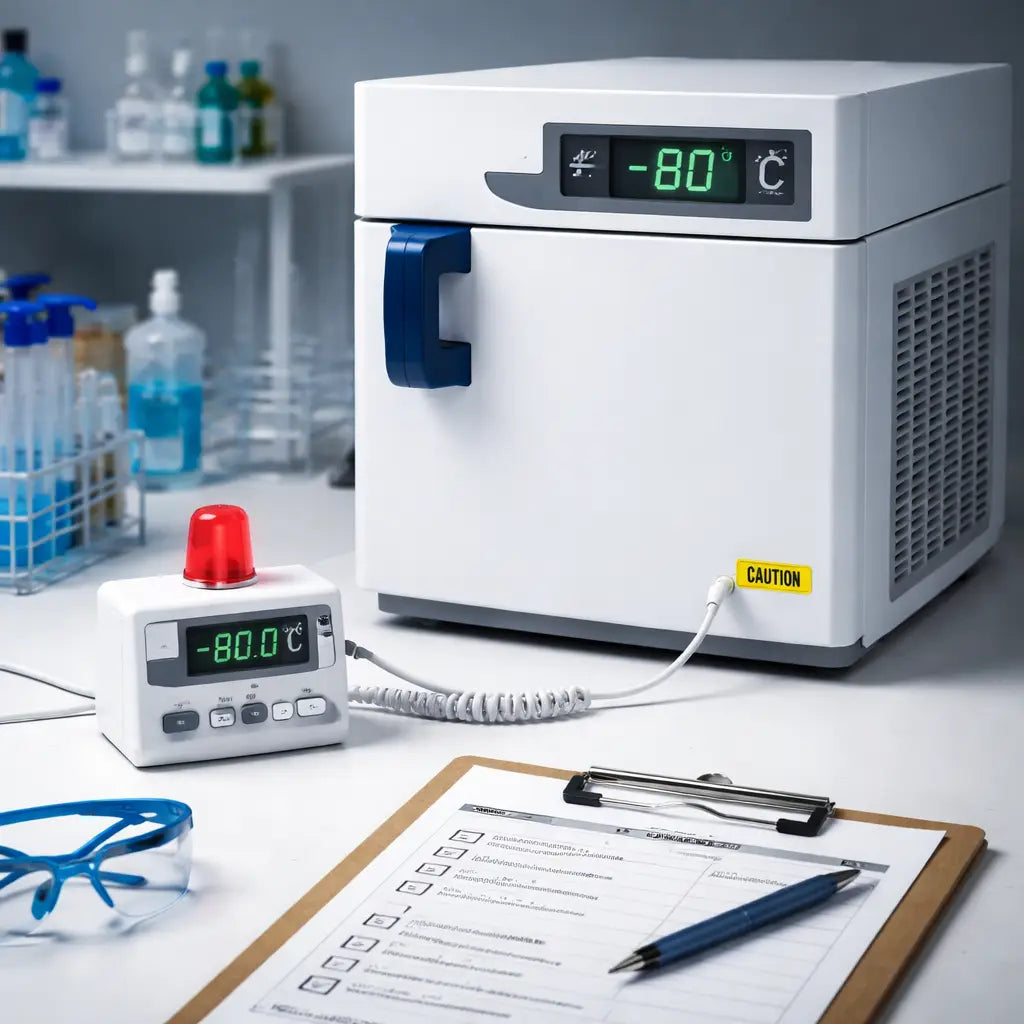
The good news is you don’t need a $2,000 monitoring system to avoid that fate. Most modern freezers, like the Shop Genomics Ai RapidChill 20 CF ULT freezer, already include audible and visual alerts, battery backup, and a simple keypad to set high‑low limits. If your unit lacks those features, a plug‑in alarm kit costs under $150 and can be wired to the temperature probe.
Here’s a quick checklist: 1. Pick a freezer with built‑in alarms or a low‑cost add‑on. 2. Hook the alarm to the temperature probe and set limits a couple of degrees off your target. 3. Use a UPS or the unit’s battery so power loss won’t mute the alert. 4. Test weekly by raising the temp a few degrees – you’ll hear the beep and see the light.
Step 1: Identify Your Freezer Requirements
First, know what your freezer needs to do for you. If you run a lab, the temperature you keep must match the sample type. A -80 °C unit protects DNA, while a -20 °C fridge is fine for enzyme stocks.
Ask yourself four questions. What is the target temperature and how many degrees can you let it drift before a sample is at risk? How much space do you need for tubes, plates, or vials? Does the unit already have built‑in alarms or will you add a cheap plug‑in kit? Will a UPS or the freezer’s own battery keep the alarm alive during a power cut?
Write down the answers. Then match them to a budget. An IT support plan for small labs can help you set up the alarm without blowing your budget. If you need a smart sensor that pings your phone, check out Bubbly Agent AI. For a label printer, Jiffy Print offers cheap, reliable printers for any bench.
Here’s a short checklist you can print and stick on the freezer door:
- Set limits 1‑2 °C off target.
- Connect alarm to probe.
- Hook to UPS or battery.
- Test weekly by raising temp.
Watch this quick demo to see the test in action:
Now picture a lab bench with a modest freezer, a small alarm box, and a sticky note that says “Check weekly”.
When you know the exact temp range, capacity, and power backup you need, picking an affordable lab freezer alarm becomes a simple match‑game. Pick the kit that fits your checklist and you’ll never lose a sample again.
Step 2: Pick the Right Alarm Type
The alarm you choose can mean the difference between a saved batch and a wasted one.
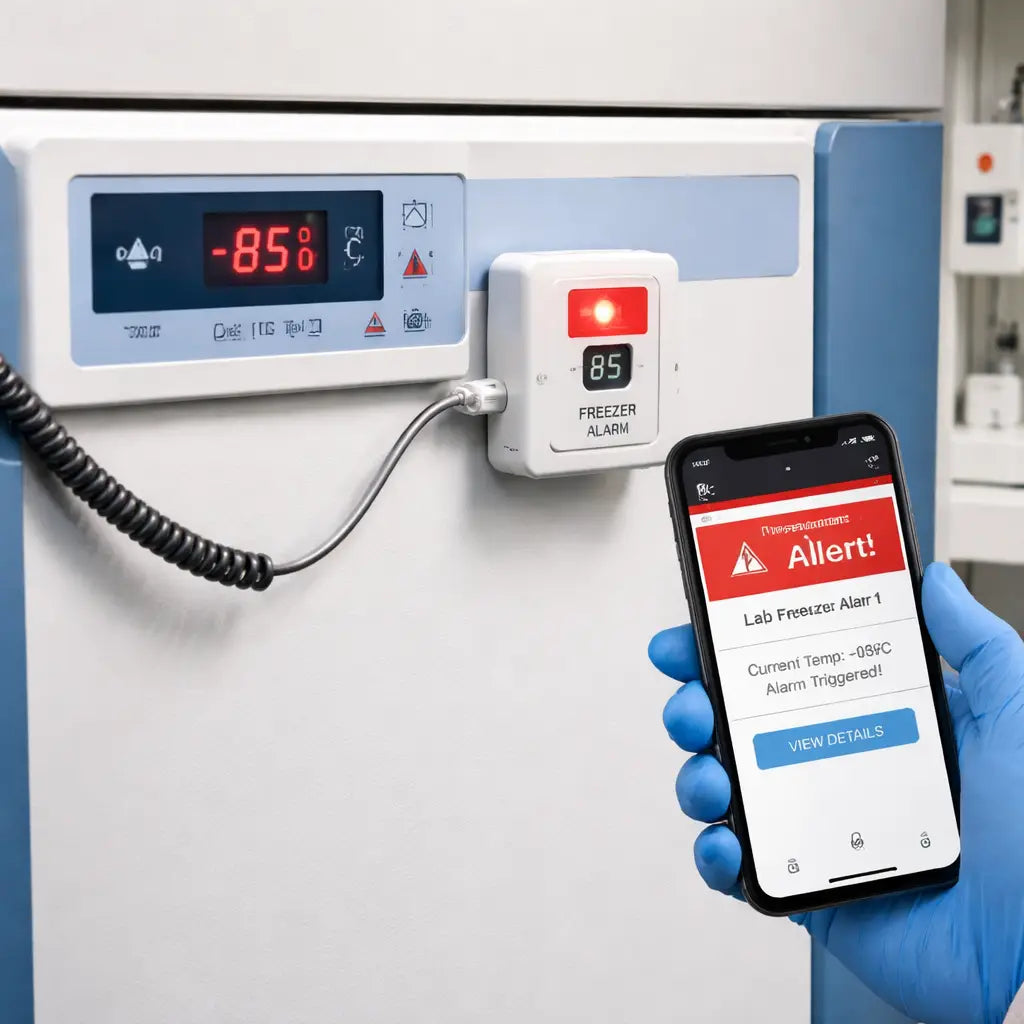
First, decide how you want to be warned. Do you need a loud beep that cuts through the lab hum? Or a flashing light that you can spot from across the bench? Some kits also push a text or app alert to your phone, so you hear the warning even when you’re not at the bench.
Audible alarms are cheap and work even if the power flickers. A simple buzzer costs under $20 and can be wired to the temperature probe. Visual alarms add a second cue, a red LED or panel light catches the eye without adding noise.
Remote alerts give you a safety net when you step out for a meeting. If the alarm can send a push notification, you’ll know right away, no matter where you are in the building.
So, what should you pick?
Match the alarm to your workflow
If your lab runs 24/7 and you rotate shifts, a phone alert is worth the extra setup. It lets the night crew act without waking the day crew.
If you work in a small bench‑top space, a compact beep‑plus‑LED module saves wall space and stays within budget.
Check power needs
Look for models that run on batteries or have a small UPS backup. A battery‑powered alarm stays alive during a brief outage, which is important for ultra‑low freezers.
Finally, read a quick checklist: set high and low limits a few degrees off your target, test the beep and light, and verify the phone push works. If everything fires, you’ve nailed the right alarm type.
For more on what features matter, see this freezer thermometer alarm guide.
Step 3: Install the Alarm – Video Walkthrough
Grab the kit and follow the video step by step. The clip shows each screw, each wire, so you don’t guess.
First, turn off the freezer power. Plug the unit into a wall socket that you can reach without bending. This keeps you safe and stops the alarm from beeping while you work.
Next, locate the temperature probe connector on the back of the freezer. The video points out a small grey plug near the control panel. Pull the plug gently, then push the alarm’s sensor cable into the same slot. You’ll hear a soft click when it’s seated.
Now mount the alarm module. Use the two short screws shown in the video and tighten them just enough you don’t need a wrench. Place the module where the LED can be seen from the bench, but away from any moving doors.
After the hardware is in place, connect the power lead. The video demonstrates how the red wire goes to the “+” terminal and the black wire to “‑”. If your model has a battery backup, snap the battery clip in as shown.
Finally, power the freezer back up. The alarm should emit a quick test tone and flash the LED. If you see both, you’ve installed it correctly. If not, double check the wiring and the screw tightness.
Tip: Run the test again after a full day of use. A real‑world lab at a university found that a weekly test caught loose wires before they caused a loss of samples.
For more on why temperature alerts matter, see this guide on temperature monitoring best practices. It explains how early alerts can prevent costly sample loss.
Step 4: Test and Calibrate the Alarm
Now that the alarm sits on the freezer, you need to prove it works. A quick test tells you if the wiring is right and if the sensor reads true temperature.
Run a basic beep‑and‑flash check
Turn the freezer on. Press the test button on the alarm module. You should hear a short beep and see the LED flash. If you don’t, double‑check the red and black wires and tighten the screws.
Does the alarm react the same way after a few hours? Let the freezer run a full cycle, then hit test again. A stable response means the sensor is locked in.
Calibrate with a trusted thermometer
Grab a digital probe that you trust. Place it next to the alarm’s sensor, then record both readings. If they differ by more than 1 °C, adjust the alarm’s set point using the small knob or digital menu.
Repeat this at two points – for example, -20 °C and -80 °C – so you know the alarm is accurate across the range you need.
Document and schedule
Write down the final set points and the date you ran the test. Keep the log on the bench or in a lab notebook. Plan to repeat the whole process every month.
Why do this? A study from 360 Medical notes that regular calibration keeps freezers efficient and helps labs stay compliant with FDA‑style standards.calibration guide
And if an alarm ever sounds, XiltriX reminds us that a fast response can stop a costly loss.freezer failure prevention
With these steps, your affordable lab freezer alarm becomes a reliable guard for every sample.
Step 5: Compare Top Affordable Lab Freezer Alarms
Now that you’ve tested and calibrated, it’s time to pick the alarm that fits your budget and workflow. Below are three options that labs of all sizes often reach for.
Here’s a quick side‑by‑side look at price, power source and alert type.
| Alarm | Key Feature | Price Range |
|---|---|---|
| Haier Salvum Ultimate (DW‑86L) | Frequency‑conversion motor, natural HC refrigerant | $150‑$200 |
| Basic Buzzer‑LED Kit | Loud beep plus red LED, battery backup | $30‑$50 |
| Wireless Wi‑Fi Sensor | App push alerts, 100 m range, memory log | $80‑$120 |
The Salvum line shows that you can get reliable ULT storage protection without breaking the bank. A study on budget freezer alarms points out that simple beep‑LED kits still meet most safety standards for basic alert needs. If you prefer remote notifications, the Wi‑Fi sensor lets you see temperature spikes on your phone – a feature highlighted in a recent lab freezer review covering affordable add‑ons.
For academic labs with tight grant budgets, the basic kit gives solid protection for under $50. Clinical labs that must log every event often choose the Wi‑Fi sensor because audit trails are easy to pull from the app.
Ask yourself which alert style fits your daily routine. Do you need a loud sound that cuts through the hum of a busy bench? Or does a silent phone ping feel less disruptive? Pick the one that makes you react fast.
Once you’ve chosen, write the model name on your calibration log and set the limits a couple of degrees away from your target. You’ll know you’ve made the right pick when the alarm sounds the first time you raise the temperature in a test.
Tip: Keep a spare battery in the freezer cabinet so the alarm never loses power during a short outage.
Conclusion
You've seen how a cheap alarm can stop a sample loss before it happens.
Pick the alert type that matches your workflow, a loud beep for a busy bench, or a silent phone ping if you step out often.
Set the limits a few degrees away from your target, log the model name, and run a quick test each week.
Keep a spare battery handy so a power glitch never silences your guard.
When you need a reliable, affordable lab freezer alarm, Shop Genomics offers kits that fit under $50 and still meet safety standards.
Now that you know the steps, grab the kit, hook it up, and let the alarm do the watching so you can focus on the science.
And remember, a simple test each month catches loose wires before they cause a loss. A few minutes now saves weeks of work later.
FAQ
What is an affordable lab freezer alarm and why do I need one?
An affordable lab freezer alarm is a low‑cost device that watches the freezer temperature and lets you know when it drifts out of range. It helps you catch power glitches, sensor failures, or door leaks before samples are lost. Because a single freeze can ruin weeks of work, the alarm acts like a guard that sounds a beep or sends a phone ping, giving you time to act.
How do I choose the right alarm type for my lab?
Pick the alarm type that fits how you work. If your bench is noisy, a loud buzzer cuts through the hum. If you prefer a visual cue, a red LED on the freezer panel works well. For labs that step out often, a push‑notification to your phone keeps you warned wherever you are. Match the alert style to your daily flow, and set the high and low limits a few degrees away from your target.
Can I install the alarm myself?
You can wire the alarm yourself in under an hour. First, turn off the freezer and unplug it. Then locate the temperature probe connector on the back and plug the alarm’s sensor cable into the same slot. Secure the module with the two screws shown in the kit, and attach the power lead. Finally, power the unit back on and press the test button – you should hear a beep and see the LED flash.
How often should I test and calibrate the alarm?
Run a quick test each week to prove the alarm still works. Press the test button and verify a beep and LED flash. Then raise the freezer temperature a couple of degrees – the alarm should fire. Compare the alarm’s reading with a trusted handheld thermometer; if the gap is more than one degree, adjust the set point using the knob or menu. Log the date, settings, and any changes in a lab notebook.
What power backup options work best?
A reliable alarm needs power even when the mains drop. Choose a kit that includes a rechargeable battery or a small UPS that can run the alarm for at least 30 minutes. Test the backup by unplugging the freezer; the alarm should stay quiet until the temperature moves out of range, then sound as normal. Keeping a spare battery in the freezer cabinet ensures the alarm never goes silent during a brief outage.
Where can I buy a reliable affordable alarm?
Shop Genomics offers a range of affordable lab freezer alarms that meet safety standards and ship with free returns. Their kits start under $50 and include everything you need – sensor cable, alarm module, battery backup, and a short guide. You can order directly from the website, and the support team will help you pick the right model for your lab size and workflow.


