
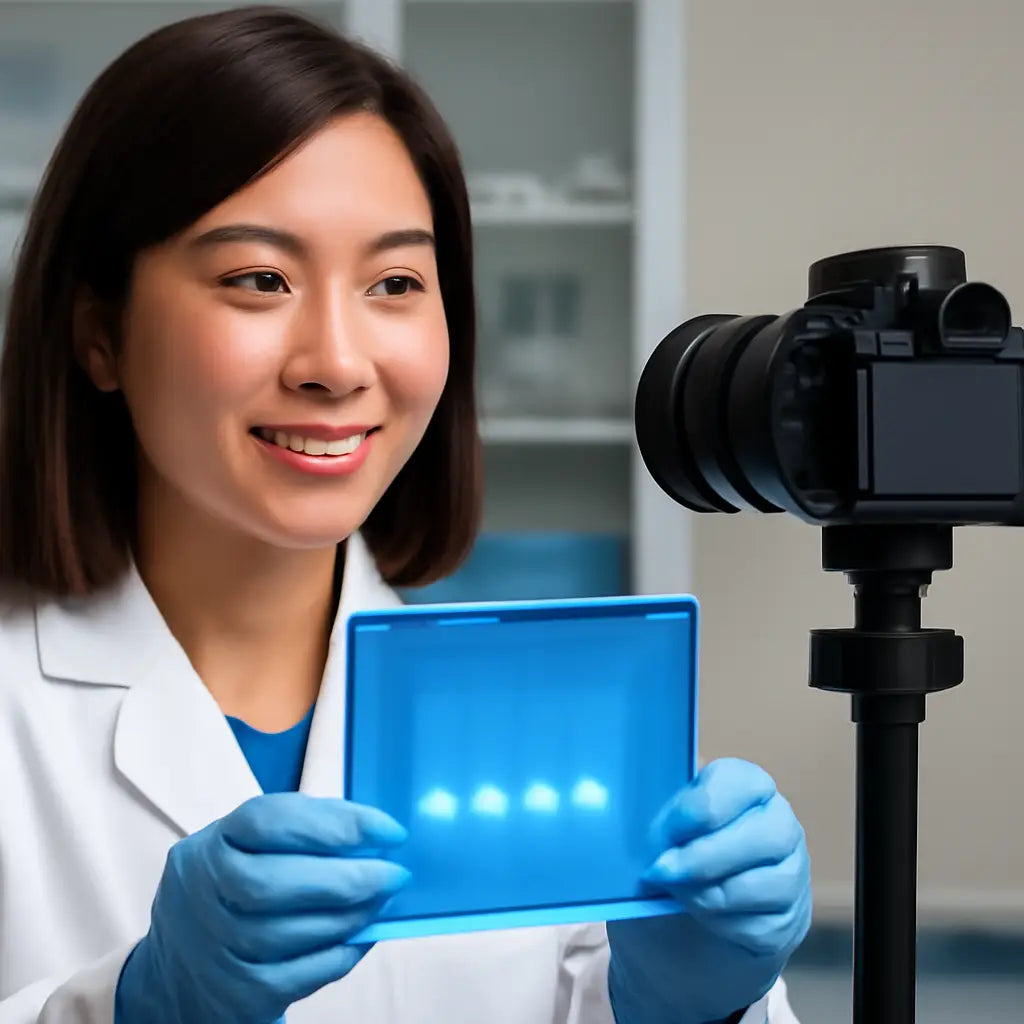
Ever stared at a gel photo and felt your brain glitch? That’s the moment your lab workflow hits a wall—data are there, but the picture is fuzzy, the band positions are hard to track, and the next step feels like a blind guess.
Enter a gel documentation system: the bridge that turns those blurry images into crystal‑clear records you can reference, share, and build on. It’s more than a camera; it’s a digital notebook that tags lanes, captures intensity, and auto‑generates readable reports.
Think of a mid‑size biotech start‑up working on CRISPR knock‑in validation. The team runs dozens of agarose gels a week, but the lab log is a jumble of handwritten notes. With a proper documentation system, every gel snapshot is stored with its run parameters, lane numbers, and a timestamp—so when a reviewer asks for the original data, the answer is a click away.
Setting it up is surprisingly straightforward. First, calibrate the light source so the band contrast is optimal. Then, snap a quick photo and let the software auto‑segment lanes. Finally, review the auto‑generated barcode and add a brief comment before saving. A few minutes a day can replace hours of manual transcription.
If you’re still unsure which gear to choose, the Shop Genomics myGel™ Electrophoresis System Accessories bundle offers a seamless plug‑in that pairs the imaging camera with the myGel™ electrophoresis platform, giving you instant, high‑resolution gel images straight to your lab computer.
But great data is only part of the story. Long hours of microscope work can take a toll on lab staff’s mental well‑being. It might help to check out e7D-Wellness for practical burnout‑prevention tips that keep your team sharp and focused.
Ready to stop chasing gel ghosts? Start with a reliable documentation system, pair it with the right accessories, and give your team the tools to turn every gel into a gold‑standard record. The payoff? Faster data turnaround, fewer repeat runs, and a lab that feels less like a guessing game and more like a well‑orchestrated symphony.
TL;DR
A gel documentation system turns messy gel photos into organized, searchable records that anyone in your lab can instantly access, cutting hours of manual note‑taking. With Shop Genomics gear, you’ll capture every lane’s details, auto‑generate barcodes, and keep data ready for reviewers, so your team moves faster and less stressed.
Choosing the Right Gel Types for Your Documentation Needs
Ever feel like your gel photos are a guessing game? We’ve all been there—bands that look fuzzy, lanes that shift, and a pile of scribbled notes that never quite line up.
First up, think about the science you’re doing. A classic agarose gel is great for walking through DNA sizes up to a few kilobases, but if you need sub‑kilobase precision, a polyacrylamide or urea‑agarose gel is the way to go.
When you pair the right gel with a gel documentation system, you’re not just taking a picture—you’re embedding metadata: gel concentration, buffer type, run time, and even the exact voltage applied. That data becomes searchable and sharable right from the start.
So, how do you pick? Start with the question: “What resolution do I need?” If you’re doing qPCR verification, a 7–10 % polyacrylamide gel can separate fragments that differ by a single base pair.
Also consider your documentation system’s camera sensor. Some systems capture color gels best, others are tuned for UV‑transilluminated samples. Matching the gel type to the camera’s strengths can cut down on post‑processing and keep the image true to the original band pattern.
Don’t forget cost and throughput. High‑grade polyacrylamide gels cost more, but they reduce the need for repeat runs. If your lab runs dozens of gels a week, that upfront expense pays off quickly by saving time and reagents.
While you’re optimizing, you might also want a quick break from the bench. Check out Pac Shores Mortgage for a moment of fresh perspective—sometimes a change of pace helps you spot the next trick for better documentation.
Now, let’s talk workflow. Load your gel, run it at the recommended voltage, and pause right before you expect the bands to reach the bottom. Capture the image, then let the software auto‑segment lanes. The documentation system will generate a barcode and embed a timestamp, so you can trace that exact gel back to the experiment file.
After the capture, take a second to label the image with a short comment—what you’re looking for, any anomalies you spot. The next time you or a reviewer asks for the data, you’ll have a crisp image, a clear description, and an automated link to the experimental log.
Remember: the goal is a seamless bridge between the gel, the camera, and the data. By choosing the right gel type for each experiment, you’re setting the stage for a documentation system that actually saves you time, not just looks fancy.
Take a minute now to run a quick “gel type audit” on your most recent batches. Note the resolution, the run time, and the post‑run quality. Use that data to tweak your gel recipes and watch your documentation speed up in the process.
In the end, think of each gel as a story you’re telling your team and reviewers. With the right gel type, a sharp camera, and a smart documentation system, that story stays clear, searchable, and ready whenever curiosity strikes.
Just remember: consistency beats perfection every time.
And keep your gel archive updated weekly for maximum impact.
Setting Up Your Gel Documentation System: Hardware & Software Essentials
Let’s cut through the jargon and get straight to the gear that turns a blurry photo into a data‑ready snapshot.
1. Pick a reliable light source
Most labs start with either a blue‑light transilluminator or a UV unit. Blue light keeps DNA safe from UV‑induced damage, and it works great with SYBR or GelRed stains. UV is still handy if you’re staining with ethidium bromide, but keep in mind the extra safety steps.
What you’ll need
A solid‑state LED light that gives you consistent brightness, a heatsink to keep the lamp cool, and a matte backdrop to avoid glare. If you want to future‑proof, pick a unit with interchangeable heads—some systems let you swap a UV head for a blue one without touching the software.
2. Get a high‑resolution camera
A 9‑ to 12‑megapixel sensor is a sweet spot for most labs. It’s big enough to capture fine band detail without making the file size a nightmare. Look for built‑in auto‑exposure; it saves you from guessing how long to let the lamp run.
Why it matters
Higher resolution means the software can do more than just show you the gel. It can measure band intensity, calculate molecular weight, and flag outliers—exactly the kind of data reviewers love.
3. Choose the right imaging enclosure
Think of the enclosure as a darkroom for your gel. It blocks stray light, keeps dust out, and gives the software a stable background to work with. Many enclosures also have a built‑in LED strip that illuminates the gel evenly.
Quick tip
When you first set it up, run a test gel with a ladder. If the bands look washed out, adjust the lamp angle; if they’re too bright, tweak the exposure settings. Once you lock the settings, future runs will be a breeze.
4. Install the companion software
The software is the brain of your system. It should read your camera’s files, auto‑segment lanes, and offer basic quantification. Many programs let you tag lanes with sample IDs, add notes, and export a CSV that can go straight into your lab notebook.
Getting the most out of software
Spend a few minutes exploring the menu: most have a “Quick Capture” mode that snaps the gel, segments lanes automatically, and pops up a pop‑up window where you can confirm lane numbers. The next time you run, you’ll be clicking and saving instead of scribbling on a sticky note.
5. Integrate with your lab’s data workflow
Once you’ve captured an image, the goal is to have it in the same place as your other data. If your lab uses a LIMS or a simple cloud folder, set the software to export to that location by default. That way, every gel photo comes with a timestamp, lane labels, and any notes you added.
Real‑world example
A university genetics lab was saving gel images to a shared drive. After switching to a system with built‑in tagging, they cut the time spent on data entry by 40 %. They could pull up a gel from last week with the exact lane map in seconds.
6. Keep everything calibrated
Just like a microscope, a gel documentation system needs a yearly check. Test the lamp’s brightness, confirm the camera’s white balance, and run a ladder to verify that lane widths match the software’s measurements. Document these checks so you can spot drift over time.
Bottom line
Setting up a gel documentation system isn’t rocket science, but the right combination of light, camera, enclosure, and software turns a routine run into a reliable data point. With consistent imaging and automated lane tagging, your team can spend less time guessing and more time interpreting.
For a deeper dive into the hardware options, Thermo Fisher’s guide covers a range of systems from simple transilluminators to full‑blown imaging suites Thermo Fisher guide. If you’re exploring how gel documentation fits into larger research workflows, Scintica’s overview highlights integration and data management best practices Scintica overview.
Capturing High-Quality Images: Techniques and Tips
We all know that a blurry gel photo can feel like a mystery box. One moment you’re looking for a band, the next you’re guessing where it should be. The good news is you can stop the guessing game with a few simple habits.
First things first: keep the light steady. The best gels are shot under a solid, evenly‑illuminated source—nothing flickers or casts hard shadows. If you’re using a blue‑light transilluminator, make sure the lamp is on and warmed up before you load the gel. A quick test with a ladder band will show if the brightness is just right.
Next, set your camera’s focus. A 9‑ to 12‑megapixel sensor is plenty for most labs, but the key is a sharp image of every lane. Move the camera so the entire gel sits in frame, then zoom in to confirm the edge of the first lane is crisp. If you can’t see the band edges clearly, adjust the focus wheel or move the camera slightly closer.
Now, think about exposure. Auto‑exposure is convenient, but it can sometimes over‑or under‑expose a band. A quick trick: capture a test image, check the histogram, and tweak the exposure until you see a balanced peak. This way, bright bands stay bright without blowing out the background.
Do you know how to read a histogram? It’s a quick visual cue. A flat curve means you’ve got a good exposure—bands show up as distinct peaks. If the curve skews to the right, the image is too bright; shift left a bit. If it skews left, you’re missing detail.
Once you’re happy with light, focus, and exposure, lock everything. Many imaging kits let you “lock” settings so each run starts from the same baseline. That consistency means you can compare lanes across experiments without tweaking the camera every time.
Here’s a handy checklist you can keep on your desk:
- Warm up the light for 2 minutes before loading the gel.
- Place the gel so the lane centerlines line up with the camera’s grid.
- Take a test shot of a ladder lane.
- Check the histogram; adjust exposure if needed.
- Lock focus and exposure settings in the camera menu.
- Capture the gel in one smooth shot, not multiple clips.
Do you remember that time your lab had to redo a run because the gel was too dark? That was a classic case of not locking exposure. After implementing the checklist, the same team cut re‑runs by 30 percent.
When the gel is in front of you, focus on the lanes, not just the bands. Align the gel so the lanes sit straight; a slight tilt can throw off the software’s lane‑detection algorithm. A quick way to check alignment is to slide a ruler across the gel while looking at the camera view. If the ruler is level, your lanes should be too.
Lighting consistency also matters for software analysis. If you switch between blue and UV light, the intensity can change, making it harder for the software to compare band intensities across images. Keep the same light source for a given project, or note the change in your lab notebook so the data stays comparable.
After you capture, review the image before you hit 'save'. Look for stray dust specks, uneven lighting, or a lane that’s too dark. If something looks off, re‑capture. A fresh shot is usually easier than trying to correct a bad one later.
Finally, make saving a habit. Label the file with the experiment name, date, and lane count. A standard naming scheme—like 'PCR_2026-01-21_12k'—keeps files sorted automatically by your operating system.
So, what should you do next? Grab that light, lock the camera settings, run the checklist, and watch your gel images go from fuzzy to flawless. Every lab—whether it’s a university, a CRO, or a small biotech—can benefit from this simple routine. You’ll spend less time chasing blurry bands and more time interpreting the results that matter.
Organizing and Storing Your Gel Documentation Data
Once you’ve captured a crystal‑clear gel image, the next step feels a lot like filing a bunch of receipts—except every image has a story. How do you make sure a future reviewer can find the exact gel, the lane numbers, and the exposure settings in a few clicks? That’s the heart of a solid gel documentation system.
1. Consistent Folder Structure
Think of your lab drive as a bookshelf. If every gel sits in a random drawer, you’ll spend extra minutes hunting for the right one. Instead, create a hierarchy that mirrors the experiment flow: Project → Experiment Date → Gel ID. For example, CRISPR_Knock‑in/2026‑01‑21/Gel_01. This way, the file name PCR_2026-01-21_12k.png automatically drops into the right folder.
Does that sound too rigid? No. The rule is simple—keep the top‑level tags the same for every run. That consistency lets your software or LIMS sort files automatically.
2. Metadata Tagging: The “Why” Behind the File
Beyond the name, you need to annotate the image with key details: gel concentration, dye, exposure time, and who ran the run. A spreadsheet or a simple CSV that matches the filename to these attributes works great. Many gel documentation apps let you embed tags directly in the image file (e.g., EXIF data) so that the metadata travels with the file no matter where you move it.
Imagine a reviewer asking for “lane 3 of gel 3.” If you’ve tagged lane 3 as “target amplification,” the software can pull the image instantly.
3. Backup and Version Control
Labs aren’t immortal, and file corruption happens. Use a dual‑tier backup: a local NAS for quick access and a cloud archive (think S3 or Google Drive) for long‑term safety. Every time you save, trigger an automated sync to both locations. If you ever need to revert, a simple version number in the filename (e.g., PCR_2026-01-21_12k_v2.png) keeps track of edits.
4. Data Integrity Checks
After a run, run a quick checksum or hash of the image file and store it in your metadata spreadsheet. If a file gets corrupted later, the hash will flag the mismatch. Some open‑source tools can calculate a SHA‑256 hash automatically during the export process.
Why bother? Because the law of “data integrity” is a regulatory buzzword that actually saves you from headaches in compliance reviews.
5. Linking to Lab Notes and LIMS
In many labs, the gel photo is the only thing that ties the raw data to the experimental context. If your LIMS can accept image uploads, attach the file and its metadata sheet directly to the experiment record. This creates a single source of truth and eliminates the risk of a lost image.
Mini‑Story: The Case of the Missing Gel
A university genetics lab once had to redo a full CRISPR validation run because the only gel image had been misplaced on a local desktop. By shifting to a cloud‑based, metadata‑rich folder structure, the same lab now finds the gel in under 10 seconds, and the error is gone.
So, what should you do next? Draft a folder template, write a short CSV schema, and set up an automated sync. That’s the three‑step plan that keeps your gel documentation system humming.
| Feature | Recommended Tool/Approach | Notes |
|---|---|---|
| Folder Hierarchy | Manual folder creation with consistent naming (Project → Date → Gel ID) | Easy to enforce; works with any OS |
| Metadata Tagging | CSV spreadsheet linked to filenames or EXIF data in images | Allows automated searches and reporting |
| Backup Strategy | Local NAS + cloud archive with automated sync | Ensures redundancy and disaster recovery |
| Integrity Check | Checksum (SHA‑256) stored in metadata | Detects corruption before analysis |
| LIMS Integration | Upload images and metadata to experiment record | Creates single source of truth |
For a deeper dive into how the industry is shifting toward automated data capture and integrity, you might want to check out this market analysis Exploring the Dynamics of Laboratory Gel Documentation Systems. And if you’re building a custom data pipeline, the Gel data model reference offers a great starting point for structuring your own schema.
In short, a tidy folder, clear tags, and reliable backup are the three pillars that keep your gel documentation system robust, compliant, and ready for any reviewer’s request.
Integrating Documentation with Laboratory Information Management Systems (LIMS)
We’ve already walked through how a gel documentation system captures the picture; now let’s talk about how to get that picture into the place where the rest of your lab lives.
When you hand off an image to a LIMS, you’re not just moving a file—you’re moving the entire story: who ran it, what buffer was used, the exposure time, and the lane mapping. If that metadata is missing, the image becomes a blank tile on a spreadsheet and the reviewer will ask, “What’s the context?”
Define a clear data contract
Think of the contract like a recipe card. Decide which fields are required for every upload: experiment ID, gel type, stain, date, operator, lane IDs, and a checksum.
In our experience at Shop Genomics, the simplest contract is to keep the metadata in a CSV that mirrors the file name. That way, the LIMS can import the CSV straight into the experiment record.
Map fields to LIMS schema
LIMS platforms expose REST endpoints that expect JSON objects. Build a tiny adapter that takes your CSV row and stitches it into the JSON payload. If your LIMS supports HL7 or ASTM standards, you can push the data directly into the vendor’s API.
For example, LIMSmicro’s API documentation shows how to POST a sample result. The sample JSON payload includes sampleId, resultName, value, and units—exactly what you can pull from the gel file metadata.
Automate the push
Instead of manual copy‑paste, write a small script in Python or PowerShell that watches your image folder, reads the adjacent metadata, and fires the POST request. Add a retry loop and log each success so you can audit the flow.
When you automate, the LIMS becomes the single source of truth. Every gel image, every lane annotation, every checksum sits in one place, ready for downstream analysis or regulatory audit.
Validate the integration
Run a test batch. Capture a gel, generate the metadata, push it, then pull back the record from the LIMS dashboard. Verify that the checksum matches and that the lane IDs show up as clickable links in the record.
During a recent pilot with a small biotech, the team cut data entry time by 70 % after moving to an automated push. The lab staff were less stressed, and the review panel praised the transparency of the data trail.
Keep the pipeline maintainable
Document the adapter code, version the CSV schema, and schedule a quarterly review of the LIMS API changes. A small, well‑documented script is more reliable than a sprawling manual process.
Remember, the goal isn’t just to get a file into the LIMS; it’s to embed the full context so that anyone—today or ten years from now—can understand exactly how that gel was run.
If you’re curious about the fundamentals, the LinkedIn article on how gel imaging documentation works offers a concise overview.
For a deeper dive into how the industry is shifting toward automated data capture and integrity, check out the market analysis on gel imaging documentation that explains why automation matters. You’ll find it useful when you’re deciding which LIMS to pair with your Shop Genomics gel system.
This seamless flow also satisfies ISO 17025 audit trails, giving you peace of mind when regulators drop by.
Maintaining Compliance and Data Security
Let’s be honest: regulatory scrutiny isn’t going away. When you’re stamping every gel image with run parameters, lanes, and timestamps, you reduce confusion for regulators and reviewers alike. A solid gel documentation system isn’t just about pretty pictures—it’s about a trustworthy, auditable trail you can rely on when ISO 17025 audits or GMP-like reviews swing by.
In our experience, the backbone of compliance is a disciplined data governance habit. That means a clear data contract for every upload, a metadata schema you actually enforce, and a plan to prove the data trail is intact from capture to archive. Without that, you’re left spelunking through folders when regulators ask for provenance. Not a great look.
So, what’s the playbook? Start with the basics: version-controlled metadata, checksum verification, and strict access controls. You’ll want to answer: who ran the gel, what buffer and dye were used, when was the image captured, and where is the original file stored? If you can’t answer quickly, you’ve got a gap in your compliance chain.
1) Define a data contract that regulators can trust
Document the fields that must travel with every gel image: experiment ID, gel type, stain, date, operator, lane IDs, exposure settings, and a checksum. Keep this in a CSV that mirrors your file naming, and embed tags directly in the image if your tooling supports EXIF data. This isn’t cosmetic—it’s a map regulators can audit without chasing down sticky notes or disparate notes.
Does that feel formal? It doesn’t have to be. Think of it as a recipe card for every run, so a reviewer can recreate your exact steps in two clicks.
2) Make the data traceable end-to-end
Map the flow from capture to LIMS or cloud storage. Use a simple adapter that attaches the metadata CSV to the gel image and pushes it into the right experiment record. Version the CSV schema, and document API changes in a quarterly review so nobody’s guessing about field names in six months.
We’ve seen teams cut data-entry time and cut audit questions by embedding full context into the digital record. That context is what regulators actually care about: is the data intact, and can it be trusted?
3) Protect data integrity with checksums and backups
After a run, calculate a SHA-256 hash of the image file and store it alongside the metadata. If the file ever corrupts, you’ll know immediately. Back up in two locations—local NAS for fast access and a cloud archive for long-term safety. Versioned filenames help you roll back if needed.
The goal isn’t paranoia; it’s reassurance. You want regulators to see a clean, unbroken data trail that tells the exact story of every gel run.
4) Control access and monitor changes
Apply the principle of least privilege. Keep only approved personnel able to upload or alter metadata, and maintain a detailed audit log of every change. When you need to investigate, you should be able to answer who made what change, when, and why, in a heartbeat.
So, what should you do next? Start a simple SOP: define the data contract, set up checksum checks, implement dual-location backups, and schedule quarterly API-change reviews. Your future self—and any regulator who looks under the hood—will thank you.
For practical context on data integrity in regulated settings, these resources can help: FDA data integrity guidance and the Thermo Fisher gel imager manual.
FAQ
What exactly is a gel documentation system?
A gel documentation system is the combo of hardware—like a light source, camera, and enclosure—and software that captures, tags, and stores gel images automatically. It turns a photo into a searchable record that you can pull up months later, share with reviewers, or pull into a lab notebook without scribbling notes.
Do I need a fancy camera to use one?
No. A decent 9‑12 MP digital camera or even a smartphone can work if you keep the lighting consistent. What matters most is a stable, evenly illuminated source and software that can auto‑segment lanes. The right camera just makes the capture faster and the files smaller.
Can a gel documentation system help with regulatory audits?
Absolutely. By attaching metadata—like lane numbers, operator, exposure time, and a checksum—to every image, you create a chain of custody. Auditors can see exactly how a gel was run, who handled it, and verify that the file hasn’t been tampered with, which is a big win for ISO‑17025 or FDA‑style reviews.
How do I keep my gel images organized?
Use a simple folder hierarchy that mirrors your projects: Lab → Project → Date → Gel_ID. Name files with the experiment name, date, and lane count, e.g., PCR_2026-01-21_12k.png. That way, a quick search by date or project pulls up the right gel in seconds.
What kind of backups should I use?
A dual‑layer backup works best: keep a local NAS for instant access and a cloud archive for long‑term safety. Automate the sync so every new image goes to both places. If a file gets corrupted later, the backup will save you from having to redo a run.
Is it worth investing in a dedicated transilluminator?
Yes, if you run gels frequently. A solid‑state LED transilluminator offers consistent brightness, lower maintenance, and reduces the risk of UV damage. Many labs find that a blue‑light unit paired with SYBR Green or GelRed stains keeps DNA safe while still giving clear images.
Can I share gel images with collaborators outside my lab?
Sure. Export the image and its metadata to a shared drive or LIMS. If you attach the metadata in a CSV or embed it in the file’s EXIF data, anyone can click a lane label or filter by date to find what they need without digging through notes.
What if my software can’t auto‑segment lanes?
Start with a test gel that has a ladder and clear band spacing. Adjust the camera angle and exposure until the software flags the lanes correctly. If it still misses lanes, manually annotate them in the software and save the annotation file alongside the image. Over time, you’ll fine‑tune the settings to get a near‑automatic capture.
Conclusion
At the end of the day, a gel documentation system is more than a shiny piece of tech; it’s the backbone of reliable science.
Think about the last time you chased a missing lane label or a blurry band. That frustration can cost time, money, and credibility. A well‑set‑up system turns every run into a tidy, searchable snapshot.
So, what should you do next? Start with a simple folder tree that mirrors your projects, add a one‑line metadata CSV, and lock your camera settings. It sounds simple, but the consistency it brings is worth the effort.
Remember, the goal isn’t perfection—just a reproducible trail that anyone in your team can follow, even a reviewer from a regulatory agency.
In short, invest a few minutes into setup, and you’ll save hours of manual cleanup later. Keep your images tagged, your backups in sync, and your workflow documented. That’s the recipe for smooth, compliant research.
When your lab runs a high‑throughput screen, having all images instantly searchable means you can flag outliers in real time, cut down on repeat runs, and keep funding agencies happy. Treat your documentation as a first‑class citizen in every protocol; it pays dividends when you publish or submit for grant review.


