
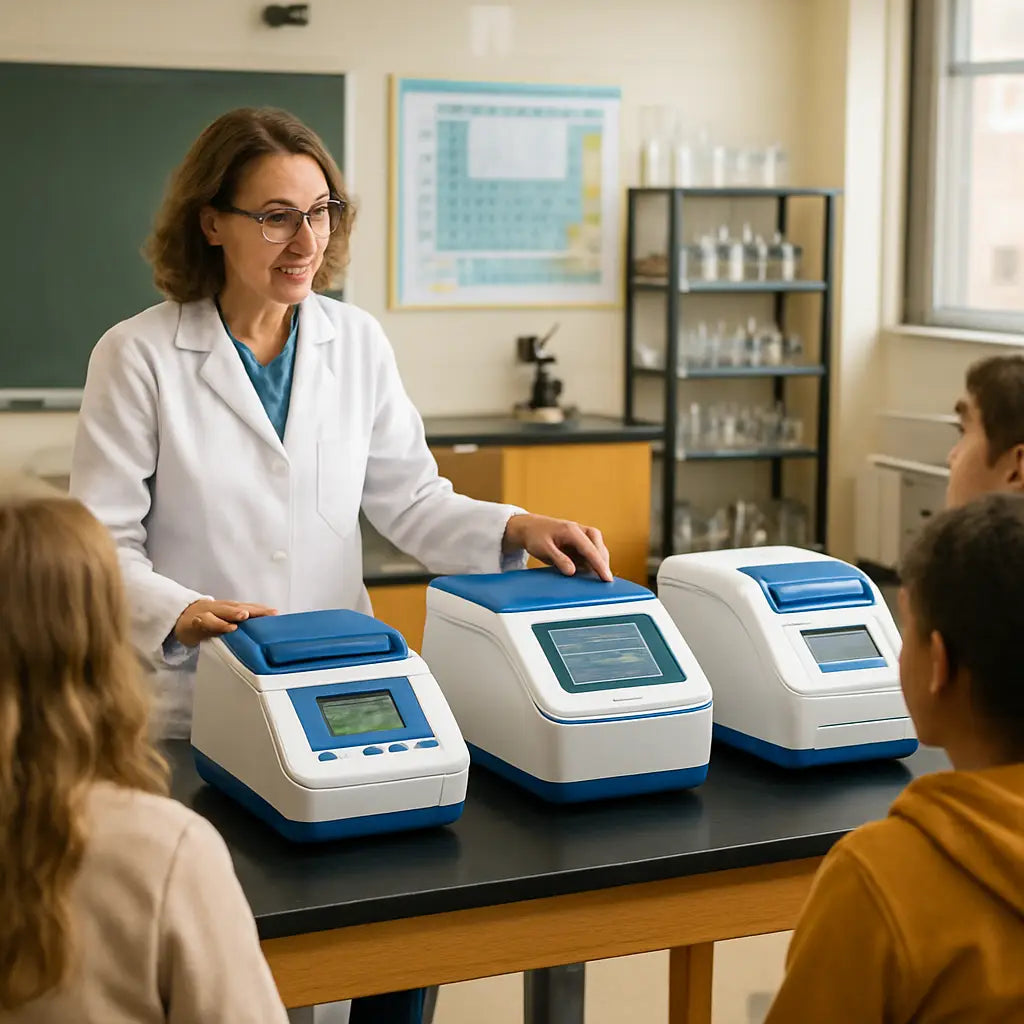
Ever walked into a high‑school lab and felt the hum of a PCR machine that just doesn't fit the space or budget? You're not alone.
Choosing the right classroom PCR machine can feel like solving a puzzle blindfolded—there's the price tag, the footprint, the learning curve, and the fear of buying something that sits idle.
First, ask yourself what you really need: a sturdy workhorse for daily student runs, or a compact unit that can double as a demo for occasional lessons?
If you're teaching biology to freshmen, you probably want a system that's plug‑and‑play, with intuitive software and clear LCD readouts. You don't want to spend the whole class troubleshooting the interface.
On the other hand, advanced labs in universities might crave higher throughput, multiplexing options, and the ability to run qPCR assays. Those features add cost, but they also unlock deeper experiments.
Budget is the elephant in the room for most schools. That's why we at Shop Genomics focus on making cutting‑edge tech affordable, with free shipping on larger orders and easy returns if the model isn’t the perfect fit.
Think about the lab layout: a bench that can support a 15‑kg instrument, enough power outlets, and enough ventilation. A machine that’s too heavy or too noisy can disrupt the whole class.
Reliability matters more than flashy specs. A machine that needs service every month will eat up both time and money. Look for brands with solid warranty terms and responsive support.
Don't forget consumables. Some PCR kits lock you into pricey reagents, while others are more flexible. Check the cost per run and whether the machine uses standard tubes you already have.
A quick sanity check: write down your top three priorities—price, ease of use, or performance—and score each model on a 1‑5 scale. The highest total usually points to the best fit.
And remember, you don’t have to decide in isolation. Talk to colleagues, read recent buyer guides, and even test a demo unit if the vendor offers it.
By mapping your needs, budget, and space constraints, you’ll feel confident about how to pick a classroom PCR machine that actually works for your students, not just for a spec sheet.
TL;DR
When you wonder how to pick a classroom PCR machine, list priorities—budget, space, and ease of use—then check weight, noise level, and consumable cost, scoring model on reliability and performance.
That rubric helps you choose a system—options we showcase at Shop Genomics—so you avoid noisy units or pricey reagent locks.
Step 1: Identify Classroom Needs and Testing Goals
Let me be completely honest: picking a classroom PCR machine isn’t just about price or flashy specs. It’s about the learning moment you create for your students and the daily rhythm of your lab.
Start by picturing the people you’re teaching. Are you working with freshmen who need something plug‑and‑play, or with advanced students chasing multiplexing and higher throughput? Then map your space: how many benches will you have, how many power outlets, and is there room for a quick demo? Think about throughput not just peak specs—two or three students running a basic PCR versus a full class of thirty are two very different setups. And yes, it matters if the unit fits on the bench and still leaves space for safe movement.
In our experience at Shop Genomics, reliability, service, and the ongoing cost of consumables often beat the latest feature list. A dependable machine reduces class downtime, while a friendly warranty and fast support keep teachers from getting stuck mid‑lesson. If you can demo a unit, you’ll learn more about real‑world usability than any spec sheet can reveal.
Next, define your testing goals clearly. What will your students actually do with this machine this semester? Will you run basic amplification checks, or will you tackle multi‑plex assays and data interpretation in biology lab reports?
Write down your top three applications. For example: basic DNA amplification with standard tubes, occasional gel checks for quick homework assignments, and a demo for a lab tour to prospective students. That simple list becomes your compass when you compare models, because it ties features directly to classroom outcomes rather than marketing hype.
Create a straightforward scoring rubric. Prioritize price, ease of use, reliability, and the cost and availability of consumables. Add a column for warranty terms and the vendor’s responsiveness. This is where a lot of good intentions turn into a practical decision, especially for Educational Institutions and Independent, Small, or Large Laboratories alike.
Don’t forget the lab layout realities. If the unit is heavy or noisy, it can disrupt a busy class or contaminate a shared space. Make sure there’s adequate ventilation and a stable bench height so students can work comfortably for the entire period. If you’re considering procurement strategies to stretch your budget, you might want to explore practical guidance on negotiating terms—a smart move when you’re outfitting multiple classrooms. procurement negotiation strategies can be a helpful starting point to prioritize total value over sticker price.
So, what should you do next? Start with a one‑page needs map that links each classroom goal to a specific feature set and price range. Then reach out to colleagues at nearby schools to see what has worked in real classrooms, not just in vendor brochures.
For a quick, practical step you can take today, assemble a short list of three units that fit your space and budget, and request a hands‑on demonstration or a loaner unit if possible. This is how you turn a shopping list into a teaching tool rather than a shelf ornament. If you want a deeper dive into budget optimization, there are helpful strategies in procurement resources linked above.
The more you align testing goals with daily teaching needs, the more confident you’ll be in your final choice. Your students deserve a reliable tool that helps them learn by doing, not by watching a screen crawl through menus. And yes, Shop Genomics supports classrooms with affordable options and dependable service to keep your science program moving forward.
Step 2: Evaluate Technical Specifications
Now that you know what you want to achieve in the classroom, it’s time to dig into the specs that actually matter. Think of it like checking the engine before you buy a car – you don’t just stare at the paint job.
Footprint and Weight
Measure the bench space you have. A typical benchtop PCR machine occupies roughly a 12‑inch square and weighs about 12 kg. If your lab’s workbench can’t handle that, look for a lighter, compact model. For example, a rural high‑school in Ohio swapped a 15‑kg unit for a 9‑kg tabletop model and freed up two extra seats for students.
Power Requirements
Most entry‑level machines run on standard 120 V outlets, but some high‑throughput models need a dedicated 240 V line. Check your lab’s electrical plan before you sign the quote. A university chemistry department once bought a 240 V system only to discover the lab’s old wiring couldn’t support it, causing a costly delay.
Noise Level
Nothing kills a learning vibe like a humming cycler that sounds like a small fridge. Look for a dB rating under 55 dB – that’s about the noise of a quiet office. In our experience, a quieter unit keeps students focused on the data, not the sound.
Temperature Accuracy & Calibration
Accurate thermal cycling is the heart of PCR. Even a 0.5 °C drift can ruin a reaction. Schedule regular calibration – most manufacturers recommend at least once every six months. Following regular calibration best practices can extend the lifespan of the instrument and protect your budget.
Throughput and Well Capacity
Ask yourself how many samples you’ll run per class. A 48‑well block is fine for a quick demo, but a 96‑well or 384‑well system pays off if you run weekly projects. The guide from lab‑equipment experts breaks down which capacities suit different lab sizes.
Software UI and Data Export
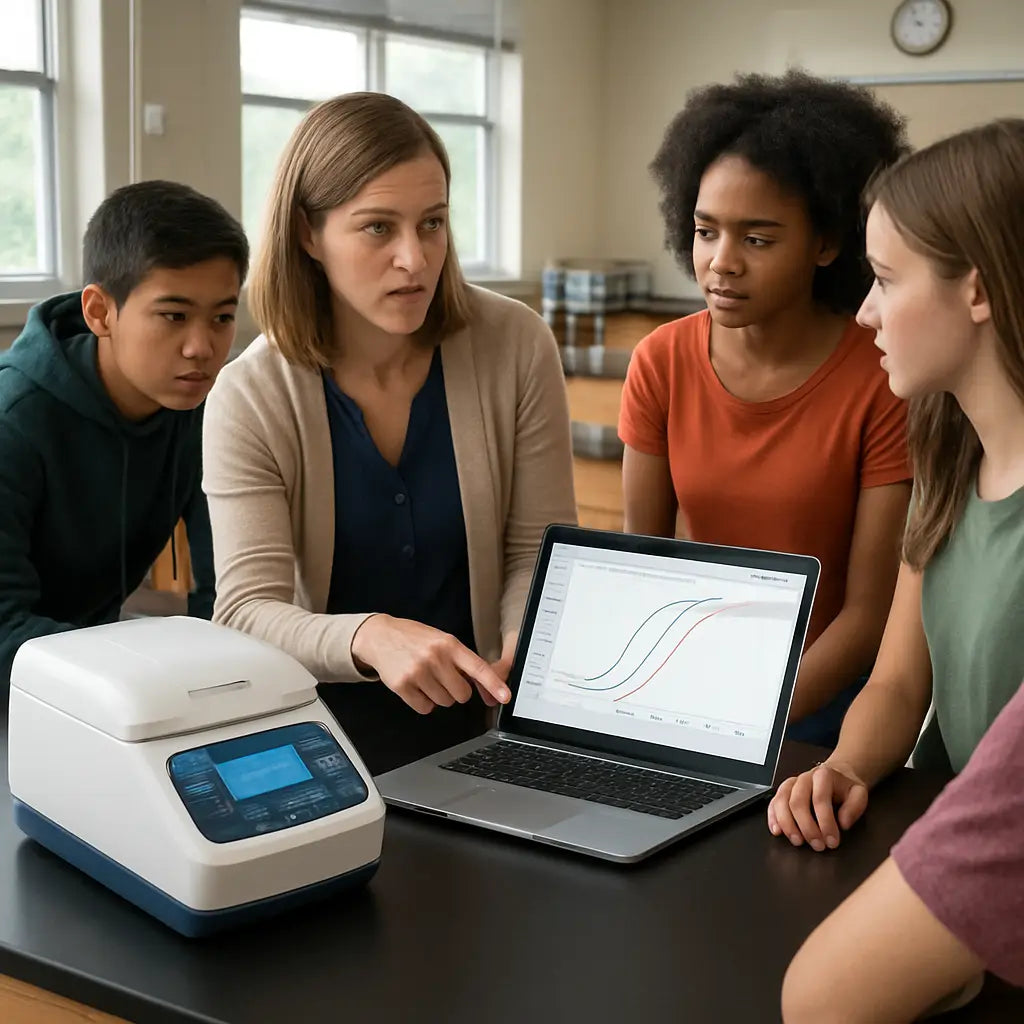
Kids respond better to a touchscreen that walks them through each step. Look for software that can export Ct values to CSV with a single click – that makes grading easier and lets you pull graphs for the next lesson.
Connectivity and Compatibility
Does the machine talk to your school’s network? Ethernet or Wi‑Fi can streamline data logging, but it also raises security questions. If you’re in a tightly controlled IT environment, a USB‑only model may be safer.
Consumable Flexibility
Some brands lock you into proprietary tubes that cost €2‑€3 per reaction. Others accept standard 0.2 ml strip tubes you already have. Calculate the per‑run cost and factor it into your annual budget.
Maintenance and Service
Check the warranty length and whether the vendor offers on‑site service. A machine that needs a technician once a month will eat up both class time and money. Look for manufacturers that provide a clear service contract.
Action Checklist
- Measure bench space (length × width) and weight limit.
- Verify power outlet type and voltage.
- Record the dB rating; aim for < 55 dB.
- Confirm calibration interval and service options.
- Match well capacity to expected sample volume.
- Test software UI with a trial run.
- Ensure network compatibility or plan for USB data transfer.
- Calculate consumable cost per reaction.
Quick Comparison Table
| Feature | Typical Classroom Need | What to Look For |
|---|---|---|
| Footprint | Limited bench space | ≤12 in², weight ≤10 kg |
| Noise | Quiet environment | ≤55 dB operating level |
| Throughput | Weekly class projects | 48‑well or 96‑well block |
By ticking these boxes, you’ll feel confident that the technical specs line up with your classroom goals. That’s the core of how to pick a classroom PCR machine – match the numbers to the real‑world teaching moments you’ve imagined.
Step 3: Consider Ease of Use and Maintenance
You’re not just buying a machine—you’re buying time. In the classroom, every minute counts, and a setup that’s fiddly or confusing will steal lesson moments and student attention. So, how to pick a classroom pcr machine that’s actually friendly to teachers and kids? It comes down to ease of use and predictable maintenance.
In practice, you want a unit that starts fast, guides students through a run, and shows results clearly without a software PhD. Think one‑button starts, step‑by‑step wizards, and visual readouts that a student can understand at a glance. If the interface requires constant IT tinkering, you’ll be chasing tech support instead of exploring biology.
Prioritize user-friendly features
- Guided run workflows that walk students through setup, run, and interpretation.
- Clear Ct values and amplification curves with simple color cues.
- Preloaded classroom templates to launch projects in minutes.
- Touchscreen or minimal keyboard navigation for quick teaching moments.
- Quick-start guides and printed prompts for desk‑side reference.
- Error‑friendly messages that point to a fix instead of math.
Does a clean user interface actually matter? Yes. It lowers the learning curve for both students and teachers and reduces the class time spent on troubleshooting. You’ll get more hands‑on time and better discussion of results, which is the whole point of a teaching lab.
Beyond the UI, set‑up time matters. A unit that arrives ready‑to‑run and ships with a quick start card lets you start a demo within a single period. If you’re in an Educational Institutions or Academic setting, you’ll appreciate a vendor who ships with ready‑to-use consumables and clear calibration steps.
Maintenance and service planning
- Warranty length and on-site service options.
- Calibration intervals and what gets calibrated.
- Availability of spare parts and expected lead times.
- Remote diagnostics and a clear escalation path.
- Simple maintenance checklists you can hand to staff.
Maintenance isn’t glamorous, but it’s the glue that keeps classroom projects moving. A clear service contract, predictable response times, and documented calibration routines cut downtime and keep you focused on teaching. In our experience, schools that plan maintenance upfront see fewer mid‑semester disruptions.
IT and data management matter too. If your district runs a locked network, ensure the device supports USB data transfer or a local workflow. Confirm how results export to spreadsheets for grading. A system that plays nice with your school’s IT policies saves headaches when you publish results to committees or publishable reports.
If you're wondering how to pick a classroom pcr machine, use this framework as your quick start. Score ease of use, maintenance, and IT compatibility on a simple 1–5 scale, then weigh the top two candidates for your specific classroom needs. That approach keeps you grounded and makes the decision feel doable, even in a busy school year.
In our experience, platforms like Shop Genomics help by offering reliable, affordable options and solid service agreements, especially for Educational Institutions and Independent, Small & Large Laboratories. Now you’ve got a practical path to choosing a classroom PCR machine that actually supports your teaching goals.
Step 4: Budget, Support, and Warranty Options
Money talks in education, and the way you queue up budget, support, and warranty matters as much as the hardware itself. You want steady uptime, predictable costs, and help when something goes wrong.
So, how do you turn that into a practical plan you can actually use in a busy lab or classroom? Let’s break it down into bite‑sized steps that fit real school calendars and procurement cycles.
Budget considerations
Start with total cost of ownership. Include the upfront instrument price, consumables per run, calibration kits, maintenance, and potential downtime costs. A lower sticker price can bite you later if consumables are expensive or service is slow.
Map runs to budget. Estimate how many reactions you’ll run per class term and multiply by the per‑reaction cost for common consumables. If you’re comparing models, note which ones use open, generic consumables versus proprietary kits that drive up ongoing costs.
Don’t forget hidden fees. Some quotes exclude shipping, installation, training, or calibration visits. Ask for a clean, itemized quote so you can compare apples to apples.
In our experience, schools that build a simple 12‑month budget model—not just a price tag—avoid budget shocks in mid‑term reviews. And yes, you should factor in some cushion for downtime during busy grading periods.
So, what should you do next? Create a one‑page budget plan that lists upfront costs, expected annual consumables, and a conservative maintenance line. It’ll save you headaches when the time comes to renew or expand.
Warranty terms to watch
Warranty terms vary, so read the fine print. Look for at least a 1‑year warranty with on‑site service and clear coverage of parts and labor. If you’re in Educational Institutions or Academic settings, consider longer coverage or a service contract that includes calibration and annual preventive maintenance.
Key questions to ask: what’s covered under warranty, what isn’t, and what’s the response time for on‑site service? Is loaner equipment available while yours is being repaired? Is remote diagnostics included?
Calibration matters. Include a clause for periodic calibration and specify who supplies the calibration kits or technician visits. Regular calibration helps keep results consistent and protects your investment. For practical guidance on equipment care, Edvotek’s quick guides offer useful reminders about routine maintenance and calibration. Edvotek's classroom equipment tips
Support and training options
Strong vendor support is a live saver in a busy program. Look for structured onboarding, teacher‑friendly tutorials, and a clear escalation path for IT or hardware issues.
Ask for remote support, a comprehensive knowledge base, and access to classroom templates. On‑site training for staff can pay off in faster setup and better use of the instrument in the first weeks of class.
Shop Genomics makes this easier by offering educational equipment with sensible service options, including straightforward returns and support designed for school labs. That backstop can be a real relief when you’re juggling a curriculum and a budget.
Maintenance planning
Put a simple maintenance calendar on the wall and assign a point person. Schedule calibration (typically every 6–12 months), routine cleaning, and a quick check of consumables and tubes. Treat maintenance like a classroom routine, not a surprise.
Include a spare parts plan for commonly worn components and a rollback path if a part is backordered. Remote diagnostics capabilities and a clear software update process can cut downtime and keep results trustworthy.
Where does this fit into your IT policies? If you’re in a locked network environment, confirm whether the device supports USB data transfer or requires a local workflow. A good plan keeps data flowing to grade books and committees without IT bottlenecks.
Financing and procurement tips
Investigate flexible payment terms, educational discounts, or leasing options. If there are district grants or program funds, align your quote with those timelines. Don’t forget to ask about trade‑in or upgrade paths so you’re not boxed into an obsolete setup after a couple of years.
Pro‑tip: request bundled shipping, installation, and training as part of the deal. It simplifies budgeting and ensures you’re not caught with surprise charges later. A ready‑to‑run unit and a solid service plan can dramatically shorten the time to first class data and discussion.
So, what’s your next move? Draft a concise budget and service plan, then reach out to a few vetted vendors to compare terms side by side. A little upfront planning goes a long way toward a smooth, productive PCR learning experience.
Step 5: Test, Compare, and Make the Final Decision
You’ve done the legwork on needs, space, and budget. Now it’s time to bring it all to life with real-world testing. Does the machine actually fit your classroom workflow, not just the spec sheet?
In our experience, the best buys come from hands-on validation, not glossy brochures. Let’s map out a practical plan you can run this term so you can walk into a purchasing decision with confidence.
Why this phase matters
Specs are great, but classrooms are messy in the best way. You’ll see how students actually interact with the UI, how quiet the unit runs during a demo, and whether data export behaves the way your teachers and techs expect. Without this step, you might buy something that sounds perfect on paper but stalls during a Friday lab.
So, what should you test first? The answer is simple: test what will block a lesson from running smoothly—setup time, reliability, and the clarity of results.
Design a quick test plan
Pick three models (or two models plus a strong backup) that fit your space and budget. Run a standard classroom‑style workflow on each: load a basic template, run a single test, and capture the results. Do this with both teachers and a small group of motivated students to gather real feedback.
Think in real terms: will you need 10 minutes to get a run started, or is it more like 25 minutes from boot to first result? Is the interface intuitive enough for a new teacher, or does it demand IT fiddling every week? These aren’t nitpicky questions—they’re the dry‑run reality check you need.
Build a scoring rubric
Create a simple 1–5 rubric for each criterion. Keep it tight so you can compare apples to apples. Consider these categories:
- Footprint and weight: does it fit on the bench without crowding other tools?
- Noise and comfort: is the background hum distracting during lessons?
- User experience: how clear are the readouts, and how easy is the run to start?
- Data export and compatibility: can you download Ct values or amplification curves into your grading system?
- Consumables and per‑reaction cost: is the ongoing cost sustainable for a term or a year?
- Maintenance and support: what’s the process for calibration, parts, and service calls?
- IT compatibility: does the device play nicely with your district network or USB‑only workflow?
At the end, give each model a total score. It’s not magic, but it makes the decision tangible when the budget gods are watching.
Run a short pilot in your classroom
Schedule a two‑to‑three‑week pilot in a couple of sections. Collect both teacher and student feedback on ease of use, reliability, and how the results spark discussion. You’ll uncover practical hurdles you won’t find in a spec sheet.
Does this really work in practice? The pilot often reveals hidden benefits—like faster setup for warm‑ups or a more engaging data discussion because Ct values are easier to interpret.
Compare costs and support
Ask vendors for a transparent total cost of ownership. Include upfront price, consumables per run, calibration or maintenance fees, and any training or installation charges. Don’t forget to factor in potential downtime and the cost of any required IT fixes or network adjustments.
Look at service terms: response times, on‑site support options, and whether loaner units are included during repairs. In educational settings, predictable service is as valuable as a friendly price tag.
In our experience, arranging a written service contract early reduces mid‑term surprises and keeps classrooms humming. If you’re weighing options, consider how well a vendor supports teachers—with ready guides, templates, and remote help when a tricky error pops up.
Make the decision and plan the rollout
Once your rubric yields a clear winner, draft a one‑page decision memo with the scores and the rationale. Share it with a small committee, or your department head, and lock in a date for installation and teacher training. A clear plan beats last‑minute chaos every time.
And here’s a practical nudge: document the exact class‑by‑class rollout schedule, including a simple maintenance calendar and the first week’s lesson flow. It makes the transition smoother for everyone involved.
If you’re unsure where to start, remember this: a top pick for school labs combines hands‑on validation, a friendly user experience, and reliable service. Shop Genomics helps schools navigate this stage with ready‑to‑run options and dependable support, so you can focus on what matters—great biology learning.
What will you test first when you start your pilot? Let’s map it out and get you moving this week.
Conclusion
We've walked through the whole process of how to pick a classroom pcr machine, from spotting the need to testing a few contenders. By now you should feel a lot less blindfolded.
Remember the three pillars: fit the space, fit the budget, and fit the workflow. If a unit sits heavy on the bench, sounds like a kitchen blender, or forces you to chase pricey consumables, it's probably not the right fit.
What helped most for schools we’ve seen? A quick pilot that lets teachers and students actually run a run, then a simple scoring sheet that adds up footprint, noise, ease‑of‑use and cost. That sheet turns a vague feeling into a clear number.
So, what’s the next step? Grab a notebook, map your class schedule, and line up a demo with a vendor you trust. Lock in a service contract early – it saves headaches later.
In the end, the right PCR machine lets your students focus on the science, not the tech. If you’re ready to start, check out the options we’ve curated at Shop Genomics – they keep pricing transparent and shipping simple.
Take a breath, make that decision, and watch your lab come alive next week today.
FAQ
What factors should I consider when learning how to pick a classroom pcr machine?
First, look at the space you have – measure the bench and check the weight limit. Next, think about noise: you don’t want a machine that sounds like a blender during a quiet lesson. Then, compare the per‑run cost of consumables; cheap kits keep the budget happy. Finally, test the user interface – a one‑button start or clear visual cues save class time. In short, size, sound, cost, and ease of use are the four pillars.
How do I know if a PCR machine’s footprint will fit my lab?
Grab a ruler and sketch the area on a piece of paper. Most entry‑level units sit on a 12‑inch square and weigh around 10–12 kg. If your bench can’t handle that, look for a lightweight model under 9 kg. Some manufacturers list exact dimensions in the spec sheet; use those numbers to compare side‑by‑side. A quick visual check prevents a surprise when the box arrives.
Is noise level really that important for a classroom?
Absolutely. A noisy cycler can drown out the teacher’s voice and make students nervous. Look for a dB rating under 55 dB – that’s about as loud as a quiet office. If the spec sheet doesn’t list it, ask the vendor for a noise test video. When the machine hums softly, you’ll notice students staying focused on the results, not the buzz.
What should I ask a vendor about consumables?
Ask whether the machine uses standard 0.2 ml strip tubes or proprietary kits that lock you into pricey reagents. Find out the cost per reaction – many schools see a difference of €0.80 versus €2.00 per run. Also, check if the vendor offers bulk discounts for educational institutions. Knowing these numbers lets you calculate the true total cost of ownership before you sign the contract.
How can I test a PCR machine before buying it?
Set up a short pilot in one class. Run a simple amplification of a plant gene and time how long it takes to get a result. Ask the teacher how easy the software was to navigate and whether the students could start the run without constant help. Score the experience on a 1‑5 scale for setup, noise, data export, and overall satisfaction. The pilot often reveals hidden hiccups that spec sheets hide.
Do I need a service contract, and what should it include?
Yes, especially if the machine will see daily use. A good contract covers on‑site repairs, a response time of 48 hours or less, and loaner equipment while yours is being fixed. It should also include scheduled calibration every six months – that keeps results reliable. Ask the vendor if the warranty extends beyond the first year and whether training sessions are part of the package.
Where can I find reliable comparisons of classroom PCR machines?
Shop Genomics regularly publishes side‑by‑side guides that break down price, footprint, noise, and consumable flexibility. Those guides are built from real‑world feedback from teachers and lab managers. Using a trusted comparison helps you see which model checks the boxes for your specific needs without getting lost in marketing fluff.


