
Ever stared at a gel and thought, “How much am I really spending just to see these bands?” You’re not alone. Lab managers, grad students, and biotech startups all wrestle with the gel imaging system price, especially when budgets are tight and every dollar counts.
Imagine a busy university molecular biology lab. They need to run dozens of PCR checks each week, but the old transilluminator broke last month. Replacing it with a high‑end UV system would set them back over a thousand dollars, which is a chunk of their annual consumables budget. Meanwhile, a small biotech startup in a co‑working lab space is trying to keep equipment costs under $500 so they can allocate more funds to reagents and staff.
Here’s the good news: there’s a sweet spot between “budget‑friendly” and “premium.” The SmartDoc™2.0 Smart Phone Imaging and Gel Visualization starts at just $26.49 and gives you clear, high‑resolution images using a smartphone. It’s a favorite for academic labs that need reliable results without blowing the budget.
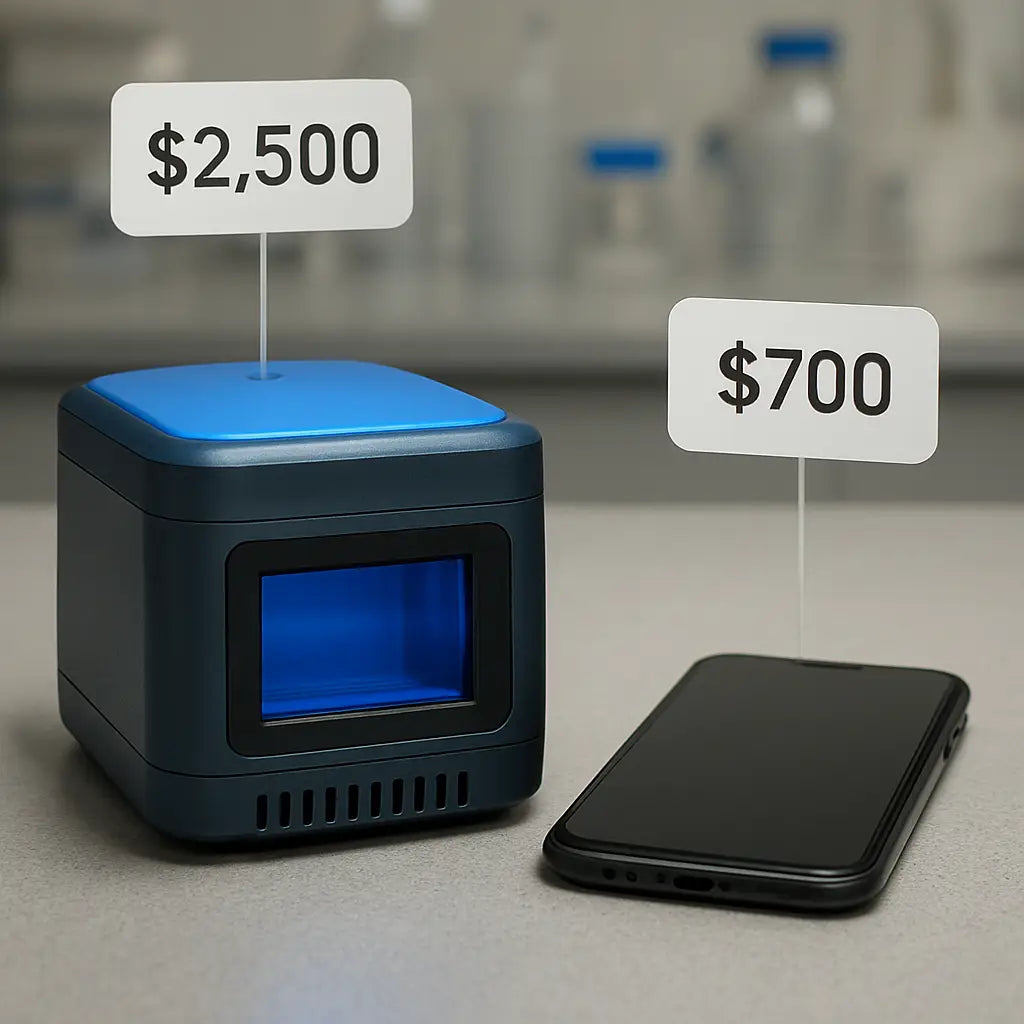
What drives the price differences? First, the light source. UV lamps are cheap to produce but require safety enclosures, which add cost. Blue‑light transilluminators, like the SmartBlue™ model, avoid UV hazards and often come cheaper because the LEDs are inexpensive. Second, the detector. Traditional CCD cameras push prices above $1,000, while smartphone‑based systems leverage the phone’s camera, slashing the expense dramatically.
Practical tip: before you buy, list the features you truly need—wavelength, image resolution, software integration, and portability. Then compare the total cost of ownership: initial price plus any required accessories (e.g., protective glasses, software licenses). For many labs, the $30‑$50 range of a phone‑based system plus free Android or iOS apps provides more bang for the buck than a $700 UV unit that needs extra safety gear.
Another real‑world scenario: an agricultural research facility needed to document gels in the field. Shipping a bulky UV box was impractical, so they opted for a compact blue‑light unit priced at $38.12. The lower price meant they could buy two units—one for each field station—doubling their capacity without breaking the bank.
Bottom line: the gel imaging system price isn’t a one‑size‑fits‑all number. It hinges on light source, detector technology, and your lab’s specific workflow. By pinpointing exactly what you need and exploring smartphone‑based options, you can keep costs low while still getting crisp, publish‑ready images.
TL;DR
Choosing the right gel imaging system price means matching light source, detector type, and workflow to avoid overspending while still getting publish‑ready images.
List your must‑have features, compare total cost of ownership, and consider smartphone‑based options like SmartDoc™2.0 for affordable, high‑quality results that fit academic, biotech, or field labs today.
Understanding What Drives Gel Imaging System Prices
Ever wonder why two gel imaging systems that look almost identical can have price tags that differ by hundreds of dollars? The truth is, the gel imaging system price is a sum of many little choices that add up, and most of those choices are hidden until you start digging.
Let’s start with the most obvious piece of the puzzle: the light source. UV lamps have been the go‑to for years, but they need safety enclosures, special glasses, and sometimes a cooling fan. Those add‑ons push the price up. Blue‑light LEDs, on the other hand, are cheaper to produce, run cooler, and don’t require bulky shields. If you’re okay with a slightly different wavelength, you can shave a good chunk off the total cost.
Light Source Matters
Think about it like picking a light bulb for your lab bench. A 60‑watt incandescent will cost more in electricity than a modern LED, even if the upfront price looks similar. The same logic applies here: higher‑wattage UV bulbs may cost less initially but raise long‑term operating expenses.
Another factor is the detector. Traditional CCD cameras are pricey because they need precise optics, cooling systems, and often proprietary software. Smartphone‑based detectors piggy‑back on the phone’s camera, which is already high‑resolution, so the hardware cost drops dramatically.
Detector Technology
When you compare a CCD‑based unit to a phone‑based one, you’ll see a price spread from under $30 to well over $1,000. The key is to ask yourself how much resolution you really need. For routine PCR checks, a 2‑megapixel phone camera is usually more than enough. For high‑throughput research where you need to capture faint bands, a dedicated CCD might be worth the extra spend.
Software is the silent cost driver that many overlook. Some systems bundle a full‑featured analysis suite—think lane quantification, background subtraction, and cloud storage. Those bundles can add $200‑$300 to the price tag. On the flip side, open‑source tools or free mobile apps can keep the total cost of ownership low.
Software and Integration Costs
Ask yourself whether you need a standalone system that talks to your lab’s LIMS, or if a simple plug‑and‑play device will do. Integration fees, licensing renewals, and even the cost of extra cables can creep up fast.
Now, let’s talk about build quality and warranty. A rugged chassis with a solid metal frame will survive a busy bench longer than a flimsy plastic enclosure. The longer lifespan often justifies a higher upfront price because you avoid frequent replacements.
And don’t forget market dynamics. Newer technologies launch at a premium, then settle as competitors catch up. Seasonal sales, bulk‑order discounts, and even the vendor’s geographic location can swing the price by a few hundred dollars.
So, how do you keep the gel imaging system price from blowing your budget?
- List your must‑have features: wavelength, resolution, software, portability.
- Calculate total cost of ownership: initial price + accessories + maintenance.
- Consider phone‑based options if you don’t need ultra‑high resolution.
- Check warranty length and what’s covered—sometimes a $100 higher price includes a two‑year parts‑and‑service plan.
- Look for bundled accessories (protective glasses, calibration plates) that might be sold separately elsewhere.
Below is a quick video that walks through the key components you should examine before clicking “Add to Cart.”
Notice how the presenter points out the LED array and the camera sensor—those are exactly the parts that drive the price up or down.
When you’ve got a clear picture of what you need, the decision becomes much easier. You’ll be able to say, “I’m okay with a blue‑light source and a smartphone camera, so I can stay under $50.” Or, “My CRO work demands a CCD with advanced software, so I budget $1,200.” Either way, you’re matching the gel imaging system price to real lab needs, not just shiny specs.
Price Comparison Table: Entry‑Level to High‑End Gel Imaging Systems
When you start looking at gel imaging system price, the numbers can feel like a roller‑coaster. One minute you see a $30 phone‑based kit, the next you’re staring at a six‑figure spectrometer. The trick is to line up what you actually need with the right price bucket.
Let’s break it down with three practical tiers that most labs I talk to fall into: entry‑level, mid‑range, and high‑end. I’ve seen a small academic lab in Boston buy two SmartDoc™2.0 units for under $60 total because they needed a portable solution for weekly PCR checks. A biotech startup in Singapore chose the SmartBlue™ transilluminator at $38.12 each, buying a pair to double their field‑work capacity. And a core facility in Berlin splurged on an Invitrogen iBright FL1500 Imaging System – a high‑end model that runs into the low‑four‑figures but offers laser‑based scanning and automated quantification.
So, what should you ask yourself before you click “add to cart”?
1. Light source and safety
If UV is a must for your application, budget for the enclosure, goggles and the extra cooling fan. That alone can add $200‑$300 to the sticker. Blue‑light LEDs skip most of those safety add‑ons, which is why the SmartBlue™ unit stays under $50.
2. Detector technology
Smartphone cameras have come a long way – they’re basically 12‑megapixel CCDs in your pocket. That’s why entry‑level kits can stay cheap. Dedicated CCD or CMOS cameras, like those in the iBright FL1500, push the price upward but give you sub‑micron resolution and multi‑channel fluorescence.
3. Software and workflow integration
Some vendors bundle a subscription‑based analysis suite. If you already use free ImageJ, you can skip that fee. High‑end systems often include turnkey quantification, which can save weeks of training time – a hidden cost you might want to factor in.
Below is a quick comparison table that pulls the most common specs together. Use it as a checklist when you’re budgeting.
| Tier | Typical Price (USD) | Light Source | Detector | Key Feature |
|---|---|---|---|---|
| Entry‑Level | $30‑$60 | Blue‑light LED | Smartphone camera | Portable, no software fee |
| Mid‑Range | $150‑$500 | Blue‑light LED + optional UV | Built‑in CCD (8‑12 MP) | Dedicated software, higher resolution |
| High‑End | $3,000‑$7,000+ | Laser‑based (375‑900 nm) | High‑performance CMOS/CCD | Automated quantification, multi‑channel fluorescence, LIMS integration |
Here’s how you can turn the table into a decision:
- Write down the light source you need – UV only if you run chemiluminescent blots.
- Match detector to the resolution you require. If a 300 dpi image is enough for your thesis, the entry‑level tier is fine.
- Add any software costs you can’t avoid. Remember, a $200 subscription over a year equals a $20 per month “hidden” expense.
- Calculate total cost of ownership: price + accessories (goggles, filters, spare lenses) + possible shipping for bulk orders.
Real‑world tip: when I helped a CRO in Toronto scale from one unit to three, we negotiated free shipping on the mid‑range models because the vendor offered a bulk discount on orders over $1,000. That saved the lab roughly $150 in logistics alone – a small win that added up.
Finally, keep an eye on future upgrades. Some manufacturers let you swap out the LED module without buying a whole new box. That flexibility can stretch your budget for years.
Bottom line: the gel imaging system price isn’t a mystery; it’s a set of choices. Align those choices with your actual workflow, and the numbers will start to make sense.
How to Budget for Your Gel Imaging System Purchase
Ever looked at a quote and thought, “Is this really what I need for my lab?” You’re not alone. The gel imaging system price can feel like a mystery, especially when you’re juggling grant money, consumable costs, and the occasional surprise expense.
First, ask yourself what you actually need to see. Do you just need a quick band check for PCR, or are you planning to run chemiluminescent western blots every week? That answer will dictate whether you can get away with a blue‑light phone kit or if you have to budget for a UV‑laser unit.
Step 1: List Must‑Have Features
Grab a notebook (or a digital note) and write down the essentials:
- Light source – UV vs. blue‑light LED.
- Detector – smartphone camera, CCD, or high‑performance CMOS.
- Software – one‑time license or subscription?
- Accessories – goggles, filters, mounting brackets.
Seeing everything on paper stops you from adding “nice‑to‑have” items later on.
Step 2: Calculate Total Cost of Ownership (TCO)
It’s tempting to focus on the sticker price, but the real cost includes hidden fees. Multiply the monthly software subscription by 12, add the price of safety glasses (around $30‑$50), and factor in shipping if you’re ordering bulk.
For example, a mid‑range system listed at $400 may end up around $550 once you add a $150 software subscription and $50 in accessories. That extra $150 can be the difference between staying within a grant’s line‑item budget or having to request a supplemental fund.
Step 3: Compare New vs. Used Options
Used equipment can shave off 30‑50 % of the price, but you need to vet the seller. Marketplace sites like LabX’s gel imaging listings let you filter by condition, warranty, and price range. Look for sellers who provide a clear service history and, if possible, a short test period.
Just because something is cheaper doesn’t mean it’s a bargain. Check whether the calibration is still valid and whether the light source has enough life left. In our experience, a well‑maintained used unit can be a solid choice for CROs or teaching labs that need reliability without the premium new‑device cost.
Step 4: Factor in Future Upgrades
Some manufacturers let you swap the LED module or upgrade the software without buying a whole new box. That flexibility can extend the life of your purchase for years, turning an upfront $300 expense into a long‑term investment.
When you’re budgeting, ask the vendor: “Can I replace the light source later, and what will that cost?” A simple answer can save you from a surprise expense down the line.
Step 5: Leverage Bulk Discounts and Free Shipping
If you’re buying for a department or multiple labs, ask for a bulk discount. We’ve seen labs in Toronto secure free shipping on orders over $1,000, trimming $150–$200 off the total. Even a 5 % discount on a $2,000 order is $100 back in your research fund.
Platforms like LabX’s gel imaging system marketplace often list bulk‑sale options that aren’t advertised on manufacturer sites. It never hurts to inquire.
Step 6: Build a Simple Budget Checklist
Before you hit “Add to Cart,” run through this quick list:
- Core feature list matched to your workflow.
- Total cost of ownership (price + accessories + software + shipping).
- Potential upgrades or replacement parts.
- Discounts for bulk orders or academic pricing.
- Warranty and support terms.
If any item feels shaky, pause and revisit your feature list. Remember, the goal isn’t to buy the most expensive unit, but the one that gives you reliable data without draining your grant.
Bottom line: budgeting for a gel imaging system is less about guessing the gel imaging system price and more about mapping your actual needs to a transparent cost breakdown. With a clear feature list, a realistic TCO, and a bit of savvy shopping on marketplaces, you can keep your lab’s budget happy and your images crisp.
Tips to Reduce Costs Without Compromising Quality
We’ve all stared at a pricey gel imaging system price tag and thought, “Do I really need to spend that much?” You’re not alone. The good news is you can shave dollars off the bill without sacrificing the crisp, publish‑ready images you need.
Start with the essentials, not the extras
First, write down the absolute must‑haves for your workflow. Do you need UV illumination for chemiluminescent blots, or will a blue‑light LED do the job? If the latter, you instantly eliminate the cost of safety enclosures and goggles.
Next, ask yourself whether a dedicated CCD camera is truly required. Many labs get reliable results using a smartphone camera paired with a simple transilluminator. That combo can keep the gel imaging system price under $100.
Leverage modular upgrades
Look for systems that let you swap out the LED module later. Analytik Jena’s PhotoDoc‑It offers a compact UV imager with a replaceable light source, so you can start with a basic LED and upgrade only when your needs change learn more about the PhotoDoc‑It. That way you avoid paying for a high‑end laser module you’ll never use.
Buy smart, not cheap
Bulk discounts aren’t just for consumables. If you’re equipping a department, bundle the transilluminators and ask for a volume price. We’ve seen labs in Toronto lock in free shipping on orders over $1,000 – that’s a $150‑$200 saving that directly lowers the gel imaging system price for each unit.
Don’t forget academic pricing. Many manufacturers list a “research‑only” tier that trims 10‑15 % off the standard list price. It’s worth a quick email to the sales rep; the response is often faster than you expect.
DIY accessories that work
Instead of buying a proprietary mounting stand, repurpose a 3‑D‑printed holder or a simple lab bench clamp. A cheap LED diffuser made from frosted acrylic can replace an expensive optics kit without degrading image quality.
Open‑source software like ImageJ handles most analysis needs, so you can skip pricey subscription licenses. Just download the plugins you need and you’ve saved another $100‑$300.
Check the warranty and support terms
Some low‑priced units skimp on warranty, leading to hidden repair costs later. A modestly higher upfront price that includes a two‑year warranty often pays for itself if a component fails.
When you compare options, put the total cost of ownership (price + accessories + software + shipping + maintenance) side by side. The unit that looks cheapest at first glance might end up more expensive after you factor in extra lenses or a mandatory safety enclosure.
Make the most of Shop Genomics
Our platform aggregates a range of gel imaging options, from entry‑level blue‑light kits to mid‑range UV models. Because we partner with manufacturers directly, you can see bulk‑order discounts and free‑shipping thresholds right on the product page. That transparency helps you keep the gel imaging system price in check without hunting down hidden fees.
Finally, set a small “upgrade fund.” Allocate a few hundred dollars each year for future parts – a new LED, a better camera adapter, or a software plugin. Treat it like routine maintenance; you’ll avoid a big, unexpected expense down the line.
Bottom line: focus on core features, negotiate volume discounts, use modular hardware, and lean on open‑source tools. With those tactics you’ll keep your lab’s budget happy while still getting the high‑quality images you need for your next publication.
Where to Find Reliable Pricing and Vendor Options
Ever feel like you’re hunting for a needle in a haystack when you check the gel imaging system price online? You’re not alone. The good news is there are a handful of places that actually make the search painless.
Shop Genomics – a one‑stop shop
First stop: Shop Genomics. Because we aggregate dozens of brands on one site, you can compare base prices, bundled accessories, and free‑shipping thresholds side by side. That means no more hopping between vendor pages and wondering if a hidden fee is waiting for you.
What we’ve seen work best is using the filter bar to sort by “price low to high” and then ticking the “academic discount” box if you’re at a university or research institute. The platform will instantly show you the adjusted gel imaging system price, so you know exactly what your grant can cover.
Manufacturer websites – go straight to the source
If you have a brand in mind, pop over to the official website. Most manufacturers list a “request a quote” button that gives you a custom price sheet. That’s where you can ask for volume discounts, free‑shipping on orders over a certain amount, or an extended warranty – all of which can shave $50‑$200 off the sticker.
Tip: keep a short checklist handy (light source, detector type, software needs). When you email the sales rep, you’ll look prepared and they’ll be more likely to send you a tailored quote quickly.
Academic consortia and purchasing groups
Many universities belong to a purchasing consortium that negotiates bulk rates with vendors. If your lab is part of such a group, you can often log into a shared portal and see a pre‑negotiated gel imaging system price that’s already lower than the public list.
Even if your institution isn’t in a consortium, ask your procurement office if they have a “preferred vendor list.” Those vendors usually have already proved they can deliver on time and at a fair price.
Used‑equipment marketplaces
Don’t dismiss the second‑hand market. Sites that specialize in lab gear let you filter by “calibrated” or “warranty included.” A gently used unit can be 30 % cheaper, and many sellers still offer a short service contract.
Just double‑check the calibration date and ask for a recent performance test report. If the seller can’t provide that, it’s safer to walk away – a cheap unit that doesn’t work will cost you more in the long run.
Local distributors and regional reps
Sometimes the cheapest price isn’t the fastest delivery. Local distributors often keep stock in regional warehouses, meaning you get your gel imaging system within days instead of weeks. They also tend to bundle local support, which can save you hours of troubleshooting.
When you call, ask if they have a “price match” policy. If you found a lower price on another site, many reps will match it or throw in an extra accessory for free.
So, where should you start? Grab a notebook, list your must‑haves, and then hop onto Shop Genomics to get a baseline price. Next, reach out to the manufacturer for a custom quote, and finally peek at used‑gear listings for a backup option. By checking three sources, you’ll have a solid range to negotiate from.
Bottom line: reliable pricing comes from comparing at least two channels, leveraging academic discounts, and not ignoring the used market. When you line up those numbers, the gel imaging system price becomes a clear, manageable figure instead of a mystery.
FAQ
What factors actually drive the gel imaging system price?
Think of the price like a recipe – the light source is the main ingredient, the detector is the spice, and software plus accessories are the garnish. A blue‑light LED costs far less than a UV lamp with a safety enclosure, and a smartphone camera is cheaper than a dedicated CCD sensor. Add on things like goggles, filters, or a subscription‑based analysis suite, and the total climbs quickly. Knowing which part you really need helps you trim the bill.
How can I tell if a low‑price gel imaging system is a good deal?
Start by matching the specs to your workflow: does the wavelength match the stains you use? Check the warranty length – a one‑year warranty on a $30 kit is a red flag. Look for user reviews that mention reliability, and ask the seller for a recent calibration report. If the unit ships with all the accessories you’d otherwise buy separately, that’s a genuine value add.
Is buying a used gel imaging system a smart way to cut costs?
Used gear can shave 30‑50 % off the sticker, but you have to do your homework. Verify the LED or lamp life – many manufacturers list hours‑of‑use on the data sheet. Ask for a performance test or a short return window. If the seller includes a warranty or service contract, you’re much safer. For CROs or teaching labs that need occasional use, a well‑maintained used unit is often a win.
Can a smartphone‑based system really replace a dedicated camera without hurting image quality?
Modern phones pack 12‑megapixel sensors that rival entry‑level CCDs, especially when paired with good lighting and open‑source analysis tools like ImageJ. The upside is price – you’re basically paying for the housing and a few lenses. The downside is flexibility: you can’t swap in a higher‑resolution sensor or add multi‑channel fluorescence without extra hardware. If your gels are for routine checks or publications, a phone kit usually delivers crisp results.
Do academic discounts actually make a noticeable difference in the gel imaging system price?
Yes, most manufacturers offer a 10‑15 % reduction for universities, research institutes, or non‑profits. You’ll typically need a valid .edu or institutional email and sometimes a purchase order. The discount applies to the base unit, so you still save on any bundled software or accessories. It’s worth sending a quick email to the sales rep – they often reply faster than you expect and may even throw in a free spare LED.
How much do shipping and bulk orders affect the total cost?
Shipping can add $50‑$150 on a single unit, but many vendors waive fees for orders over $1,000. If you’re equipping a whole department, ask for a volume discount; a 5‑10 % cut on a $2,000 order saves you $100‑$200 right away. Local distributors sometimes keep stock in regional warehouses, so you get the system in days instead of weeks, and they may match a lower price you found online.
What ongoing maintenance costs should I plan for after I buy a gel imaging system?
Even the cheapest units have hidden costs. LED modules usually last 10,000‑20,000 hours, but you’ll eventually need a replacement – budget $30‑$60 for a spare. Software subscriptions can be $100‑$300 per year if you opt for a premium analysis suite. Finally, factor in occasional calibration checks or a service contract, especially for high‑throughput labs. A small yearly maintenance budget keeps your images sharp and avoids surprise downtime.
Conclusion
We’ve walked through everything that makes a gel imaging system price jump or drop – from the light source and detector to software fees and accessories.
So, what’s the bottom line? If you know exactly which features move your workflow forward, you can pick a unit that fits your budget without buying extra fluff.
For academic labs or CROs that only need reliable band checks, a blue‑light, smartphone‑based kit often stays under $50 and still delivers publish‑ready images. If you run high‑throughput western blots, budgeting for a dedicated CCD camera and a subscription‑based analysis suite makes sense, even if the gel imaging system price climbs into the low‑hundreds.
Remember to factor in hidden costs: LED replacements, software renewals, and shipping. A quick spreadsheet that adds those line items to the sticker price usually reveals the true total cost of ownership.
And don’t forget the power of bulk discounts – a department‑wide purchase can shave 5‑10 % off the list price, plus free shipping on larger orders.
Ready to take the next step? Browse our curated selection on Shop Genomics, compare specs, and use the checklist we’ve shared to lock in a gel imaging system price that works for your grant.
Good luck, and happy imaging! May your results be clear and reproducible.


