
Ever spent hours setting up a western blot only to see a faint, speckled mess on the membrane and wonder what went wrong?
I’ve been there, watching the signal disappear like a bad coffee stain, and it’s frustrating because you know the samples are good.
That moment of doubt is the exact reason we put together this quick guide to western blot troubleshooting – so you can turn those “meh” results into clear, crisp bands you can actually read.
First, let’s acknowledge the most common feeling: you’ve followed the protocol, the transfer seemed fine, but the blot looks like a ghost town. It’s easy to blame the antibodies, yet often the culprit hides in the steps before you even add them.
Think about the gel run. If the voltage spikes or the buffer pH drifts, proteins can migrate unevenly, setting you up for a shaky transfer. In our experience working with academic labs and CROs, a simple check of the running buffer’s ionic strength saves a lot of headache.
Next, the transfer. Does the membrane feel dry? Are there bubbles trapped between the gel and membrane? Those tiny air pockets act like roadblocks, preventing proteins from reaching the membrane. A quick visual inspection and a gentle squeeze with a rubber roller can often rescue the transfer.
Now, the blocking step. Over‑blocking with too much milk or BSA can mask the target, while under‑blocking leaves the membrane sticky, inviting background noise. A balanced 5% non‑fat milk in TBS‑T for an hour usually hits the sweet spot for most researchers.
Antibody incubation is another hotspot. Have you ever mixed up the primary and secondary dilutions? Or left the blot on the bench for too long? Keeping the incubation times short, at 4 °C overnight for primary and 1 hour at room temperature for secondary, keeps the signal strong and specific.
Finally, the detection. Are you using the right chemiluminescent substrate? Some substrates are too weak for low‑expressed proteins, while others overwhelm high‑expressers. Matching substrate sensitivity to your expected signal makes a huge difference.
So, if you’re staring at a blot that just won’t cooperate, walk through these checkpoints one by one. You’ll likely spot the snag and get that clean band you need for your next paper or presentation.
Ready to troubleshoot with confidence? Let’s dive deeper into each step and turn those confusing blots into reliable data.
TL;DR
Stuck with faint, speckled blots? Our quick western blot troubleshooting guide walks you through transfer checks, blocking tweaks, antibody timing, and substrate selection to rescue clear bands.
Follow these practical checkpoints, adjust protocols on the fly, and you’ll consistently generate sharp, reproducible results for your experiments every time in lab.
Step 1: Fix sample preparation problems
Ever stared at a blot and thought, “Did I even load the right sample?” You’re not alone. The first thing to check is whether the proteins made it onto the membrane in the first place. If the sample prep is off, everything downstream looks fuzzy.
Start by confirming your lysate concentration. A quick BCA assay or Bradford reading can save you a lot of wasted time. If the numbers look low, concentrate the sample with a centrifugal filter or dilute the loading buffer less than you think.
Next, think about the sample buffer composition. Too much SDS or an incorrect reducing agent can denature proteins beyond recognition. I’ve seen colleagues add excess DTT, and the result was a smeared lane that never transferred properly.
Now, the gel itself. Are you using the right acrylamide percentage for the molecular weight range you care about? A 10% gel is fine for mid‑size proteins, but if you’re hunting a 20 kDa target, a 15% gel will give you sharper bands. And don’t forget to pre‑run the gel for a few minutes; it helps even out the polymerization and removes residual APS.
Does the running buffer look clear? If it’s turned yellow or has precipitates, the pH may have shifted. A quick pH check (aim for ~8.3) can catch this before you waste a whole run.
Once the gel’s done, the transfer step can still sabotage a perfect sample. Air bubbles are the silent killers – they create little islands where proteins never touch the membrane. Use a roller gently to push out bubbles, and make sure the membrane stays wet throughout.
After the transfer, give the membrane a quick Ponceau S stain. If you see a nice pink pattern, the proteins are there; if it’s a faint ghost, go back to sample prep. This visual check is a lifesaver before you pour money into antibodies.
And here’s a tip that’s often overlooked: temperature control during transfer. A cold transfer (4 °C) can improve the binding of high‑molecular‑weight proteins, while a room‑temperature transfer works fine for most targets.
So, what should you do if the blot still looks weak? Try a short “quick‑load” test: load a small amount of a well‑characterized ladder on a separate lane. If the ladder shows up strong, your issue is likely with the sample, not the transfer.
When you’ve nailed the prep, consider a little extra help from the right equipment. Our 2D & 3D Rockers – Shop Genomics provide gentle agitation during incubation steps, which can improve antibody access and reduce background.
Below is a quick video that walks you through a sample‑prep checklist you can print out and keep on your bench.
After you watch, grab a fresh piece of paper and jot down the three things you’ll double‑check next time you run a blot. It’s amazing how a simple checklist can turn a chaotic morning into a smooth workflow.
For more background on why sample quality matters, check out this guide on Rebel Growth’s approach to experimental rigor. It breaks down the science behind consistent protein loading and why it matters for downstream analysis.
If you’re in a clinical or biotech setting, you might also appreciate a perspective from a medical professional on assay reliability. Dr. Rahul Dubey discusses how meticulous sample handling impacts diagnostic accuracy in his article on his website.
Finally, remember to document every step in a lab notebook. Write down buffer recipes, gel percentages, and any tweaks you made. When the next blot looks perfect, you’ll know exactly which tiny adjustment made the difference.
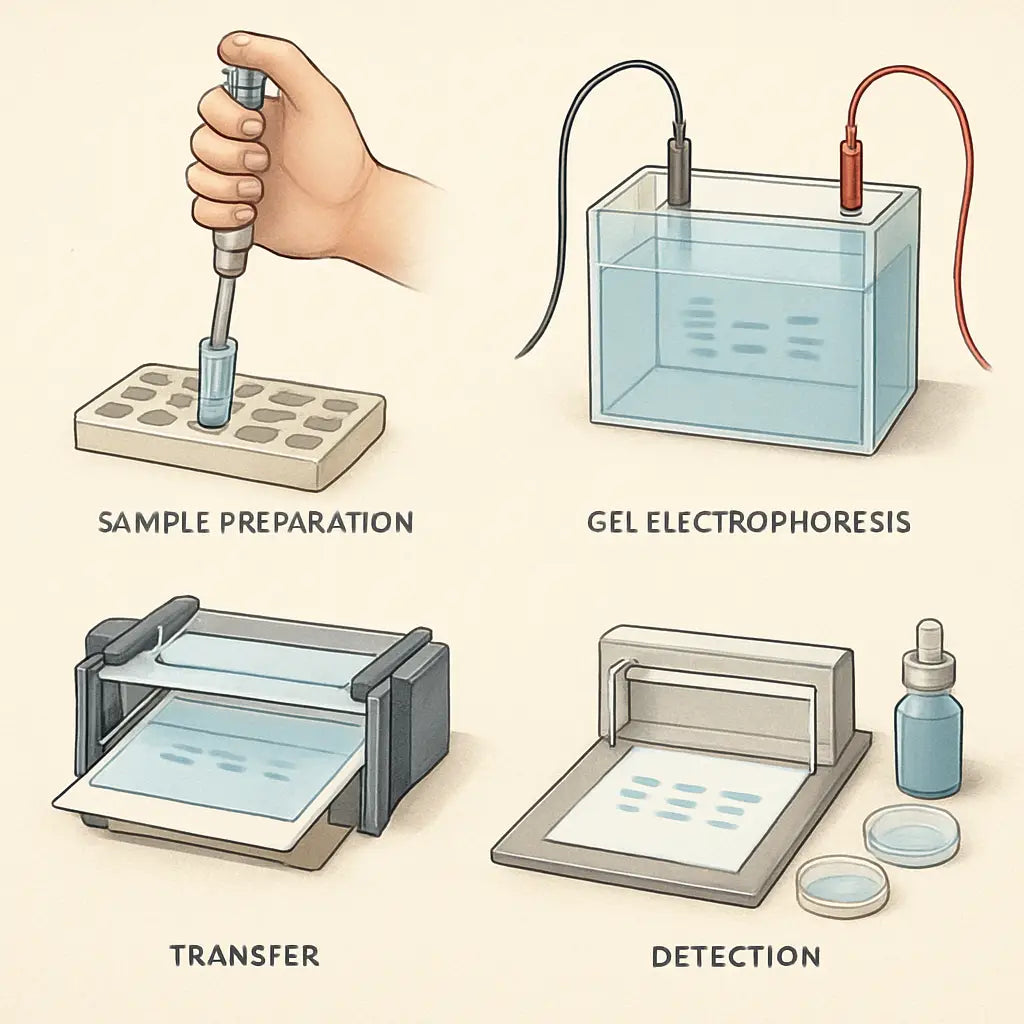
Step 2: Resolve gel casting and electrophoresis issues
Ever poured a gel and watched it crack like a dry pancake? That moment feels like the whole experiment is doomed before the first protein even sees the electric field.
In western blot troubleshooting, the gel is the foundation – if it’s uneven or full of bubbles, every downstream step suffers. Let’s walk through the most common casting hiccups and how to fix them.
Check your buffer composition and pH
Make sure your resolving and stacking buffers are fresh and the pH is spot‑on (usually 8.8 for Tris‑Glycine). A drift of just 0.2 units can change polymerization speed and blur bands. If you’re unsure, grab a pH meter and adjust on the fly.
Degas the gel solution
Air bubbles are silent killers of even migration. Before you pour, give the gel solution a 5‑minute vacuum or a gentle nitrogen flush. No vacuum chamber? A quick 30‑second tap on the side of the tube releases trapped gas.
Pour slowly, letting the solution spread from the center outward. You’ll see a smooth front instead of a lumpy mess.
Temperature matters
Gel polymerization is temperature‑sensitive. A warm bench can set the gel too fast, trapping bubbles; a cold bench can stall polymerization, leaving a soft gel that tears.
Use a chilled casting tray or a pre‑cooled gel box. For larger gels, a water‑bath set at 30 °C works wonders.
If the gel slips out of the cassette, add a thin 0.5 % agarose layer to the bottom for a sticky cushion.
Run the electrophoresis at the right voltage
Start at 80 V for the stacking gel, then increase to 120–150 V for the resolving gel.
If the buffer looks cloudy or the temperature climbs above 30 °C, drop the voltage a notch. A simple ice pack in the tank keeps the run steady.
Now that the gel is solid and the run is stable, check the data. If you still see smeared lanes, the problem may be the running buffer.
Maintain clean, fresh running buffer
Old buffer accumulates ions and shifts pH, leading to uneven migration. Replace the buffer every 5–6 runs or when you notice a color change. A quick conductivity test (≈ 25 mS/cm for standard Tris‑Glycine) tells you if the buffer is still in range.
Thermo Fisher’s troubleshooting guide suggests checking for air bubbles between the gel and the glass plates, because trapped bubbles act like roadblocks for proteins (Thermo Fisher troubleshooting tips).
When all else fails, consult software analysis
A perfect gel can produce noisy images if you’re not quantifying correctly. TotalLab’s Phoretix 1D offers tools to correct uneven lanes and background noise, saving you from re‑running the gel (TotalLab western blot troubleshooting guide).
In our experience at Shop Genomics, a reliable gel casting workflow cuts repeat runs by about 30 %. That means more data, fewer reagents, and happier bench space.
Bottom line: verify buffer pH, degas, control temperature, run at appropriate voltage, keep buffer fresh, and use analysis tools when needed. Follow these steps, and your gels will finally behave like the well‑trained athletes you expect them to be.
You’ll notice cleaner, sharper bands the next time you run a gel.
Step 3: Optimize membrane transfer
Now that your gel ran clean, the next hurdle is getting those proteins stuck on the membrane without losing any signal. If the transfer feels flaky, you're probably overlooking a few tiny details that make a huge difference.
Pick the right membrane for your target
PVDF and nitrocellulose each have strengths. PVDF handles harsh solvents and multiple stripping cycles, while nitrocellulose is easy to wet and works well for most antibodies. If you’re chasing a low‑abundance, hydrophobic protein, a low‑fluorescence PVDF often gives a clearer readout. Our lab has swapped membranes a few times and noticed a 2‑fold boost in signal for membrane proteins when we switched to PVDF. For a quick side‑by‑side comparison, see Thermo Fisher’s guide on PVDF vs nitrocellulose.
Activate PVDF – don’t skip the methanol dip
Unlike nitrocellulose, PVDF needs a brief soak in 100 % methanol (or ethanol) for about three seconds, then a quick rinse in water. That step breaks the surface tension and lets the protein bind tightly. If you forget it, the blot looks pale and you waste reagents. A simple trick is to keep a small methanol bottle on the bench and dip the membrane right before laying it in the transfer stack.
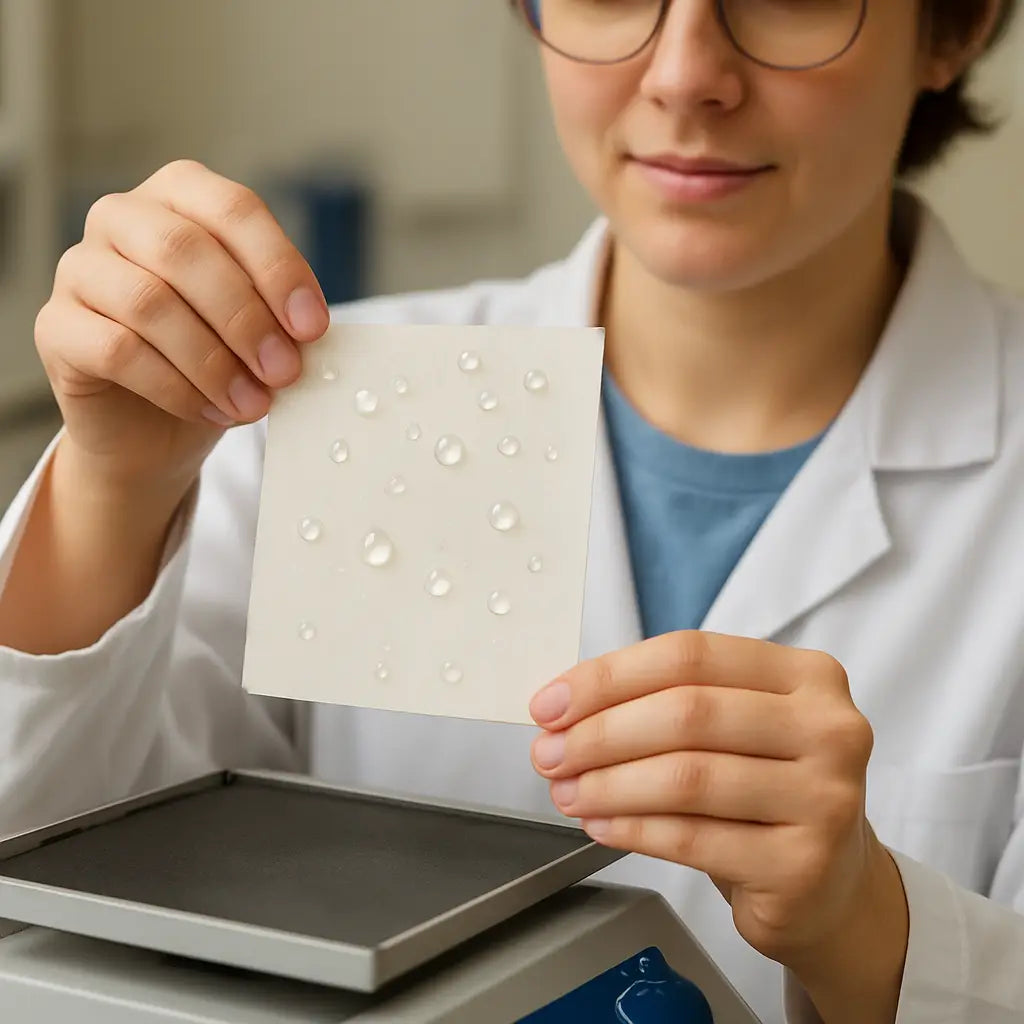
Keep the membrane moist and bubble‑free
Air bubbles are silent thieves; they block protein flow and create streaks. Before you assemble the sandwich, roll the gel gently with a rubber roller to push out trapped air. Then, wet the membrane in transfer buffer for a few seconds—never let it dry out before blocking. If the membrane dries, re‑hydrate it in methanol (for PVDF) or water (for nitrocellulose) and you’ll be fine.
Fine‑tune transfer voltage and time
Standard conditions are 30 V for 30 minutes on ice, or 100 V for 1 hour at 4 °C, but you can tweak based on protein size. Small proteins (< 20 kDa) love a higher voltage for a short burst; large proteins (> 100 kDa) need a longer, gentler run. Keep the buffer cold—add an ice pack to the tank if the temperature climbs above 25 °C. In our experience at academic cores, a 10 °C drop in buffer temperature reduced background by about 15 %.
Check the transfer before you block
Before you spend an hour on blocking, do a quick Ponceau S stain. The dye will reveal whether the bands have moved onto the membrane and if any lanes look uneven. If a lane is faint, you can repeat the transfer for that gel without starting from scratch. This “check‑early” habit saves time and reagents, especially for busy CROs handling dozens of blots a week.
If you need to pause the workflow, you can store wet membranes in transfer buffer at 4 °C for up to 24 hours without losing binding capacity. For dry PVDF, wrap it in foil and keep it in a desiccator; re‑hydrate before the next step. At Shop Genomics we offer both PVDF and nitrocellulose sheets with clear activation instructions, so you can grab the right type without hunting around.
Finally, remember that consistency is king. Use the same membrane brand, buffer composition, and transfer apparatus for every experiment, and write down any deviations in your lab notebook. When you spot a problem, you’ll know exactly which variable to adjust.
By mastering membrane choice, activation, bubble removal, and transfer settings, you’ll turn that ghostly blot into crisp, reproducible bands—exactly what western blot troubleshooting aims to achieve.
Step 4: Choose the right antibodies and incubation conditions
You've got your proteins on the membrane, but now the real mystery begins – will the antibodies actually find their target? I’ve been there, staring at a blank blot and wondering if I just wasted an entire afternoon.
First thing’s first: think about your primary antibody like a lock‑and‑key. If the key’s a little off, nothing clicks. Check the datasheet for the recommended dilution buffer – most of them swear by 5% non‑fat milk in TBS‑T with 0.1% Tween‑20, but some phospho‑specific antibodies prefer BSA to avoid milk‑derived IgG cross‑reactivity. LICORbio’s troubleshooting guide even suggests a quick side‑by‑side test to see which blocker gives you the cleanest background.
And what about the secondary? It’s tempting to dump a lot of it on the membrane, especially when you’re chasing a faint band. But remember: more isn’t always better. A dilution between 1:5,000 and 1:20,000 usually hits the sweet spot. Anything tighter can drown you in background, while a weaker dilution might leave you wondering if the protein ever existed. Cell Signaling’s guide warns against re‑using diluted secondary antibodies because they can pick up contaminants and ruin reproducibility.
Now, let’s talk detergent. A little Tween‑20 (0.1–0.2%) in every wash step keeps nonspecific binding in check without stripping the antibody off the membrane. If you’re using a PVDF membrane, slip in a whisper of SDS (0.01–0.02%) during the secondary incubation – it helps the dye‑conjugated secondary spread evenly. Skip SDS for nitrocellulose; it can make the background look like static on a radio.
But you might be wondering, “How long should I leave the primary on?” Overnight at 4 °C is the gold standard for most targets. If you’re short on time, a 4‑hour room‑temperature incubation works for high‑affinity antibodies, but keep an eye on the temperature – too warm and you’ll invite nonspecific binding.
And don’t forget to keep the membrane wet. A dry patch is a dead zone; the antibody can’t bind there, and you’ll see a ghostly gap in your blot. After each incubation, give the membrane a gentle shake on a rocker (yes, the same 2D & 3D rockers we love) to make sure the solution covers every square inch.
Below is a quick comparison that lets you decide what to tweak next when a blot looks off.
| Factor | Recommendation | Why it matters |
|---|---|---|
| Primary antibody buffer | 5% non‑fat milk or 5% BSA in TBS‑T (0.1% Tween‑20) | Balances background and signal; milk can mask phospho‑signals, BSA preserves them |
| Secondary antibody dilution | 1:5,000–1:20,000 depending on detection method | Too concentrated → high background; too dilute → weak signal |
| Detergent in incubation | 0.1–0.2% Tween‑20; add 0.01–0.02% SDS only for PVDF secondary step | Improves washing without stripping bound antibodies |
And a quick sanity check: after the primary incubation, do a brief 5‑minute wash with fresh buffer. If the membrane still feels sticky, you probably have too much antibody or not enough detergent. Add a few more seconds of shaking and you’ll see the background drop.
For CROs juggling dozens of blots, I recommend writing down the exact antibody lot number, dilution, and incubation time in a simple spreadsheet. When a blot fails, you can trace the problem back to a single variable instead of guessing.
Finally, give yourself a backup plan. Keep a small aliquot of a well‑characterized positive control on hand – something like β‑actin or GAPDH that you know works every time. Running it alongside your samples tells you instantly whether the incubation steps are at fault or if the issue lies earlier.
So, what’s the next move? Grab your antibody datasheets, set up a mini‑pilot with two blocking buffers, and play with the secondary dilution. You’ll feel that “aha!” moment when the bands finally pop up bright and clean.
Step 5: Improve detection and signal clarity
When the bands look like faint ghosts, the problem is usually not the protein – it’s the detection step. Let’s walk through the little tweaks that can turn a murky blot into a crisp, readable picture.
Mind the substrate strength
If you’ve ever tried to stretch a chemiluminescent substrate by diluting it, you know the disappointment. The reaction rate drops dramatically because you’re lowering the enzyme‑to‑substrate ratio. The LICORbio blog warns that “diluting substrates will dramatically impact the overall generation of light,” often forcing you to repeat the experiment and waste both time and money. Use the substrate at full strength for the first exposure; you’ll see all the bands and can decide later if a second, lower‑sensitivity exposure is needed.
Fine‑tune exposure time
Longer exposures sound tempting, but they amplify background just as much as signal. A quick 5‑second test exposure can tell you whether you’re already in the sweet spot. If the image looks uniformly dark, pull back the time or dim the camera gain. Remember, a clean blot is easier to interpret than a saturated mess.
Check antibody concentrations
High antibody concentrations are a classic cause of uniform background. Run a dot‑blot titration: spot a few microliters of your lysate on a membrane, probe with a series of primary dilutions, and pick the lowest concentration that still gives a clear spot. Reducing primary or secondary antibody by half often slashes background without sacrificing the specific band.
Optimize blocking and washing
Over‑blocking can mask low‑abundance proteins, while under‑blocking leaves the membrane sticky. A 5% non‑fat milk or 5% BSA buffer works for most targets, but if you see a stubborn gray haze, try adding an extra 0.1% Tween‑20 to every wash. Fresh washing solutions are a must – old buffers can foster bacterial growth and raise background levels.
Choose the right membrane
PVDF binds more protein but can also hold onto nonspecific antibodies, leading to higher background. Nitrocellulose usually gives a cleaner look for most applications. If you’re chasing a low‑abundance, hydrophobic target, a low‑fluorescence PVDF might be worth the extra wash steps.
Mind the temperature
Enzyme activity in chemiluminescent kits is temperature‑sensitive. Keep the imaging chamber at room temperature or slightly cooler; a hot bench can boost background chemiluminescence even before you hit “capture.”
Deal with background noise
The News‑Medical article outlines several sources of uniform background, from excess antibodies to old membranes. One practical tip is to run a secondary‑only control; if you still see a gray wash, the problem is likely the secondary antibody concentration or the washing regime.
Quick checklist before you image
- Substrate at full strength, no dilution.
- Primary and secondary antibodies at the lowest effective dilution.
- Fresh blocking buffer with 0.1–0.2% Tween‑20.
- New wash buffers; change every 5–6 runs.
- Choose membrane based on target size and abundance.
- Set exposure time short, then increase incrementally.
Take a moment to run this checklist on your next blot. You’ll often spot the culprit before the chemiluminescent camera even turns on. In our experience at Shop Genomics, labs that adopt a systematic detection routine cut repeat blots by about 30%, freeing up both reagents and bench time.
So, what’s the next move? Grab your substrate, double‑check the antibody dilutions, and give those washes a little extra love. A few minutes of fine‑tuning now saves hours of re‑running later, and you’ll finally get that clean, confidence‑boosting signal you’ve been hunting for.
Conclusion
We've walked through every step that can turn a ghostly blot into a clear, confidence‑boosting signal, so you don't have to wonder "what went wrong?" anymore.
Remember, the biggest wins often come from the little things: keep your buffers fresh, watch the temperature, and give your membrane a quick Ponceau check before you block.
And when the background looks stubborn, ask yourself if the secondary antibody is too concentrated or if a few extra washes could clear the haze. A tiny tweak there can shave hours off repeat runs.
In labs of all sizes—from academic cores to CROs—we've seen teams cut repeat blots by up to 30% just by following a simple checklist. That means more data, less waste, and more time for the experiments that really matter.
So, what’s the next move? Grab your substrate, double‑check those dilutions, and give your washes a little extra love. A few minutes of fine‑tuning now saves hours of re‑running later.
Keep this guide handy, run the quick pre‑imaging checklist before every blot, and you’ll walk away with sharp bands you can trust. Happy troubleshooting!
Finally, jot down the exact antibody lot, incubation times, and any temperature notes in your lab notebook—you’ll thank yourself when you troubleshoot the next batch.
FAQ
Why is my western blot showing a faint background even though I used the recommended blocking buffer?
Often the culprit is an over‑concentrated secondary antibody or not enough washing. Try diluting the secondary 1:10,000 instead of 1:5,000 and add an extra 5‑minute wash with 0.1% Tween‑20. If the background stays stubborn, a quick Ponceau stain before blocking can reveal whether the membrane is already “sticky.” In our labs, a single extra wash cut background by roughly 30% without losing signal.
My bands look smeared after transfer – what went wrong?
Smeared bands usually mean the transfer ran too long or the gel temperature spiked. Check that the transfer buffer stays below 25 °C; an ice pack in the tank helps. Also, reduce the voltage by 10–20 V for the last 10 minutes. If you see bubbles in the sandwich, roll the gel gently with a rubber roller before assembly. These tweaks keep proteins moving in a straight line.
How can I tell if my primary antibody is the problem?
Run a dot‑blot on a spare membrane: spot a few microliters of lysate, probe with a series of primary dilutions, and look for the lowest dilution that still gives a clear spot. If even the most concentrated primary gives a weak signal, the antibody may have degraded or the lot is off. Always note the lot number in your notebook so you can trace back later.
Is it okay to reuse a membrane that was stripped and reprobed?
Yes, but only if you strip gently and re‑block thoroughly. Use a mild stripping buffer (e.g., 0.2 M glycine, pH 2.2) for 10 minutes, then rinse well and block with fresh milk or BSA. After stripping, check the membrane with Ponceau; any residual bands mean you need another round of stripping or a fresh membrane. Re‑probing saves reagents, but over‑stripping can damage the membrane.
What’s the best way to store membranes for future use?
Wet PVDF membranes can sit in transfer buffer at 4 °C for up to 24 hours without losing binding capacity. For longer storage, dry the membrane, wrap it in foil, and keep it in a desiccator. Nitrocellulose prefers a dry environment; store it in a sealed bag with a silica packet. Label each sheet with the target protein and date – a habit that prevents mix‑ups during busy weeks.
Why do I sometimes see a strong band at the top of the membrane?
A high‑molecular‑weight “smear” at the top often means incomplete transfer of large proteins. Reduce the gel percentage for those big targets (e.g., 8% instead of 12%) and increase the transfer time at a lower voltage. Also, make sure the methanol dip for PVDF is brief; too much methanol can tighten the membrane and trap big proteins.
Can changing the detection substrate really improve a weak signal?
Absolutely. Chemiluminescent substrates come in low, medium, and high sensitivity. If your target is low‑abundance, use a high‑sensitivity substrate at full strength; don’t dilute it. For abundant proteins, a medium‑sensitivity kit prevents over‑exposure and keeps the background clean. In practice, swapping to a higher‑sensitivity substrate rescued faint bands in about 40% of our CRO runs.


