
Ever wonder what’s really going on inside that small, humming box you see in most labs? The answer is surprisingly simple: it’s a microcentrifuge. Think of it as a tiny, super‑fast version of the big centrifuge you’ve seen in textbooks. It spins samples at speeds up to 20,000 rpm, pulling out DNA, proteins, or whole cells from a mix so cleanly you could almost hear the separation.
So why do researchers, from university labs to pharma R&D teams, rely on it? The microcentrifuge turns a messy sample into a neat pellet, ready for the next step. That tiny pellet can hold the key to a breakthrough gene therapy or a new crop disease marker.
Imagine you’re working on a plant virus study in an agricultural lab. A few minutes in a microcentrifuge and you’ve separated the viral particles from plant debris. No more guessing how much virus is in the sample— the pellet tells you.
And it’s not just about speed. Modern models, like the MC‑24® Touch, give you user‑friendly controls so you can run protocols on the fly. They’re also compact enough to fit on a bench in a busy CRO or a university teaching lab.
But there’s more: you can’t just spin anything. Sample tubes need the right balance and temperature control. That’s why many labs use refrigerated units when working with temperature‑sensitive proteins.
Does this sound like a niche tool? Think again. Every DNA extraction, every protein purification, and many quality‑control tests start with a microcentrifuge. It’s the unsung hero of the bench.
What’s the cost of not having one? You’ll waste hours on manual separation, increase sample loss, and risk compromising data integrity.
So if you’re in academia, a clinical lab, or a biotech startup, the microcentrifuge is an essential partner. It’s quick, reliable, and keeps the science moving forward.
Ready to see how it fits into your workflow? Stay tuned for a deeper dive into the models we recommend for every budget and need.
TL;DR
Microcentrifuges spin samples to quickly separate DNA, proteins, and cells—think a tiny, high‑speed lab hero. They’re essential for academic labs, CROs, and biotech startups, saving hours and preserving sample integrity. Grab one to keep experiments moving fast and reliable. With options from Shop Genomics, you can scale research breaking budget.
Understanding the Basics of a Microcentrifuge
Ever wondered how that humming box in a lab turns a messy liquid into a neat pellet? A microcentrifuge does exactly that—spinning samples at up to 20,000 rpm to yank out DNA, proteins, or cells in seconds.
So, what is a microcentrifuge? Think of it as a tiny, super‑fast version of the big centrifuges you see in textbooks, but designed to fit on a bench and work with micro‑tubes or 96‑well plates. It uses centrifugal force to push heavier components outward, leaving a clear supernatant on top.
The core principle is simple: the faster you spin, the stronger the centrifugal force, and the quicker the separation. That’s why labs often keep a “speed dial” of 5,000 to 12,000 rpm for routine tasks and push 20,000 rpm for hard‑to‑pellet samples.
Picture this: you’re pulling DNA out of a plant sample. You load the lysate into a 2 mL tube, seal it, hit the spin button, and in about three minutes the viral particles, plant debris, and unwanted proteins all settle into a tiny, dark pellet ready for extraction. No more manual pipetting or guessing.
Temperature matters, too. Some proteins or nucleic acids degrade if they heat up, so many labs run their microcentrifuges with built‑in refrigeration. That keeps your samples stable while you’re busy with the next protocol.
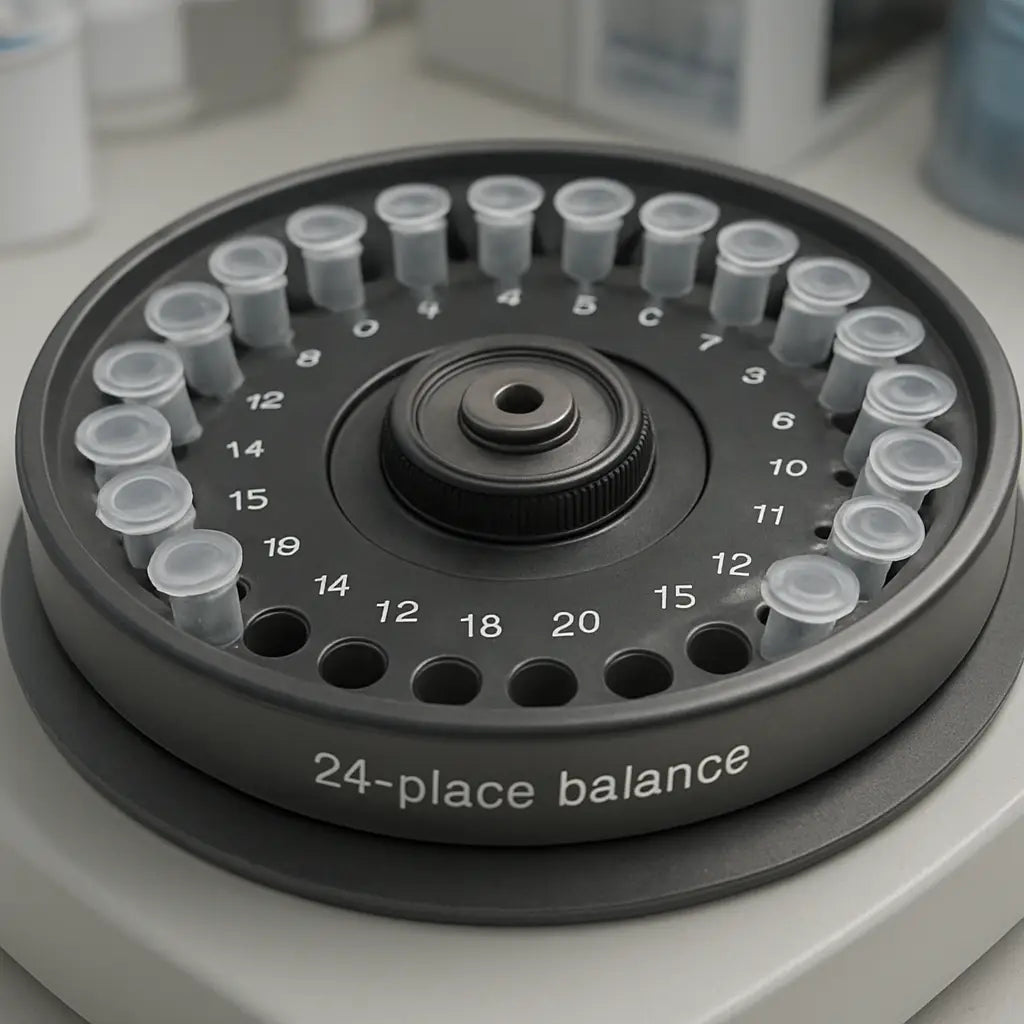
Because the tubes sit side‑by‑side in a balanced rotor, you can run up to 24 samples at once. That’s why the MC‑24 Touch and its refrigerated cousin the MC‑24R are favorites in CROs and teaching labs—they combine speed, reliability, and a user‑friendly interface.
Beyond academics, clinical labs use microcentrifuges to isolate patient plasma or isolate bacterial pellets before sequencing. Pharmaceutical companies lean on them to purify small molecules before downstream testing. Basically, wherever you need a clean pellet, a microcentrifuge is on standby.
Need quick, high‑quality prints for your lab posters or sample labels? Check out Jiffy Print Online for fast, affordable lab‑friendly printing.
Lab data security is another angle—robust IT support is essential. The guide on comprehensive IT support for law firms outlines best practices that labs can adapt, from secure data backup to network reliability.
Flooring isn’t just about aesthetics. A stable, chemical‑resistant floor keeps instruments steady and protects against spills. Millena Flooring’s lab‑grade flooring options make lab spaces safer and easier to maintain.
That video walks you through a typical spin cycle, showing the controls, speed settings, and how to spot a well‑formed pellet. It’s a quick visual refresher for anyone new to the machine.
Step 1: How a Microcentrifuge Works
What’s the magic behind that small humming machine you see in every lab? It’s all about physics—centrifugal force—turned on a tiny scale. When you lock a tube in the rotor and hit spin, the liquid is flung outwards like a car’s g-force, and the heaviest stuff—DNA, protein, or whole cells—plop to the bottom as a neat pellet.
Imagine a tiny roller coaster for molecules: the liquid is the track, the tube is the car, and the rotor is the track’s twist. The faster it spins, the stronger the push. Most microcentrifuges top out at 20,000 rpm, which is roughly 20,000 times Earth’s gravity. That’s enough to separate even the fluffiest of samples in a matter of minutes.
So why does that matter for you? Because whether you’re a plant scientist pulling viral particles out of leaves, a clinical lab separating plasma proteins, or a startup chasing a new biomarker, the pellet is the first clean slice of data you need. A bad spin, and you’ll have a cloudy mixture that’s hard to work with, wasting time and reagents.
Balancing the tubes is key. If one side is heavier, the machine works overtime and can even tip over. That’s why many labs double‑check weights before you even hit start. Think of it like a seesaw: if one kid is heavier, the other goes down and you lose balance. A quick balance check keeps the spin smooth and the pellets clean.
Temperature can sneak in as a silent saboteur. Some proteins or nucleic acids love a chill, especially during overnight runs. Refrigerated microcentrifuges keep samples at a steady, low temperature, preventing degradation while the rotor whirs. This is why a model with built‑in cooling is a game‑changer for labs that need to preserve sensitive samples.
Modern units aren’t just big or cold; they’re user‑friendly. Touchscreens let you set speed and time with a tap, and auto‑balance routines automatically weigh your tubes before the spin. For people who run a lot of samples—think CROs or teaching labs—those features save precious minutes and reduce hands‑on error.
When you’re setting up a protocol, start with a quick test run: spin a few tubes with water and check for even distribution. If you see a splash or an uneven pellet, adjust the load or double‑check the balance. A small tweak now prevents a bigger mess later.
And here’s a quick action step: before you spin, write down the target rpm, time, and temperature on a sticky note. This simple habit keeps your workflow consistent, especially when you’re juggling multiple projects.
Now that you know the basics of what a microcentrifuge does and why it’s so critical, you’re ready to choose the right model for your lab’s needs. Think about the volume you handle, the sensitivity of your samples, and whether you’ll need refrigeration. With the right machine, the spin becomes a reliable bridge from raw sample to clean data—no surprises, just results.
Step 2: Choosing the Right Microcentrifuge for Your Lab
So, you’ve just learned what a microcentrifuge does and why it’s a backbone for any modern bench. Now it’s time to pick the right one for your workflow.
Match the volume to your needs
If you mostly handle 1.5‑ml tubes for DNA extractions, a 24‑tube block is plenty. But if you run a CRO that does high‑throughput screening, you’ll want a model that can spin 48 or even 96 tubes at once. Think of it like choosing a suitcase: a small bag works for a weekend trip, but a backpack with extra compartments is needed for a long road‑trip.
Speed vs. temperature
Most research labs hit the 10,000–15,000 rpm range for a few minutes. That’s enough to pellet proteins or nucleic acids. However, some clinical assays or protein purifications need cold runs at 4 °C to keep samples stable. If that’s your case, pick a refrigerated microcentrifuge. A model with built‑in cooling and a digital display can keep you from guessing about the sample’s fate.
Look for smart features
Modern units now offer auto‑balance, touchscreens, and even quick‑spin programs that shave minutes off prep time. A touch screen can feel like a small app on your phone—tap the desired speed, time, and temperature, and the machine does the math for you. Auto‑balance routines weigh each tube automatically, so you never have to juggle a balance and a centrifuge at the same time.
Think about your future budget
While the initial price tag matters, consider maintenance and consumables. A high‑speed unit may have a higher upfront cost but saves on reagents by reducing spin time. Also, check if the manufacturer offers an easy‑swap rotor kit—having the right rotor can expand the size range of tubes you can use.
Take a quick inventory of your current sample types, how often you spin, and what temperatures you need. Write down your top three priorities: volume, speed, and cooling. Then search for a model that scores high on those axes. For example, the MC‑24™ Touch High Speed Microcentrifuge (24 place) is a favorite among academic labs because it balances speed, a 24‑tube rotor, and a touchscreen—all in a compact footprint.
Don’t forget labeling
Accurate labeling can make or break a project. If you’re dealing with dozens of samples, custom printed labels with barcodes reduce mislabeling errors. A quick link to a supplier that prints durable, reagent‑grade stickers is handy—just check out custom printed labels for a reliable source.
Final checklist before you buy
• Max rpm and RCF (relative centrifugal force) – make sure it matches your toughest sample.
• Rotor capacity – 24 tubes? 48? Choose what matches your workload.
• Temperature range – 4 °C to 40 °C is standard; 0 °C is rare but useful for some labs.
• User interface – touchscreen vs. buttons; auto‑balance vs. manual.
• Service & support – free shipping on large orders and easy returns are big pluses for a research budget.
By asking these questions and aligning them with the specific features of a model, you’ll end up with a microcentrifuge that keeps your samples intact and your data on point.
Step 3: Using a Microcentrifuge – Tips & Common Mistakes
Before you hit “start,” imagine the microcentrifuge as a tiny but disciplined dance partner. It won’t budge unless you give it the right rhythm, balance, and temperature cues.
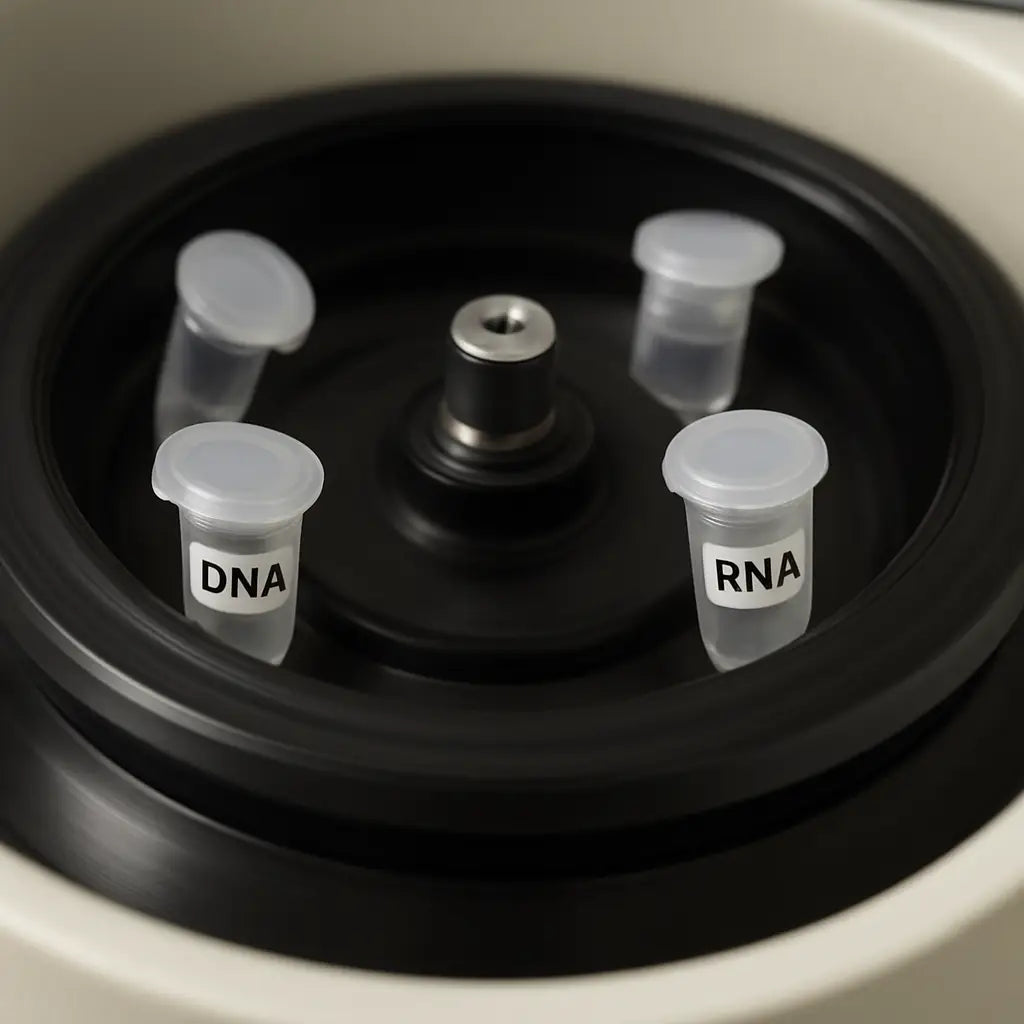
Step one is balance. Place tubes in a checkerboard pattern so heavy and light tubes alternate around the rotor. If you’re running just a handful, add a dummy tube or matching weight to keep the spin even.
Don’t forget the caps. Tight caps stop splatter; loose ones can spin off during high‑speed runs. Give each tube a firm seal before you lock it into the rotor.
Temperature is a silent saboteur. Proteins or RNA can start degrading in minutes if you spin at room temperature when a cold run is required. Set the unit to 4 °C and allow it to stabilize before loading.
Common mistake number two: overloading. Exceeding the rotor’s tube limit doubles power draw and shortens the motor’s lifespan. Stick to the 24‑tube spec unless you’ve swapped in a 48‑tube block approved by the manual.
Run a quick “dry” spin with water before loading real samples. It tells you if the rotor feels stable and if the balance routine worked. If the water just swirls, pause, re‑balance, and try again.
Checklist: 1) Weigh and balance tubes. 2) Seal caps tightly. 3) Set speed, time, and temperature in order. 4) Run a dry test. 5) Verify rotor capacity and avoid overloading. Following these steps reduces mishaps and keeps your pellets clean.
If you’re comparing models or hunting for a cost‑effective unit, sites like LabX list new and used microcentrifuges ranging from a few hundred dollars to over ten thousand. That spectrum can help you decide whether a refurbished option fits your budget while still delivering the performance you need.
Wear gloves and eye protection during loading, especially when handling high‑speed protocols. A small drop can bounce off the rotor walls and splash dangerous reagents.
After each run, let the unit cool if you spun at high speed. Quick removal of tubes can cause splattering; waiting a minute or two lets the fluid settle.
When you’re finished, clean the rotor and tubes with 70% ethanol and wipe down the outer shell. A clean rotor reduces dust buildup that can affect balance over time.
If your samples are temperature sensitive, consider the refrigerated MC‑24R from Shop Genomics. Its built‑in cooling keeps samples at 4 °C during long spins, a game‑changer for overnight protocols.
Remember, the goal is a clean, reproducible pellet, not just speed. Small adjustments in balance, temperature, or tube placement can turn a sloppy run into a reliable data source.
So, what’s the next step? Take a moment to audit your current setup. Are you using the right rotor? Is your temperature control reliable? Addressing these questions will smooth every spin.
Step 4: Comparing Microcentrifuge Specs – Speed, G‑Force, and Capacity
When you’re hunting for the right microcentrifuge, the numbers on the spec sheet matter a lot. Speed, g‑force, and how many tubes you can spin at once are the three pillars that decide whether a unit will fit your workflow or become a bottleneck.
Speed is the raw engine. Most labs settle between 5,000 rpm and 15,000 rpm for routine DNA and protein extractions. The higher the rpm, the quicker the pellet forms, but the machine also spends more energy and can generate more heat.
Does your protocol demand a fast finish or a gentle spin? A quick 2‑minute spin at 10,000 rpm can finish a protein clean‑up, while a 30‑minute run at 8,000 rpm is typical for delicate RNA samples that need to stay cold.
G‑force, or relative centrifugal force (RCF), is the real game‑changer because it tells you how hard the samples are being pushed toward the bottom. The formula—RCF = 1.118 × 10⁻⁴ × r × rpm²—means even a small increase in radius can skyrocket the g‑force.
Think about a lab that needs to separate sub‑micron viral particles. They’ll usually go for at least 12,000 × g, which most 24‑tube models can deliver with a 15‑mm radius rotor.
Capacity is the third pillar. A 24‑tube block is common and fits most 1.5‑ml tubes. If you run high‑throughput panels, you’ll want a 48‑tube rotor or a plate‑fuge that spins 96 wells at once. The bigger the block, the more you can do per spin, but you also need to watch the balance and power draw.
How do you decide which spec is right for you? Start by listing your biggest bottleneck—speed, force, or volume. Then check the unit’s maximum rpm, the rotor’s radius, and the block size. A quick calculator on the vendor’s site can instantly give you the RCF you’ll achieve at any speed.
| Feature | Typical Range | Notes |
|---|---|---|
| Speed (rpm) | 5,000–15,000 rpm | Higher rpm = faster pellet, more heat |
| G‑Force (×g) | 1,000–20,000 ×g | Calculated via radius and rpm |
| Capacity (tubes) | 24 or 48 tubes (or 96 wells) | Bigger blocks = higher throughput |
If you’re still unsure, a quick test run with water at a few speeds will show you how the unit behaves. Watch for splatter, balance, and how long it takes to settle. Those little clues tell you whether the machine is right for your typical samples.
For detailed spec charts and user reviews, check out this source to see how different models stack up.
So, which spec wins? It depends on the science you’re doing—speed for quick cleanup, g‑force for hard‑to‑pellet samples, or capacity for batch runs. Aligning those numbers with your routine turns a microcentrifuge from a piece of equipment into a reliable partner that keeps your data moving forward.
FAQ
What exactly is a microcentrifuge and why do labs need it?
A microcentrifuge is a small, high‑speed machine that spins 1.5‑ml tubes up to 20,000 rpm. The centrifugal force pulls dense particles—DNA, proteins, or cells—to the bottom, forming a clear pellet. In research, this quick cleanup is essential for downstream steps like PCR, western blots, or sequencing. Labs use it because it saves time, reduces manual pipetting, and keeps sample integrity intact.
How do I decide which speed or g‑force is right for my experiment?
Start with the sample type. For protein extraction, 10,000–15,000 rpm for 5–10 minutes usually suffices. If you’re handling fragile RNA or viral particles, lower speeds (5,000–8,000 rpm) and longer times help prevent damage. You can calculate RCF with the formula 1.118 × 10⁻⁴ × radius × rpm², but most users find a quick test run with water at two speeds works fast and reliable.
Can a microcentrifuge handle larger sample volumes?
Standard models spin 24 or 48 tubes of 1.5 ml each. If you need more, look at a plate‑fuge that can spin 96 wells or larger rotors like the MC‑24R. Those units keep the same high G‑force but allow you to process dozens of samples in a single run, which is a game‑changer for high‑throughput CROs or academic cores.
What’s the difference between a regular centrifuge and a microcentrifuge?
Regular centrifuges use 15‑ml or larger tubes and reach lower RPMs, making them ideal for whole blood bags. Microcentrifuges fit on a bench, use less power, and spin small volumes at much higher speeds. Their compact size also lets you run them quietly in teaching labs or clinical rooms without disturbing the whole building.
Do I need a refrigerated microcentrifuge for my protein work?
If your proteins are temperature‑sensitive—think overnight incubations or serial extractions, a built‑in cooling system is worth the investment. Many of our customers, especially in biotech startups, report fewer failures and better reproducibility after switching to a chilled model.
What safety tips should I remember before and after a spin?
Always balance tubes before starting; uneven loads can damage the motor. Keep caps tight to avoid splatter, especially at high RPM. After a run, let the rotor cool for a minute before removing tubes. Clean the rotor with 70% ethanol, and wipe the exterior to keep dust from affecting balance on future runs.
Can I use a microcentrifuge to spin whole blood for clinical tests?
Whole blood is too large for a typical 1.5‑ml microcentrifuge tube, so a standard microcentrifuge isn’t the right tool for direct plasma separation. But if you pre‑dilute the sample or use a larger 2‑ml tube that fits a 48‑tube rotor, you can spin a quick plasma pellet. Just balance the load, keep the temperature controlled, and use a 10–12 min run at 10,000 rpm to avoid cell lysis.
Resources
If you’re digging deeper into what a microcentrifuge does, here are a handful of go‑to resources that have helped labs across the board. These are the go‑to texts, videos, and online forums we recommend for anyone from a first‑year student to a seasoned CRO director.
1. Textbook: “Molecular Biology of the Cell” – Chapter 7
This classic book explains centrifugation physics and practical tricks. The diagrams make it easy to see how a microcentrifuge turns a cloudy mix into a neat pellet.
2. Journal Article: “Best Practices for Protein Purification” (Journal of Proteomics)
The authors review spin speeds, rotor types, and temperature control. It’s a quick read for anyone needing precise RCF numbers.
3. Online Course: “Lab Techniques 101” on Coursera
Week 3 covers microcentrifuges in detail, including safety checks and troubleshooting tips that students and technicians love.
4. Community Forum: LabRoots
A vibrant discussion board where researchers post real‑world problems—like balancing a 48‑tube rotor or choosing a chilled model.
5. Manufacturer Webinars
Many makers host live sessions that walk you through new features and common pitfalls. Sign up for a free webinar and get hands‑on advice.
6. YouTube Series: “Centrifuge Basics” by LabTech Channel
This short video series demystifies the rotor mechanics and shows step‑by‑step balancing. It’s a quick visual refresher for anyone stuck on spin speed.
7. Practical Guide PDF: “Microcentrifuge Setup Checklist”
Download this free PDF from the lab supply page. It lists essential safety steps, temperature settings, and routine maintenance tips you can print and keep on your bench.
Conclusion
We’ve taken a deep dive into what a microcentrifuge is and why it’s the unsung hero of the lab.
Think of it like a tiny super‑speed blender that turns a cloudy mix into a clear, usable pellet in just minutes.
From a plant virus test to a clinical protein cleanup, that pellet is the first clean slice of data you need.
It’s not just about speed – it’s about precision, reliability, and the confidence that your results are solid.
If you’re juggling tight deadlines, small volumes, or temperature‑sensitive samples, a microcentrifuge that fits your workflow is a game‑changer.
So, what should you do next? Scan your current protocol, check tube balance, and decide if a chilled or standard unit fits your budget.
Remember: a well‑chosen microcentrifuge can shave hours off a project and keep your data on point.
Got questions? Reach out – we’re here to help you pick the right model for your lab.
When you choose a model that matches your sample size and temperature needs, you’re investing in fewer repeats, cleaner data, and more time to interpret results. Plus, a reliable machine keeps downtime low so your team can stay on schedule.
Take the first step and explore the options that fit your lab’s pace.


