Ever walked into a lab and seen a big, noisy machine chewing up DNA like a blender, then thought there must be a cheaper, quieter way?
If you’re juggling a tight grant budget or teaching a class that can’t afford a pricey instrument, you’re not alone. The good news is that an affordable benchtop DNA shearing device can give you reliable fragment sizes without breaking the bank.
In the next few minutes we’ll unpack why size‑selection matters, what features really count, and how you can pick a model that fits on a standard bench and on your spreadsheet.
At Shop Genomics we’ve helped academic labs, biotech startups, and even high‑school classrooms find compact shearing tools that start under $2,000. What we’ve seen work best is a device with adjustable speed, a simple cartridge system, and a footprint that won’t crowd out your pipettes.
First, think about the DNA you need to chop. Are you preparing libraries for short‑read sequencing, or just generating fragments for a teaching demo? The required fragment length will dictate the shear force and the speed range you should look for.
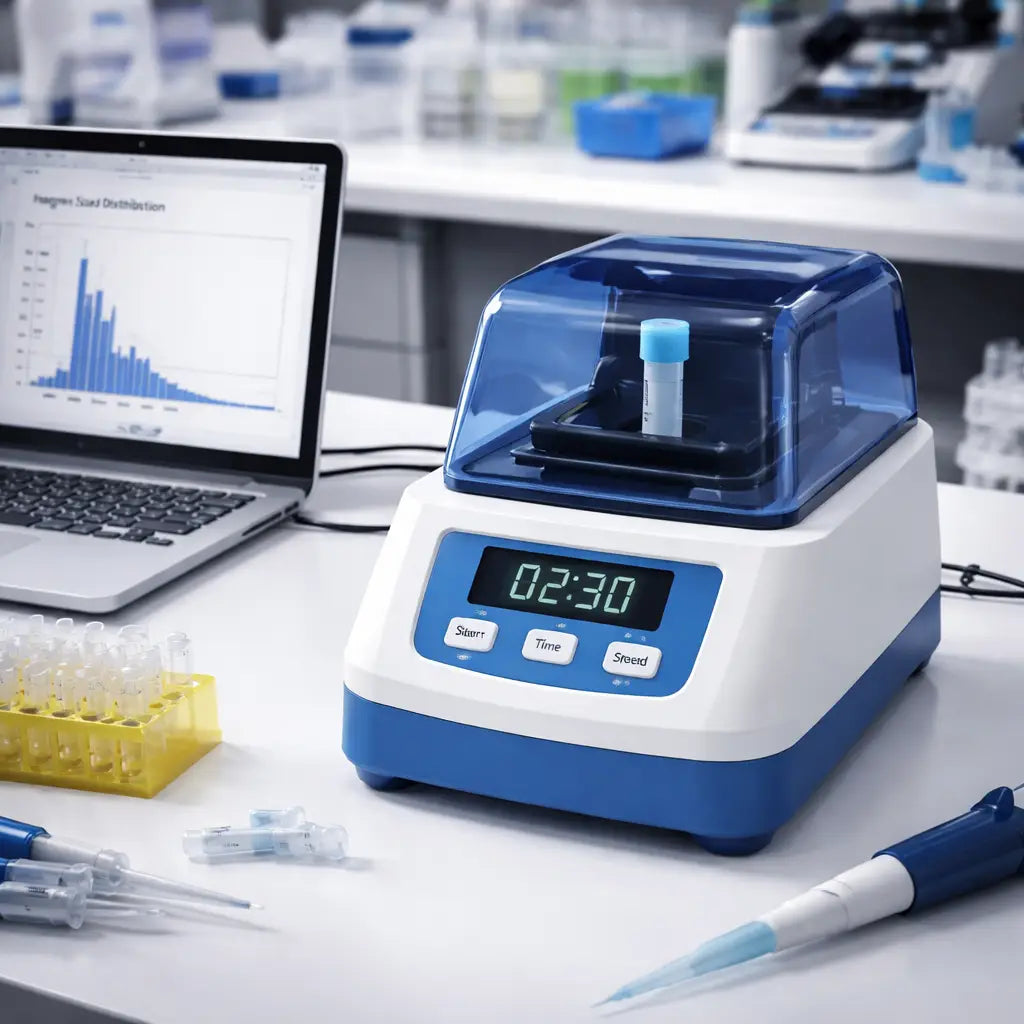
A good affordable benchtop shear will let you set speeds from a few hundred up to a few thousand rpm, and it will include a timer so you can stop the run at exactly the right moment. Look for models that use disposable spin‑columns or flow‑cells – they keep cross‑contamination low and cleanup fast.
Tip: measure your sample volume before you load it. Most bench‑top units handle 20‑200 µL; over‑filling can cause uneven shearing and waste reagents.
You know that moment when you finally see a clean smear on the gel and realize the fragments are just right? That “aha” feeling is what makes the investment worth it, especially when the device costs less than a semester’s worth of consumables.
So, does an affordable benchtop DNA shearing device sound like the missing piece in your workflow? Let’s keep the conversation and explore the exact specs that will make your next experiment a breeze.
TL;DR
If you need reliable fragment sizes without draining your grant, an affordable benchtop DNA shearing device gives you precise control, easy cleanup, and a compact footprint that fits any lab bench.
Choose a model with adjustable rpm, a timer, and disposable cartridges, then you’ll spend minutes setting up, run samples in seconds, and see clean gels that prove everything worked as expected.
Step 1: Define Your Shearing Needs
First thing’s first: what exactly do you need to cut? The fragment size you’re after drives every other decision. If you’re prepping a short‑read library, you’ll probably aim for 300–500 bp fragments. For a teaching demo, 800 bp might be enough to see a nice smear on a gel. The key is to match the shearing force to the DNA length you want.
So, ask yourself: how much DNA are you loading, and what volume does your benchtop device handle? Most affordable shearing units accept 20–200 µL per tube. Over‑filling can lead to uneven shearing, while under‑filling can waste precious sample. Measure your sample volume before you even think about the speed setting.
Next, think about the speed range. An adjustable‑rpm device that runs from a few hundred up to a few thousand rpm gives you the flexibility to fine‑tune fragment sizes without buying multiple machines. A built‑in timer is a lifesaver too – you can stop the run at exactly the right moment and avoid over‑shearing.
Match the device to your workflow
If you’re in an academic lab that runs dozens of small projects a week, you’ll want a quick‑setup instrument that fits on a crowded bench. Look for a footprint under 8 × 10 inches and a power draw under 100 W so you won’t overload a typical lab outlet.
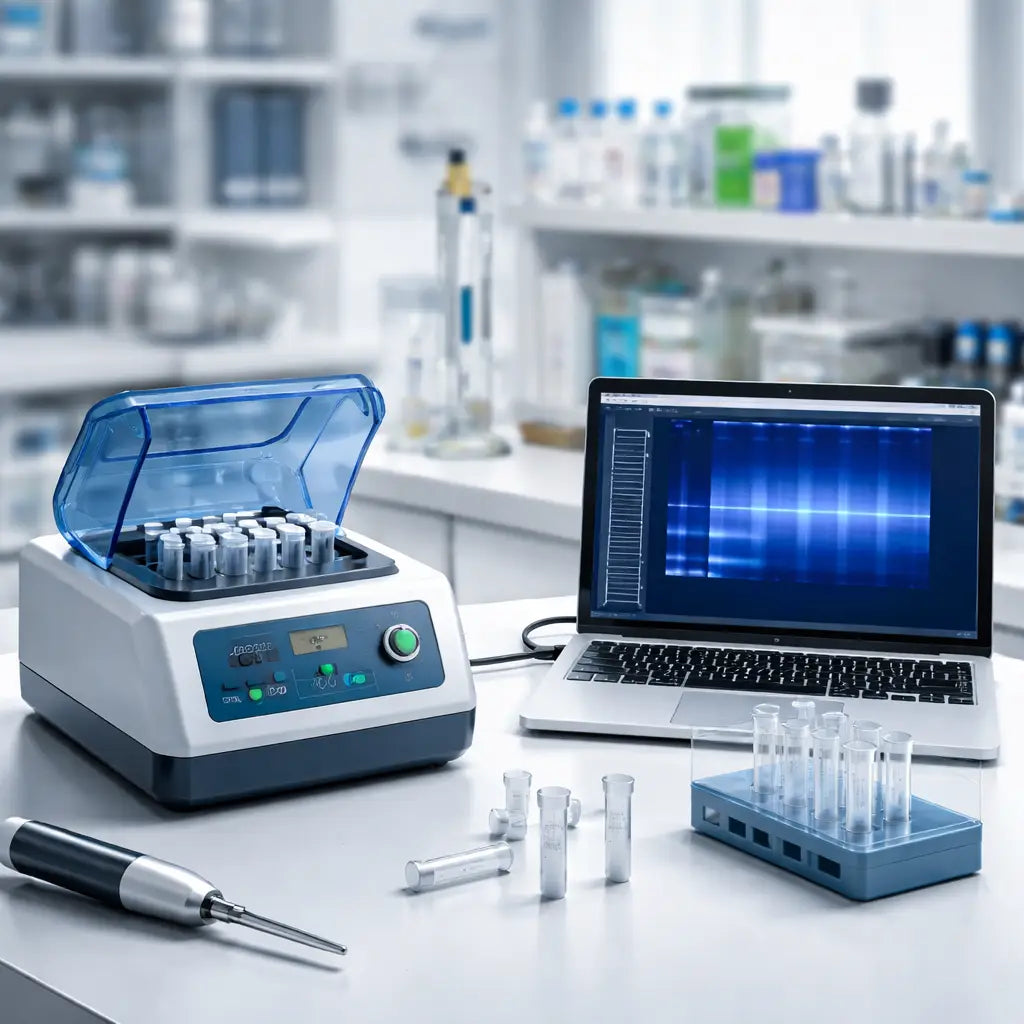
For a clinical or biotech setting where reproducibility matters, consider a model with disposable cartridges. Those keep cross‑contamination low and make cleanup a breeze – no more scrubbing the rotor between runs.
And don’t forget data handling. Modern shearing devices often stream speed and time data to a laptop via USB. If your lab already uses a networked data‑storage solution, you’ll need reliable IT support to keep everything secure. That’s where reliable IT support for labs can make a real difference, ensuring your device talks to your server without glitches.
Once you’ve nailed down the basic specs, write a quick checklist:
- Target fragment size (bp)
- Sample volume range (µL)
- Speed range (rpm)
- Timer precision (seconds)
- Footprint and power needs
- Cartridge vs. reusable rotor
This simple list keeps the conversation focused when you compare models, and it helps you avoid the temptation to add “nice‑to‑have” features that drive up cost.
When you start testing a new shearer, capture what works and what doesn’t. A quick way to do that is to record your observations in an audio note and let an AI assistant sort the feedback for you. BubblyAgent can transcribe your lab notes, highlight recurring issues, and even suggest protocol tweaks – all without typing a single line.
Here’s a short video that walks through the basic setup of a typical affordable benchtop DNA shearing device. It shows how to load the sample, set the rpm, and start the timer.
After you’ve watched the video, take a minute to note any questions that pop up. Maybe you’re unsure whether the device can handle high‑molecular‑weight DNA, or you wonder how often you need to replace the cartridges. Those doubts are normal – jot them down and check the manufacturer’s FAQ or reach out to the vendor.
Finally, give the whole process a quick trial run with a control DNA sample. Run a 30‑second shear at a mid‑range speed, then run the gel. If the band pattern looks like a tidy smear centered around your target size, you’ve hit the sweet spot. If the smear is too broad, dial back the speed or shorten the timer.
With this checklist and a hands‑on trial, you’ll be able to define your shearing needs clearly, pick the right affordable benchtop DNA shearing device, and move forward with confidence.
Step 2: Compare Device Specs and Performance
Now that you’ve nailed down what fragment size you need, it’s time to stare at the spec sheet and ask yourself: does this affordable benchtop DNA shearing device actually do what I need, or am I buying a fancy paperweight?
First thing’s always the speed range. Most entry‑level models spin somewhere between 2,800 and 4,000 rpm, but the sweet spot for 300‑500 bp fragments usually lands around 3,000 rpm. If a device only tops out at 2,500 rpm, you might end up with a fuzzy gel and a lot of wasted time tweaking.
Next, look at volume capacity. You’ll see numbers like 20‑200 µL or 30‑150 µL. In a teaching lab, you might only need 30 µL per run, but a biotech startup that processes 96‑well plates will appreciate the higher end of that range. The key is to match the cartridge or tube size to the volume you actually use.
And what about the timer? A built‑in timer that lets you set 10‑second increments gives you fine‑grained control. Some cheaper units only have a fixed 30‑second run, which can be a nightmare when you’re trying to dial in a specific fragment length.
So, how do you compare these numbers quickly? Below is a handy cheat‑sheet you can print and stick on the bench.
| Feature | Typical Range | What to Look For |
|---|---|---|
| Speed (rpm) | 2,800‑4,000 | Adjustable in 100 rpm steps for precise tuning |
| Volume Capacity | 20‑200 µL | Matches your sample prep workflow; avoid over‑filling |
| Timer Resolution | 5‑30 seconds | Fine control reduces trial‑and‑error |
| Cartridge Compatibility | 1‑3 tube slots | Look for interchangeable cartridges to scale up |
Notice how the table pulls out the bits that actually affect your day‑to‑day work. If you’re juggling dozens of samples, the cartridge count can be a make‑or‑break factor.
Want a real‑world reference point? Covaris’ g‑Tube data shows you can fragment 150 µL of DNA to a tight 10 kbp band in just 60 seconds using a standard centrifuge (Covaris g‑Tube performance data). That’s the kind of reproducibility you should expect from any decent benchtop shear – even if the mechanism is magnetic instead of acoustic.
Another useful benchmark comes from a recent NTI study that compared several benchtop DNA shearing instruments on speed, fragment distribution, and energy consumption (NTI bench‑top DNA shearing report). The takeaway? Devices that let you tweak both rpm and run time consistently outperform fixed‑speed models when you need tight size ranges.
Now, let’s talk about the little details that often slip through the cracks. Does the unit have a clear digital display? Is the control panel intuitive enough that a new graduate student can set it up without a 30‑minute tutorial? Those ergonomics matter just as much as raw specs.
And don’t forget power. A 100‑watt motor will draw less from the lab’s electrical budget than a 300‑watt beast, but it still needs to spin fast enough for your target fragment size. Check the wattage rating on the spec sheet and compare it to your lab’s power budget.
So, what should you actually do with all this info? Grab a sheet of paper, write down the three specs that matter most for your workflow – speed, volume, timer – and score each model on a 1‑5 scale. Add up the scores, and the highest‑scoring device is likely the best fit for your budget and experiment design.
One tip we’ve seen work wonders in both academic cores and biotech startups: keep a small logbook next to the instrument where you note the exact rpm, run time, and resulting fragment size for each sample type. Over time that log becomes a gold mine for troubleshooting and reproducibility.
Ready for a quick visual recap? Check out this short video that walks through the key knobs you’ll be turning on an affordable benchtop DNA shearing device.
Remember, the goal isn’t just to pick the cheapest gadget – it’s to find a tool that gives you reliable fragment sizes, fits your bench space, and won’t eat your grant budget.
Step 3: Set Up and Calibrate Your Device
Setting up a new affordable benchtop DNA shearing device isn’t glamorous, but it matters. A careful, repeatable setup pays off with reliable fragment sizes and fewer reruns down the line.
In our experience at Shop Genomics, a clean start beats chasing fancy features. You want a tool that’s easy to place, easy to load, and easy to trust when you’re teaching a class or running a small project. Let’s go through a practical setup you can actually replicate.
1) Prepare the bench and power
Clear a small, clean area. Put down a non‑slip mat and keep the device within easy reach of your pipettes and a timer. Use a grounded outlet and store disposable cartridges at room temperature. Wipe the loading area with 70% ethanol to keep dust out of the slots.
Power up the unit and let it settle for a minute. If your model supports software or data connections, leave those unplugged until you’ve confirmed the motor and cartridge seating are solid.
2) Load the cartridge correctly and do a dry run
Insert the cartridge or tube exactly as the manual shows, and make sure it sits flush with the loading port. A misaligned cartridge is the sneakiest cause of odd fragment distributions.
If your device supports a dry run, use it. Listen for smooth rotation and watch for any wobble or grinding noises. If you hear anything off, reseat the cartridge or switch to a fresh slot.
3) Calibrate speed and timer in small steps
Start with the manufacturer’s baseline for your target size. For most 300–500 bp aims, mid‑range speeds work best. Run a quick test, then adjust in 10‑ to 20‑second increments. Document every change so you can reproduce it later.
If the unit has a granular timer, use those 10‑second steps to dial in the exact moment you want. If you’re on a coarser timer, keep a stopwatch handy to hit precise fragmentation windows.
4) Validate results and refine
Process a control DNA sample and check the fragment distribution with a gel or a fragment analyzer. If the smear isn’t clean, nudge the rpm or the run time slightly and rerun. The goal is a predictable distribution you can rely on across samples and days.
Keep a simple log: rpm, seconds, cartridge type, sample type, and the observed fragment size. This becomes your reproducibility backbone when you scale up or teach more labs.
5) Build a quick workflow that others can reuse
Turn your settings into a one‑page protocol you can hand to students or colleagues. Include a short troubleshooting box: common misloads, what a wobble means, and how to reset if things drift. The faster you can transfer know‑how, the smoother the bench runs for everyone.
Remember, a solid setup isn’t just about a single perfect run. It’s about repeatability day after day, bench to bench, user to user. That reliability saves reagents, time, and headaches for Academic & Research Institutions and Educational Institutions alike.
For practical context, Covaris offers mechanical DNA/RNA shearing protocols that help frame reproducibility during setup. Their guidance can be a useful reference as you calibrate your tool: Covaris DNA/RNA Shearing Protocols.
Step 4: Run Test Shears and Optimize Settings
Okay, you’ve got your affordable benchtop DNA shearing device set up and you’ve scribbled down the first speed‑time guess. Now it’s time to actually run a test and see if the DNA breaks exactly where you want it.
Run a test shear
Grab a control DNA sample – something you know the concentration of, like a 30 ng/µL prep. Load it into a disposable cartridge, close the lid, and set the device to the manufacturer’s starter settings. In our experience, a good baseline for many benchtops is around 2,800 rpm for 30 seconds, but you’ll quickly learn that the sweet spot shifts with sample volume and buffer.
After the run, pull a tiny aliquot (1 µL works fine) and pop it on a 1% agarose gel or a fragment analyzer. You’re looking for that tidy smear centered on your target size – say 350 bp for a short‑read library. If the band is fuzzy or way off, don’t panic; you’re about to fine‑tune.
Fine‑tune RPM and time
Here’s a simple rule of thumb that comes straight from the Oxford Nanopore FastPrep guide: increase the speed or lengthen the run to shave off a few hundred bases, and do the opposite to keep fragments longer Nanopore FastPrep protocol. So if your smear is a bit too high, bump the rpm up by 200–300 or add another 5‑10 seconds. If it’s too low, dial the rpm down a notch or shave a few seconds off.
Make small, incremental changes – think of it like adjusting a coffee grinder. You don’t jump from 2,800 rpm to 3,500 rpm in one go; you move in 100 rpm steps and watch the gel each time.
Validate and log results
Every time you tweak a setting, write it down. A quick table in your lab notebook (or a shared spreadsheet) with columns for rpm, seconds, cartridge type, sample volume, and observed peak size becomes your gold standard. Over a week you’ll see a pattern emerge, and that pattern is what turns a “guess” into a reproducible protocol.
Tip: use the same gel loading volume each time – 5 µL is a sweet spot – so the intensity of the bands is comparable. Consistency in how you run the gel matters just as much as the shearing itself.
Quick troubleshooting tips
- Wobble or noise? Re‑seat the cartridge, check the bench is level, and make sure the tube sits flush. A mis‑aligned cartridge is the most common cause of uneven fragments.
- Gel shows a double smear? You might be over‑shearing. Drop the rpm by 100 or cut the run time by 5 seconds and try again.
- No visible smear? Your sample could be too dilute. Bring the concentration up to at least 20 ng/µL before you run another test.
Remember, the goal isn’t to hit perfection on the first try; it’s to build a repeatable workflow that works day after day, whether you’re in a teaching lab, a CRO, or an academic core facility.
Once you’ve nailed a clean, tight fragment distribution, freeze those settings in a one‑page SOP. Add a tiny “look‑for‑this‑band” picture, and you’ve got a cheat‑sheet that anyone – from a grad student to a senior technician – can follow without a 30‑minute tutorial.
That’s it: run, tweak, record, repeat. In a few cycles you’ll have an affordable benchtop DNA shearing device that delivers reliable fragments, saves reagents, and keeps your grant happy.
Step 5: Maintenance and Cost‑Saving Tips
Maintenance might not be glamorous, but it’s the glue that keeps your affordable benchtop DNA shearing device reliable week after week.
In our experience, the simplest upkeep saves the most headaches: clean loading areas, reseat cartridges, and keep a tight inventory of consumables. Do this right, and you’ll spend less time troubleshooting and more time actually getting results. By 2026, labs that treat upkeep like a routine workflow see fewer reruns and tighter sample data.
Why maintenance matters
Small annoyances add up. A dusty cartridge slot or a crooked cartridge seating can skew fragment distribution, wasting reagents and forcing redo runs. Regular checks keep results repeatable and reduce stray fragments that derail downstream analysis.
Think of maintenance as a daily habit, not a one-off task. When you document tweaks and keep to a single SOP, you protect your data integrity across shifts and teams. It’s not flashy, but it’s powerful.
Daily, weekly, and monthly routines
Daily: wipe the loading area with 70% ethanol, confirm the cartridge sits flush, and glance at the display for any alarms. A minute here pays off in cleaner runs later.
Weekly: run a control DNA sample to check that fragment sizes stay in target ranges. Listen for unusual noises and reseat if you notice wobble or resistance.
Monthly: rotate stock, verify expiry dates on consumables, and refresh your one-page SOP with any tweaks you’ve proven reliable.
- Keep dedicated storage for cartridges and gels so you don’t mix up tubes between runs.
- Label slots and tubes clearly; a tiny sticker can prevent cross-loading errors in busy teaching labs.
- Track rpm, seconds, volume, and observed fragment size in a shared notebook so you can spot drift fast.
Does this actually save money? Absolutely. When you avoid cross‑contamination, you cut reties. When you run to a defined target size, you waste less reagents and spare expensive consumables. A small daily improvement compounds over a month, then a semester, then a year—especially when you’re teaching multiple classes or handling CRO samples.
Cost-saving tips at a glance:
- Match cartridge capacity to your typical run volume to avoid paying for idle capacity.
- Use the built‑in timer to stop runs exactly when you hit the target size—no over‑shearing.
- Lock in a standard run protocol and train every new user to follow it—consistency is cheaper than custom troubleshooting.
- Store consumables properly and monitor expiry; expired reagents are pure price inflation.
- Document and review results quarterly to catch drift before it becomes a problem.
Finally, maintenance is not just about keeping a device alive. It’s about protecting your budget, your data, and your students’ confidence as you push through 2026 with consistent, reliable fragment sizes.
Platforms like Shop Genomics make this easier by offering affordable benchtop DNA shearing devices and classroom-friendly consumables, along with clear guides to keep your workflow tight. You’re not in this alone; having a reliable partner helps you stay on track through 2026 and beyond.
Step 6: Scaling Up for Higher Throughput
Now you’ve got a reliable protocol for a handful of samples – great for a class or a pilot study. But what happens when your CRO needs to process dozens of plates a week, or a biotech startup is moving from a proof‑of‑concept to a full‑scale library prep?
That’s the moment you start thinking about throughput, and it’s not just about buying a bigger device. It’s about how you organise the workflow so you can keep the same fragment quality while the sample count climbs.
Batch your cartridges, not your patience
Most affordable benchtop DNA shearing devices use disposable cartridges that hold 20‑200 µL. Instead of swapping a cartridge after every tube, load a multi‑slot cartridge that can handle three 2 mL tubes at once. You’ll cut the number of loading steps by a factor of three and free up a pair of hands for the next batch.
Tip: label each slot with the target rpm and time. A quick glance tells you exactly which setting belongs to which sample set – no more guessing when the bench gets noisy.
Parallelize with a liquid‑handling robot
If your lab already has a Hamilton STAR or a similar pipetting platform, you can let the robot do the heavy lifting. A recent study showed that tip‑shearing on the Hamilton deck can process 96 samples in one run while still delivering N50 values above 20 kb — perfect for long‑read sequencing automated tip‑shearing on a liquid‑handling robot. The robot aspirates and dispenses the DNA through standard tips, so you don’t need a separate shearing instrument at all.
Even if you don’t have a full‑size robot, a simple 8‑channel pipette can feed multiple cartridges at once. The key is to keep the timing consistent: start all runs within a 10‑second window so the downstream cleanup stays in sync.
Standardise the run sheet
Create a master spreadsheet that lists every sample batch, the cartridge slot, rpm, seconds, and the expected fragment size range. Share it on a cloud drive so anyone on the bench can update it in real time. When you see a drift in fragment size, you’ll know exactly which variable to tweak.
For academic cores or CROs, we’ve seen teams freeze the whole sheet into a PDF SOP that’s printed and posted next to the device. It saves a lot of back‑and‑forth emails when the lab is busy.
Mind the consumable inventory
Scaling up means you’ll go through cartridges faster. Set a reorder threshold at 20 % of your average monthly usage, and keep a small safety stock on the bench. That way a delayed shipment never forces you to pause a run.
Don’t forget to track expiry dates. An expired cartridge can give you a subtle drop in speed, which shows up as a broader smear on the gel – a cheap mystery that costs you time.
Energy and space considerations
Higher throughput can bump up your power draw, especially if you’re running three devices side by side. Check the motor wattage on the spec sheet (most affordable units sit under 150 W) and make sure the outlet can handle the combined load. If you’re cramped for bench space, stack the devices on a low‑profile shelf and route the power cords neatly – a tidy bench reduces accidents.
In our experience, labs that plan the layout ahead of time avoid the “where do I put the extra cartridge?” scramble when a new project rolls in.
Quality control at scale
Run a control sample every 24‑hour shift. Load the same DNA stock into a spare cartridge and run the exact same rpm/time. Compare the gel or fragment analyzer readout to your baseline. If the control drifts, you know the issue is in the device or the cartridge, not the sample.
Document the control result in the same run sheet – a single column for “QC pass/fail” makes it easy to spot trends over weeks.
When to think bigger
If you consistently need to process more than 200 samples a week, it might be time to evaluate a higher‑capacity shear that uses a plate‑based format. Those units cost more upfront, but the per‑sample cost drops dramatically because you eliminate the cartridge change step entirely.
Until then, the combination of multi‑slot cartridges, a simple pipetting workflow, and a solid run‑sheet keeps your affordable benchtop DNA shearing device humming along without breaking the bank.
Bottom line: scaling up is less about buying a bigger machine and more about streamlining every little step – from how you load the cartridges to how you log the runs. With a bit of planning, you can keep the fragment sizes tight, the budget happy, and the bench moving at the pace your projects demand.
Conclusion
We've walked through everything you need to get the most out of an affordable benchtop DNA shearing device, from picking the right speed to keeping a tidy log.
So, what’s the next step? Grab that device, set up a quick control run, and write down the rpm, time, and observed fragment size. Those few minutes of documentation will save you hours later when you troubleshoot or hand the protocol to a new student.
If you’re in an academic lab, a teaching classroom, or a CRO, the same simple workflow scales – just add a multi‑slot cartridge or a shared spreadsheet and you’ll stay consistent across dozens of samples.
In our experience, labs that treat the run sheet like a lab‑notebook habit see tighter fragment distributions and lower consumable waste. It’s a tiny habit that pays off big time.
Remember, the goal isn’t to chase the flashiest gadget; it’s to have a reliable, repeatable process that fits your budget. An affordable benchtop DNA shearing device gives you that sweet spot of precision without draining your grant.
Ready to make the move? Check the catalog on Shop Genomics, pick a model that matches your volume needs, and start logging those runs today. Your future experiments will thank you.
FAQ
What is an affordable benchtop DNA shearing device and why does it matter?
It’s a compact instrument that uses adjustable rpm and a timer to fragment DNA into a size range you choose. Because it sits on a regular lab bench and costs a fraction of high‑throughput systems, labs with tight budgets—like teaching classrooms or CROs—can still get reproducible fragment sizes without draining their grant.
How do I choose the right speed and time settings for my sample?
Start with the manufacturer’s recommended rpm for the target fragment size, then run a quick test and look at the gel. If the band is a bit too large, bump the rpm by 100‑200 or add 5‑10 seconds. If it’s too short, dial the speed down or shave a few seconds off. Keep a one‑page log of rpm, seconds, volume and the observed band so you can spot trends.
Can I use the same device for both research and teaching labs?
Absolutely. The same adjustable‑speed motor works for a 30 µL student demo and a 150 µL research prep. Just swap the disposable cartridge to match the volume range. In our experience, labs that keep a single run‑sheet for all users avoid mix‑ups and save consumables, whether you’re training undergraduates or processing client samples.
What maintenance steps keep the device reliable?
Wipe the loading slot with 70 % ethanol every day, run a control DNA fragment once a week and check the rpm on the display. Every month give the motor a quick visual inspection for dust and replace any worn cartridges. A tiny habit like labeling each cartridge slot with the set rpm prevents wobble‑related fragment drift.
How do I troubleshoot a fuzzy gel after a shear run?
A fuzzy smear usually means the speed or time was off, or the cartridge wasn’t seated properly. First, reseat the cartridge and run a dry spin to listen for smooth rotation. If the noise is gone, try lowering the rpm by 100 or cutting the run time by 5 seconds. Document each tweak; after a few cycles you’ll see a pattern and get a tight band.
Is it worth buying a multi‑slot cartridge for higher throughput?
Yes, especially if you’re processing dozens of samples a week. A three‑slot cartridge lets you load three tubes back‑to‑back, cutting loading time by a third. Just make sure each slot is labeled with its specific rpm and time so anyone on the bench can follow the protocol without a 30‑minute tutorial.
Where can I find a reliable, budget‑friendly model?
Shop Genomics lists several options that balance price, speed range (2 800–4 000 rpm) and built‑in timers. Their catalog highlights models with interchangeable cartridges and clear digital displays, which are handy for both academic cores and biotech startups. Look for a device that offers 5‑second timer resolution and a warranty that covers at least two years of regular use.


