
Ever stared at a blank gel and thought, “Did I just waste hours of my lab time?” I’ve been there, watching the membrane dry and wondering if the whole western blot will ever show that sweet, crisp band.
Running a western blot can feel like solving a puzzle where each piece—sample prep, gel electrophoresis, transfer, antibody incubation—has to click perfectly. The good news? You don’t need a PhD in magic, just a clear plan and a few trusted tricks.
In our experience at Shop Genomics, the most common hiccup isn’t the chemistry; it’s the little details that slip through the cracks. Maybe the transfer buffer was a shade too old, or the membrane wasn’t fully wetted before blocking. Those tiny oversights are why a blot looks like a ghost town instead of a bustling city of proteins.
So, what should you keep in mind before you even load your first sample? First, double‑check your protein concentration—nothing ruins a blot like over‑loading or under‑loading. Second, pre‑warm your transfer apparatus; a cold transfer is a silent killer of signal. Third, treat your antibodies like delicate friends: keep them on ice, avoid repeated freeze‑thaw cycles, and always use fresh blocking solution.
Does this sound familiar? Maybe you’ve spent a morning tweaking the voltage only to see smeared bands the next day. It’s frustrating, but it’s also an opportunity to fine‑tune your workflow.
Imagine you’re in a busy academic core facility, juggling dozens of samples from a time‑sensitive grant. A reliable western blot protocol means you can deliver results on schedule, keep your collaborators happy, and move your project forward without endless reruns.
Stick with us, and you’ll learn how to run a western blot that consistently delivers clear, reproducible bands—no guesswork, just solid science. Let’s dive in and turn those blurry ghosts into sharp, confident signals.
TL;DR
If you’ve ever stared at a blank membrane and wondered why your bands look like ghosts, this guide shows how to run a western blot step‑by‑step, from prep to clear signals.
Follow our tips, avoid common pitfalls, and get reliable results that keep your projects moving forward without endless reruns.
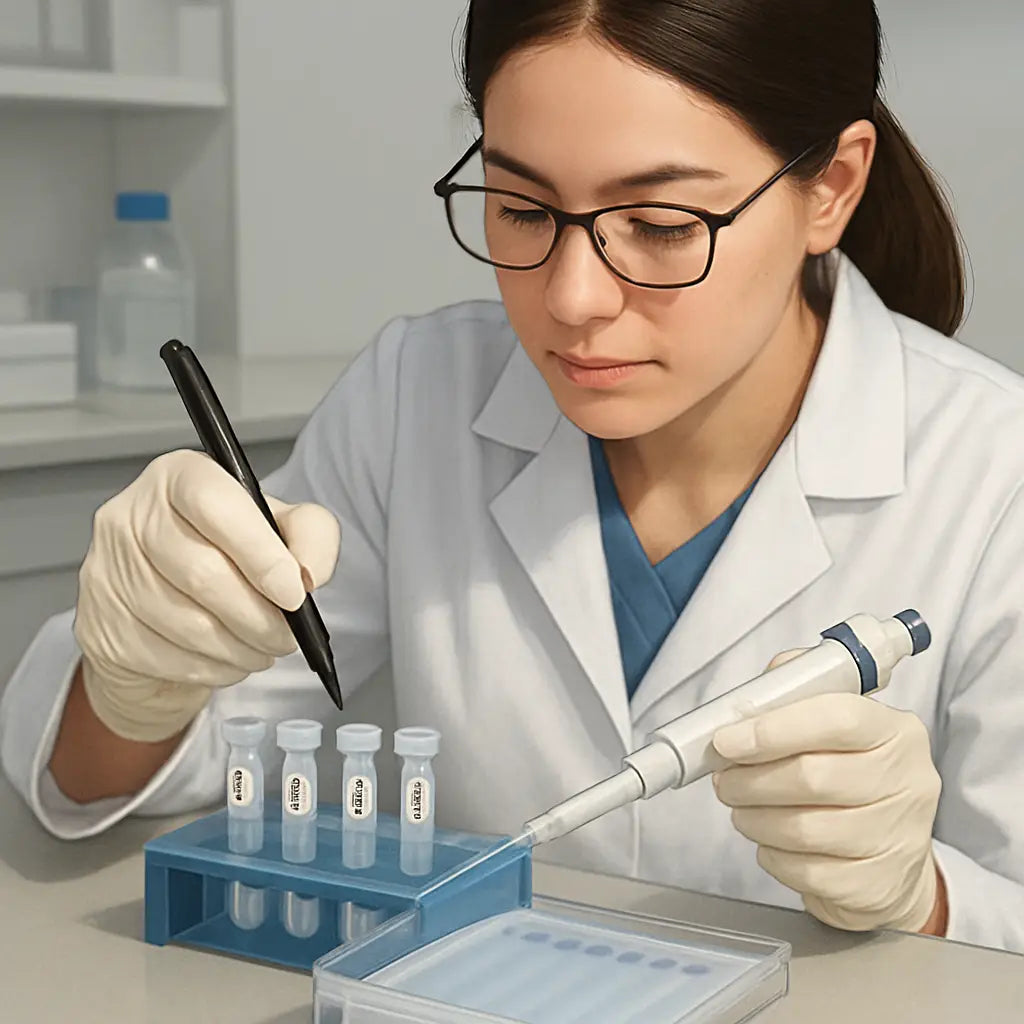
Step 1: Sample Preparation
Before you even think about loading your gel, you need a clean, well‑quantified protein soup. That moment when you stare at the spectrophotometer and wonder if the concentration is right – I’ve been there. The key is to keep things simple: measure, dilute, and keep everything on ice.
First, grab a fresh aliquot of your lysate and spin it down at 12,000 g for 10 minutes. The pellet is your junk; the supernatant holds the proteins you actually care about. If you’re working in a core facility, you might have a high‑throughput centrifuge from Shop Genomics that can handle dozens of samples at once – it saves time and reduces variability.
Next, use a reliable protein assay – Bradford or BCA works fine – but make sure you’re using a fresh standard curve. A common pitfall is re‑using the same curve for weeks; the numbers drift and you end up loading too much or too little. Once you have the concentration, calculate the volume needed to load, say, 20 µg per lane.
Here’s a quick tip: always add a small amount of sample buffer (Laemmli) and boil for 5 minutes. The heat denatures proteins and the SDS gives them a uniform negative charge. If you’re worried about over‑heating, a gentle 95 °C water bath works just as well as a fancy block.
Now, think about labeling. Mis‑labelled gels are a nightmare – you’ll waste a whole blot trying to figure out which lane is which. That’s why a quick trip to custom label printing services can make life easier. Print durable, waterproof stickers for each sample tube and for the gel wells; it’s a small step that prevents big headaches later.
While you’re preparing, plan your incubation timeline. Western blots can stretch over several hours, especially if you’re using a primary antibody that needs overnight binding. A well‑structured schedule keeps the bench clear and the technician happy. The technician‑scheduling guide offers a simple template you can adapt for your lab’s shift patterns.
Once your samples are ready, load them into the gel. Make sure the pipette tip is clean – a little tip‑touch can introduce bubbles that ruin lane integrity. If you need a refresher on pipetting technique, check out our micropipette guide. It’s a short read and saves you from those pesky air pockets.
After loading, let the gel sit for a minute so the wells fill evenly, then start the electrophoresis. Remember, the sample prep stage sets the tone for the whole blot – if you nail this, the downstream steps flow much smoother.
And if anything goes sideways, don’t panic. Our western blot troubleshooting guide walks you through the most common hiccups, from faint bands to unexpected smears.
Below is a short video that walks through the whole sample prep workflow, from lysate to loading the gel. It’s a great visual supplement to the steps above.
Take a moment to watch, then pause and compare it to your own bench setup. You’ll notice tiny differences – like how we tip the tube just enough to avoid bubbles – that make a big impact.
Finally, double‑check everything before you move on: concentration, volume, labeling, and timing. A quick checklist at the end of this step can save you from re‑running the whole blot later. You’ve got the basics down; now you’re ready for gel electrophoresis.
Step 2: Gel Casting and Electrophoresis
Alright, you’ve just checked your test lane and everything looks sharp. Now it’s time to turn that promise into a solid gel that will actually separate your proteins. The magic starts with the right gel composition, then the careful pour, and finally the run that pulls those bands into place.
Pick the right acrylamide concentration
If you’re chasing a 25‑kDa protein, a 12 % gel will give you crisp resolution; hunting a 150‑kDa giant? Drop down to 7.5 % or even a gradient. The rule of thumb is: the smaller the protein, the higher the % acrylamide, because the pores get tighter. For a quick reference, check this guide on choosing gel concentration.
Set up your casting station
First, clean the glass plates with distilled water, then a splash of 90‑100 % ethanol, and finish with a quick wipe of acetone. It sounds overkill, but any residue will cause bubbles that ruin the whole run.
Next, assemble the casting stand. Make sure the spacers are the right thickness for the gel height you want (usually 1 mm for a standard mini‑gel). Pour a thin layer of water‑saturated butanol on top of the resolving gel once it’s in the plate; this keeps the surface flat while polymerization happens.
Mix and pour the resolving gel
Grab your pre‑weighed acrylamide/bis solution, 1× Tris‑HCl pH 8.8, SDS, and deionized water. Add them in the order listed in most recipes, and save the ammonium persulfate (APS) and TEMED for last – they’re the spark that starts polymerization.
- Combine water, buffer, and 30 % acrylamide/bis.
- Add 10 % SDS, give it a gentle swirl.
- Finally, add 10 % APS (about 50 µL per 10 mL gel) and 5 µL TEMED.
Mix gently, avoiding bubbles. Pour the solution into the plate, leaving about 0.5 cm from the top. Let it sit for 15–30 minutes until it’s solid enough to handle. If it’s still liquid after 45 minutes, your APS may be old – fresh reagents make all the difference.
Stacking gel and comb insertion
While the resolving gel sets, prepare the stacking gel (usually 5 % acrylamide). It’s the thin layer that lines up all your samples so they enter the resolving gel together. Follow the same order of addition, but hold off on APS and TEMED until just before you pour.
When the resolving gel is firm, remove the butanol overlay, rinse the surface quickly with water, and pour the stacking gel on top. Immediately insert the comb, tapping it gently to pop any trapped air bubbles. Let the whole thing polymerize for another 30 minutes.
Load and run the gel
Now the moment of truth: loading your samples. Fill the wells with 1× running buffer, then carefully load each 10‑µL aliquot. Remember to add a molecular‑weight ladder in the first lane – it’s your map for interpreting band sizes later.
Connect the gel apparatus to power. A common setting is 80 V for the stacking phase (until the dye front reaches the resolving gel), then increase to 120–150 V for the separating phase. Keep an eye on the temperature; if the buffer starts to boil, lower the voltage or add a cooling jacket.
Typical run time for a 12 % gel is 45–60 minutes. When the dye front reaches the bottom of the gel, turn off the power and unplug. Immediately place the gel into a staining tray or proceed to transfer.
So, what should you do if you see uneven bands? First, check that the gel polymerized evenly – a wavy surface often means bubbles or a tilted plate. Second, verify that the running buffer is fresh and at the correct ionic strength. Finally, double‑check your voltage ramp; too high a voltage can cause “smiling” bands.
And that’s it – you’ve cast a clean gel, loaded your samples, and run the electrophoresis step. The next part will take those separated proteins onto a membrane, but for now you can feel confident that the foundation is solid.
Step 3: Transfer Proteins to Membrane
Now that the gel is clean and the bands are lined up, it’s time to pull those proteins out of the polyacrylamide and stick them onto a membrane where antibodies can actually see them. It feels a bit like moving furniture – you need the right tools, a solid plan, and a little patience.
Ever wondered why some blots look like faint ghost lines while others pop like fireworks? Most of that mystery lives in the transfer step.
Pick a membrane that fits your protein
Nitrocellulose, PVDF, or nylon each have their own personality. Nitrocellulose is great for most mid‑size proteins because it binds quickly and is easy to handle. PVDF loves hydrophobic or membrane proteins – its high binding capacity keeps those tricky targets from slipping through. Nylon is ultra‑durable, perfect if you plan to strip and reprobe several times.
If you’re working on a 20 kDa peptide, go for a 0.1 µm nitrocellulose; for a 150 kDa enzyme, a 0.45 µm PVDF will give you better recovery. It’s a small decision that can save you a day of troubleshooting.
Wet the membrane and equilibrate the gel
PVDF must be pre‑wetted with methanol for a few seconds, then immediately soaked in transfer buffer – otherwise it stays stiff and you’ll lose proteins. Nitrocellulose just needs a quick rinse in buffer; no methanol required.
Give your gel a 10‑minute soak in the same transfer buffer you’ll use for the sandwich. This step evens out the ionic strength and prevents the gel from shrinking or swelling once the electric field is applied.
Assemble the transfer “sandwich”
Think of the sandwich as a layered cake: filter paper, membrane, gel, another filter paper, then more filter paper on top. The filter papers act like cushions, keeping everything flat and letting the current flow evenly.
- Lay a soaked filter paper on the tank base (anode side).
- Place the membrane (protein‑side facing the gel) on top.
- Gently lay the equilibrated gel on the membrane, making sure no air bubbles are trapped.
- Cover with another soaked filter paper, then a second one on the opposite side (cathode side).
Press the whole stack with the transfer clamps – you want firm contact but not so tight that you crush the gel.
Set the transfer conditions
Most labs start with a wet tank transfer at 100 V for 60–90 minutes, or a semi‑dry transfer at 15 V for 30 minutes. The exact voltage and time depend on protein size: lower‑molecular‑weight proteins often need shorter runs, while >100 kDa targets benefit from a longer, lower‑current soak.
Keep an eye on the buffer temperature; if it starts to get warm, swap in a cooling plate or lower the voltage. Overheating can cause “blow‑through” where tiny proteins zip right through the membrane.
Thermo Fisher’s detailed guide on western blot transfer methods walks through the exact recipes for wet, semi‑dry, and dry buffers, so you can fine‑tune the conditions for any protein.
So, how do you know you’ve chosen the right combo? A quick test is to run a molecular‑weight marker on a duplicate gel and stain it after transfer – you’ll see whether the bands have moved cleanly onto the membrane.
Check transfer efficiency
After the transfer, briefly stain the membrane with Ponceau S. The red stain lets you see every band without destroying the membrane, so you can decide whether to proceed or repeat the transfer.
If you notice faint low‑molecular‑weight bands, try increasing the methanol concentration in the buffer or extending the transfer time by 10–15 minutes. For stubborn high‑weight proteins, add a little SDS (<0.01 %) to the buffer to keep them from sticking to the gel.
Remember, a good transfer is the bridge between a clean gel and a clear blot. Once you’ve confirmed the proteins are where they should be, you can move on to blocking and antibody probing with confidence.
Actionable tip: write down the exact voltage, time, and buffer composition for each protein class you work with. Over time you’ll build a personal “transfer cheat sheet” that cuts down on trial‑and‑error and keeps your blots consistent across projects.
Step 4: Blocking and Antibody Incubation
You’ve just transferred your proteins, and now the membrane is ready for the real storytelling part—blocking and antibody probing.
If you skip blocking, everything from the membrane to your detection system will light up like a Christmas tree, and you’ll never know which band is real.
So let’s walk through the blocking cocktail, primary antibody soak, washes, and secondary antibody step—each one a tiny safeguard that keeps your blot clean.
Pick a blocking buffer that fits your experiment
The classic choice is 5 % non‑fat dry milk in TBST; it’s cheap, works for most rabbit or mouse antibodies, and gives a low background.
But if you’re probing phospho‑proteins, milk’s casein can hide the signal—switch to 3 % BSA in TBST and you’ll see the phospho‑band shine.
For especially sticky membranes (PVDF) or when you suspect cross‑reactivity, 0.1 % gelatin or a commercial blocking agent can be a lifesaver.
Tip: always make a fresh blocking solution on the day of the blot; old milk develops microbes that raise background dramatically.
Primary antibody incubation: timing and temperature matters
Most labs dilute the primary antibody in the same blocking buffer you just used and let it sit for 1 hour at room temperature.
If you’re working with a low‑abundance target, overnight incubation at 4 °C often pulls out a detectable signal without adding more antibody.
Remember to gently rock the plate or shaker—just enough to keep the solution moving but not so vigorous that you create bubbles that dry out the membrane.
In our experience with academic labs, a 30‑minute pre‑warm of the antibody solution to room temperature reduces the chance of precipitation inside the tube.
Washing: the unsung hero
After the primary soak, give the membrane three washes of TBST, 5 minutes each, on a low‑speed orbital shaker.
If you notice a faint gray haze after the first round, add a fourth wash or increase the Tween‑20 concentration to 0.2 %.
For phospho‑blots, a quick 10‑minute rinse in a low‑salt buffer can help remove excess milk proteins that otherwise mask the signal.
Secondary antibody incubation
Choose an HRP‑conjugated secondary that matches the host species of your primary (e.g., anti‑rabbit‑HRP for a rabbit primary).
Dilute the secondary 1:5 000 to 1:10 000 in blocking buffer and incubate for 30‑45 minutes at room temperature—no need for overnight.
Protect the membrane from light if you’re using a fluorophore‑conjugated secondary; even brief exposure can bleach the signal.
Final washes and ready for detection
Give the blot three to five TBST washes, 5 minutes each, to strip away unbound secondary; the last wash should be in plain TBS if you plan to use chemiluminescence.
A quick poke with a paper towel to remove excess liquid helps prevent pooling when you add the substrate.
Now you’re set to add ECL, image the membrane, and finally see those crisp bands you’ve been waiting for.
Here’s a quick reference you can paste into your lab notebook:
| Blocking agent | Typical concentration | Incubation (time / temp) |
|---|---|---|
| Non‑fat dry milk | 5 % (w/v) in TBST | 1 h RT or 30 min RT |
| BSA | 3 % (w/v) in TBST | 1 h RT or overnight 4 °C for phospho‑targets |
| Gelatin or commercial blocker | 0.1 %–0.5 % (w/v) | 30 min RT |
Actionable tip: write down the exact blocker, antibody dilution, and wash times in a small blot log; after a few runs you’ll spot patterns that shave hours off troubleshooting.
Step 5: Detection and Imaging
Alright, you’ve washed away the excess secondary and the membrane is dry – now it’s time for the moment of truth: turning those invisible proteins into a picture you can actually see.
First thing’s first: choose the right detection chemistry. Most labs stick with horseradish peroxidase (HRP) because it’s small, stable, and you can pack a lot of enzyme onto each antibody. If you’re hunting a low‑abundance target, go for a high‑sensitivity HRP substrate; if you need a longer‑lasting signal for multiple exposures, an alkaline phosphatase (AP) option like CDP‑Star works well. Thermo Fisher’s chemiluminescent substrate guide breaks down exactly which reagent fits which situation Thermo Fisher explains how to pick a substrate.
Preparing the membrane for the reaction
Give the membrane a quick rinse with TBS to remove any residual Tween‑20 – you don’t want detergent quenching the light. Then, if you’re using nitrocellulose, add a few drops of Nitro‑Block‑II enhancer; it creates a hydrophobic surface that makes the chemiluminescent flash brighter and cuts exposure time dramatically. PVDF usually doesn’t need the enhancer, but a brief dip in the same buffer won’t hurt.
Tip: use a clean, low‑binding tray and lay the membrane flat. Any folds become shadows in the final image.
Adding the substrate
When you’re ready, pour enough substrate to cover the entire membrane – usually 0.5–1 mL for a mini‑gel blot. You’ll see a faint glow within seconds; that’s the reaction kicking off. If the signal looks weak, stop the exposure, add a fresh batch of substrate, and let it sit a few seconds longer. Remember, chemiluminescence is a one‑time burst: once the enzyme‑substrate pair is exhausted, the light fades.
For AP‑based substrates, the glow can linger for hours, which is handy if you need to re‑expose the same blot. HRP substrates tend to peak quickly and die down, so capture your image as soon as the bands appear.
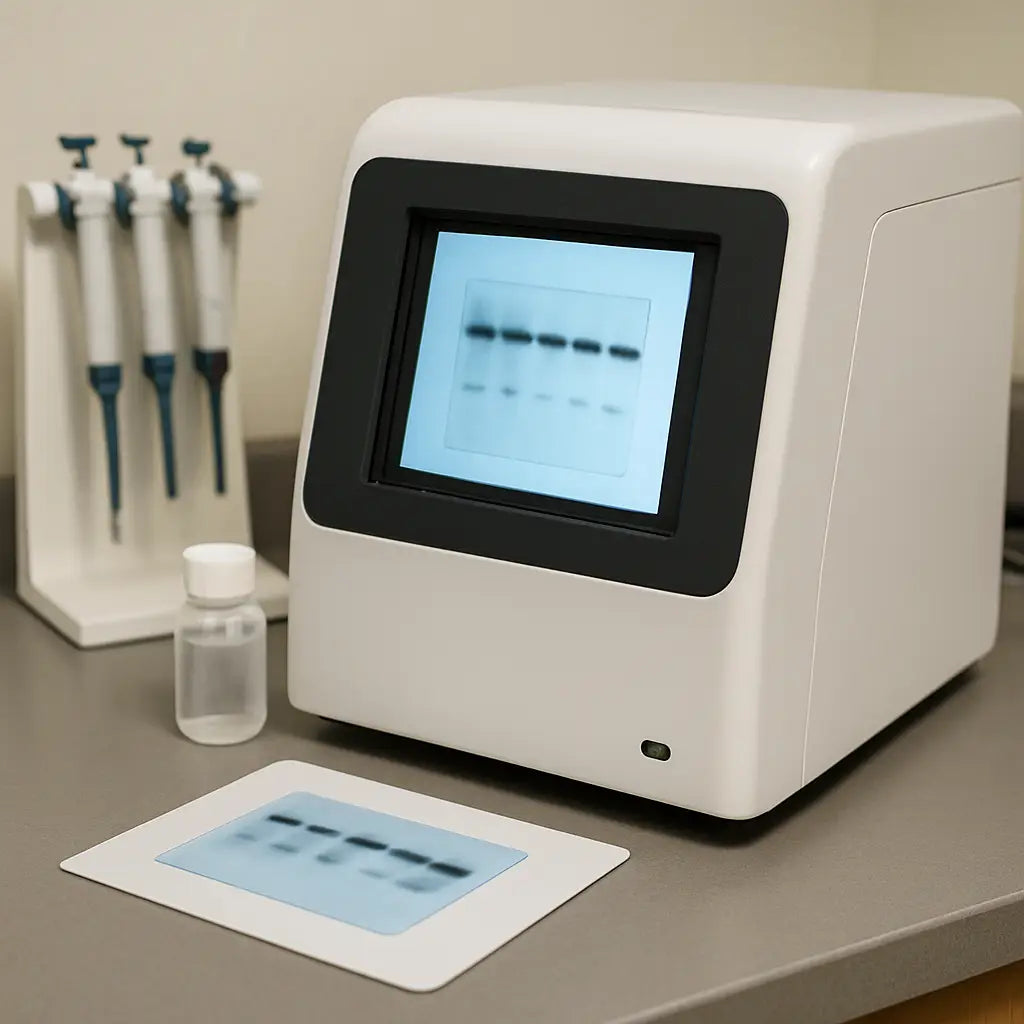
Imaging the blot
There are three main ways to capture the light: traditional X‑ray film, a CCD‑camera based imager, or a phosphorimager. Film is cheap but gives you only a single snapshot and requires a darkroom. CCD cameras, like the iBright series, let you see the image instantly on a screen, adjust exposure on the fly, and save a digital file for downstream quantification. If you have access to a phosphorimager, you’ll get the widest dynamic range – perfect for comparing a strong housekeeping band against a faint target.
Set the instrument to “chemiluminescence” mode, place the membrane on the imaging platform (membrane side up), and start with a short exposure – 10–15 seconds for HRP on PVDF, up to 45 seconds for nitrocellulose with the enhancer. If the bands look too light, increase the exposure in 5‑second increments. Over‑exposing washes out the nuance between strong and weak signals, making quantification a headache.
Pro tip: capture at least two images, one short and one longer. The short exposure preserves the intensity of the bright bands, while the longer one pulls out the faint ones. Most analysis software can merge them into a high‑dynamic‑range composite.
Saving and documenting
Once you’ve got a clean image, export it as a lossless TIFF for any publication work, and also save a compressed PNG for quick lab notes. Write down the substrate lot number, exposure time, and any enhancer you used – this tiny record will save you hours the next time you run the same target.
And don’t forget to clean the imaging chamber after use; residual substrate can stick to the glass and create background for the next blot.
Conclusion
We've walked through every step of how to run a western blot, from fresh sample prep to the final image that tells your story.
If you’ve ever stared at a faint band and felt the frustration, remember that a few small habits—like labeling aliquots, recording exposure times, and checking transfer efficiency with Ponceau—can turn that guesswork into reproducibility.
For academic labs or CROs juggling dozens of projects, a quick notebook cheat sheet saves hours, and for biotech startups the right membrane choice can be the difference between a publishable figure and a rerun.
So, what’s the next move? Grab your gel‑casting kit, set up the transfer sandwich, and give those proteins the stage they deserve—because the data you generate today fuels the discoveries of tomorrow.
When you’re ready to share the results, remember a lossless TIFF keeps the image pristine, and a brief note on substrate lot and exposure will save the next person on the bench from starting over.
If any step still feels fuzzy, our blog library is full of deeper dives—just search for the topic that’s tripping you up. Happy blotting!
And when you need reliable equipment, Shop Genomics offers everything from microcentrifuges to imaging systems, so you can focus on science, not on hunting parts.
FAQ
What’s the best way to choose a membrane for my western blot?
Pick the membrane that matches your protein’s size and chemistry. Nitrocellulose is cheap and works great for most mid‑range proteins, but it can’t handle very hydrophobic targets. PVDF, on the other hand, is perfect for membrane proteins or high‑molecular‑weight bands because its higher binding capacity keeps them from slipping through. Before you cut, think about the downstream steps – if you’ll strip and reprobe, nylon might save you a few cycles.
How can I tell if my transfer was efficient before I block?
Give the membrane a quick Ponceau S stain right after the transfer. The red dye will reveal every band, even the faint ones, without destroying the blot. If you see missing low‑weight bands, consider extending the transfer time or adding a touch of SDS to the buffer. A good visual check now saves you hours of re‑running later.
Why do I keep getting background noise after antibody incubation?
Background usually stems from either the blocking buffer or the wash steps. Milk works for most antibodies, but its casein can mask phospho‑signals – swap to 3% BSA if you’re chasing a phosphorylated target. Also, make sure you’re washing at least three times, five minutes each, with enough Tween‑20 (0.1%). Skipping a wash or using too little buffer lets unbound antibodies glow like a Christmas tree.
My bands look smeared – what’s causing that?
Smeared bands are often a voltage issue or a gel‑polymerization problem. Start the run at a low voltage (around 80 V) until the dye front clears the stacking gel, then ramp up to 120‑150 V. If the gel was under‑polymerized, bubbles or uneven pores can stretch the proteins. Double‑check that your APS and TEMED are fresh, and always degas the gel solution before pouring.
Can I reuse the same primary antibody for multiple blots?
Yes, but only if you store it properly. Aliquot the antibody into small tubes, keep them on ice during use, and snap‑freeze the leftovers at –20 °C. Avoid repeated freeze‑thaw cycles; they can denature the antibody and raise background. A quick visual check of the aliquot for precipitates before each use can catch problems before they ruin a blot.
What’s the optimal way to document my blotting conditions?
Treat your blot like a mini‑experiment notebook entry. Record the membrane type, voltage, time, buffer composition, and any additives (like methanol percentage). Jot down the substrate lot number and exposure settings right after imaging. A simple spreadsheet template makes it easy to spot patterns – you’ll notice, for example, that a 5‑minute longer transfer consistently sharpens low‑weight bands.
How do I choose the right detection substrate for low‑abundance proteins?
If your target is scarce, go for a high‑sensitivity HRP substrate that promises femtogram detection. These substrates emit a brighter flash, so you can capture the signal with a short exposure and still see the faint bands. For experiments that need multiple exposures, an alkaline phosphatase substrate like CDP‑Star gives a longer‑lasting glow, letting you re‑image without losing signal.


