
Ever stood in front of a bench‑top centrifuge and wondered if that compact box on the counter could really replace the bigger tower you see in the core facility? You're not alone – many lab members feel that tug‑of‑war between space, budget, and performance.
Microcentrifuges are the little workhorses that spin tiny tubes—think 0.5 ml to 2 ml—at speeds that are more than enough for DNA prep, protein pelleting, or quick spin‑downs of PCR products. Their footprint fits snugly into a shared bench, and they usually come with simple controls, so even a new grad can get them up and running without a manual the size of a novella.
Full‑size centrifuges, on the other hand, handle larger volumes, heavier rotors, and higher g‑forces. If you're processing 50 ml conical tubes, ultracentrifugation for virus purification, or need programmable temperature control for delicate samples, a benchtop or floor‑standing centrifuge is the go‑to.
So, how do you decide which one to pull out of the drawer? First, ask yourself what your typical workflow looks like. Are you regularly dealing with micro‑scale extractions for qPCR, or are you routinely preparing bulk cell lysates for downstream assays? The answer often points you toward the right size.
In our experience at Shop Genomics, we’ve seen academic labs keep a microcentrifuge on every bench for quick spins, while their core facilities house the heavy‑duty centrifuges for high‑throughput projects. That way, nobody has to wait for a machine that’s too big for the job, and the lab’s overall efficiency jumps.
Another practical tip: consider the accessory ecosystem. Microcentrifuges often use universal adapters that fit a range of tube types, whereas larger centrifuges may need specific rotors and balance kits. Making sure you have the right accessories on hand saves time and avoids costly downtime.
Bottom line? Microcentrifuge vs centrifuge isn’t a battle of better or worse; it’s about matching the tool to the task, space, and budget constraints you face. By aligning your choice with the actual sample volumes and throughput you need, you’ll keep experiments moving smoothly and avoid the frustration of a mismatched machine.
TL;DR
Choosing between a microcentrifuge and a full‑size centrifuge boils down to sample volume, speed needs, and lab space, so you can keep experiments moving without costly downtime.
Match the tool to your workflow, budget, and accessory ecosystem, and you’ll avoid the frustration of a mismatched machine while getting reliable results every time.
What Is a Microcentrifuge?
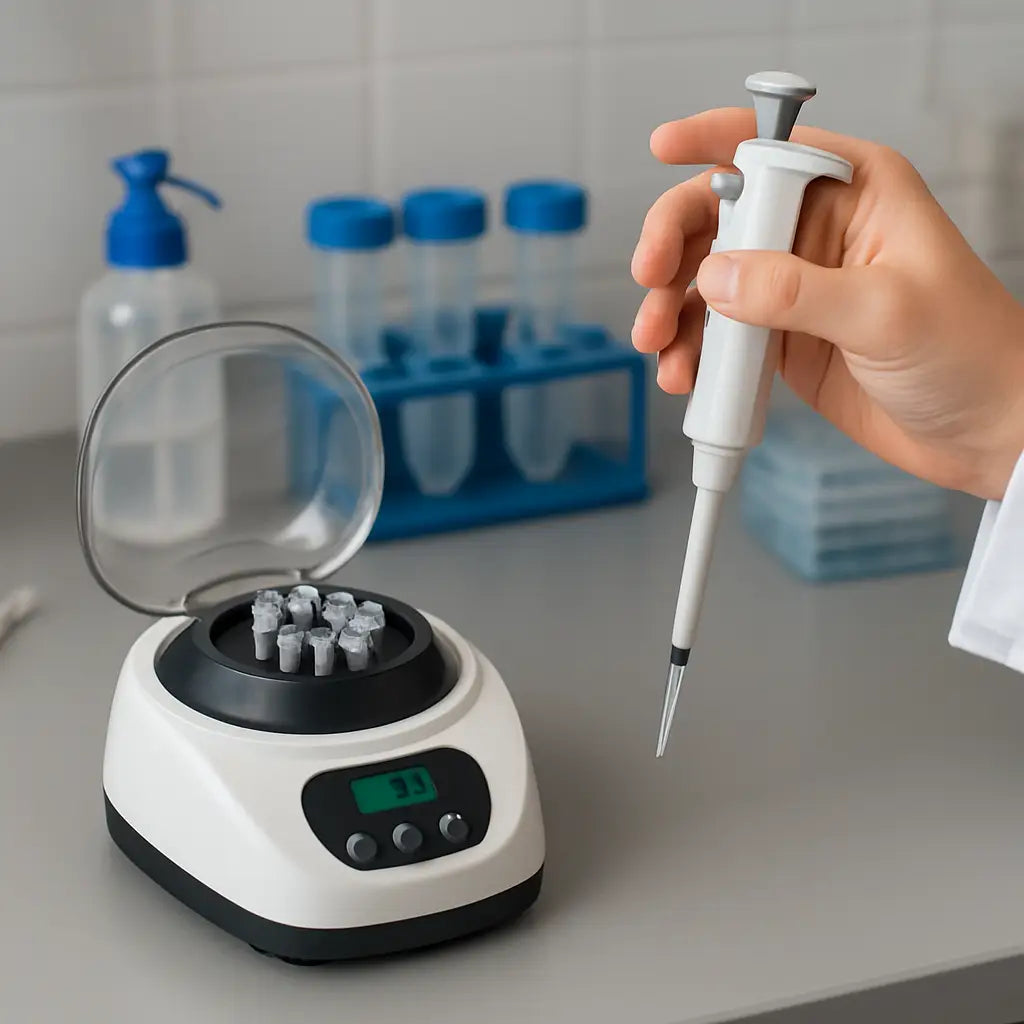
Picture this: you’re in the middle of a PCR prep, the clock’s ticking, and you need to spin down a handful of 1.5 ml tubes in a flash. That’s the moment a microcentrifuge steps in, humming quietly on the bench while you watch the tiny rotor spin at dizzying speeds.
At its core, a microcentrifuge is a compact, high‑speed device designed to spin micro‑volume tubes—usually ranging from 0.1 ml up to 2 ml. It generates centrifugal forces (g‑forces) typically between 5,000 and 30,000 × g, which is more than enough to pellet DNA, proteins, or cellular debris for most molecular biology workflows.
Why the Size Matters
The small footprint is a game‑changer for labs cramped on bench space. Instead of a bulky tower that hogs a whole corner, a microcentrifuge fits neatly beside a pipette rack. That means you can keep one on every bench in an academic lab, a CRO, or a clinical diagnostics suite without sacrificing valuable real‑estate.
And because the rotor is built for tiny tubes, you get faster spin‑down times—often under a minute for a standard 1 minute program. Faster cycles translate to less idle time, which is exactly what busy researchers crave.
Key Features to Look For
When you’re scouting for a microcentrifuge, a few specs pop up again and again. First, the maximum RPM (revolutions per minute) tells you the top speed; higher RPM usually means higher g‑force, but you also need to match that to the tube type you’re using.
Second, the control interface—some models have a simple dial, while others offer digital touchscreens with programmable protocols. For a teaching lab, a simple dial can be less intimidating, whereas a biotech startup might appreciate the flexibility of saved methods.
Third, safety features like automatic lid lock and imbalance detection are a must. Nobody wants a wobbling rotor mid‑run, especially when you’re juggling multiple samples.
Common Use Cases
In our experience, microcentrifuges shine in routine DNA extractions, RNA clean‑ups, and quick pelleting of bacterial cells before downstream plating. A typical workflow in a plant genetics lab might look like this: grind leaf tissue, add extraction buffer, then spin the lysate in a microcentrifuge to separate debris—done in under two minutes.
Clinical labs also rely on them for serum or plasma separation before ELISA assays. The low sample volume requirement means you can conserve precious patient material while still getting reliable results.
Even educational institutions love them for hands‑on teaching. Students can see the clear tube spin, stop, and immediately observe the pellet forming at the bottom—instant feedback that reinforces learning.
Maintenance and Longevity
Because they’re built for high‑frequency use, regular cleaning of the rotor and checking the balance are key. A quick visual inspection after each batch of runs helps catch wear early. Most manufacturers recommend a service check every 12–18 months, which is a small price to pay for years of reliable operation.
And don’t forget the accessories: adapters for PCR strips, 0.5 ml micro‑tubes, or even specialized rotor inserts for magnetic beads. Having a well‑stocked accessory kit means you won’t waste time hunting for the right piece when the experiment calls for it.
So, what’s the bottom line? A microcentrifuge is the go‑to workhorse for anyone who regularly handles tiny volumes and needs fast, repeatable spin‑downs. It bridges the gap between the convenience of a benchtop tool and the performance required for modern molecular workflows.
When you’re deciding whether to add a microcentrifuge to your lab, think about the volume of samples you process daily, the space you have, and the speed you need. If you’re often juggling dozens of 1.5 ml tubes, a microcentrifuge will save you both time and bench real‑estate.
Remember, the right tool makes the experiment smoother, not harder.
What Is a Centrifuge?
Ever wonder what actually makes that humming box on the bench turn a liquid into a pellet? At its core, a centrifuge is just a motor‑driven rotor that spins samples fast enough to push heavier particles outward, leaving lighter stuff in the super‑natant.
Think of it like a playground merry‑go‑round, but instead of kids you’ve got tubes, and instead of fun you’ve got g‑forces that can reach tens of thousands of times Earth’s gravity. That difference between “spinning a tube” and “spinning a tube fast enough” is what separates a microcentrifuge from a full‑size centrifuge.
Basic principle
The physics is simple: centrifugal force (F) equals mass (m) times the square of angular velocity (ω) times radius (r). In plain English, the faster you spin and the farther the tube is from the center, the harder particles get pushed to the bottom.
That’s why you’ll see a range of speeds on the control panel – from a gentle 300 rpm for delicate blood separations to a roaring 20,000 rpm for pelleting plasmid DNA in a microcentrifuge.
Key components you’ll actually touch
First, the motor. Modern units use brushless DC motors that stay quiet enough to work in a shared lab space without turning heads.
Next, the rotor. It’s the part that holds the tube adapters. Some rotors are fixed‑angle, meaning tubes sit at a tilt; others are swing‑out, so tubes become horizontal at speed, which is ideal for density‑gradient separations.
Then the lid and safety interlock – a simple but lifesaver feature that won’t let the lid open while the rotor is turning. You’ll also find a digital display that shows rpm, g‑force, and elapsed time, so you can standardise protocols across benches.
Types of centrifuges you’ll encounter
Microcentrifuges are the little workhorses we’ve already talked about – they handle 0.5 ml to 2 ml tubes, spin up to ~30,000 g, and fit on a single bench. They’re perfect for quick DNA prep, protein pelleting, or PCR clean‑ups.
Benchtop or floor‑standing centrifuges, on the other hand, take larger rotors that can accommodate 15 ml, 50 ml, or even 500 ml tubes. They often offer temperature control, programmable protocols, and higher max speeds for applications like virus purification or cell culture harvests.
For a concrete example, the Eppendorf multipurpose centrifuge specifications show a max capacity that can hold multiple 15 ml conical tubes while delivering up to 15,000 rpm. That’s the kind of flexibility a core facility might need for a range of assays.
If you’re looking for something more modest, the SCILOGEX low‑speed centrifuge details highlight a fixed‑angle rotor that fits up to six 15 ml tubes – a common choice for blood or urine separations in clinical labs.
So, when you ask yourself “Do I need a microcentrifuge or a full‑size unit?” picture your typical tube volume, the speed you really need, and the space you have on the bench. If most of your work lives in 1‑2 ml tubes and you value quick turn‑around, the microcentrifuge wins. If you regularly spin large culture volumes or need gradient separations, a larger centrifuge becomes essential.
One practical tip we’ve picked up at Shop Genomics: keep a small balance kit and the correct rotor adapters right next to your centrifuge. It saves a minute or two each time you load a new batch – and those minutes add up over a busy day.
Bottom line? A centrifuge is just a tool that turns rotational energy into a clean separation. Understanding the motor, rotor, and speed range helps you match the right size to the right job, and avoids the frustration of over‑ or under‑spinning your precious samples.
Key Differences Between Microcentrifuge and Centrifuge
When you stare at the bench and wonder why two seemingly similar machines feel so different, the answer lies in the details that matter to your workflow.
First, think about the sample volume you spin on a daily basis. A microcentrifuge is built for 0.2 ml‑2 ml tubes – the kind you see in PCR strips, DNA prep kits, or tiny enzyme reactions. A full‑size centrifuge, on the other hand, welcomes 5 ml, 15 ml, even 50 ml conical tubes and swing‑out rotors for gradient separations.
So, does a bigger rotor automatically mean better performance? Not really. What really counts is the relative centrifugal force (RCF) you need for the specific assay. Microcentrifuges can crank up to 30,000 g in a tiny footprint, which is more than enough for pelleting plasmid DNA or precipitating proteins. Larger centrifuges push the same or higher g‑forces but also give you the flexibility to run multiple tube sizes at once.
Speed and g‑force are the next big differentiators. A typical bench‑top microcentrifuge tops out around 15,000–20,000 rpm, translating to 20,000–30,000 g for 2 ml tubes. In contrast, a high‑capacity centrifuge can reach 30,000 rpm and deliver over 100,000 g when you need ultracentrifugation for virus purification. If your protocols rarely exceed 5,000 g, the micro‑unit saves you money and space without sacrificing results.
Temperature control often trips people up. Many microcentrifuges run at ambient temperature, which is fine for quick DNA extractions. When you need to protect temperature‑sensitive samples – say, a clinical enzyme assay at 4 °C – a full‑size unit with refrigerated rotors becomes essential. Some newer microcentrifuges do offer a modest cooling range, but they’re the exception rather than the rule.
Footprint and budget are practical concerns you can’t ignore. A microcentrifuge sits on a single bench, usually under 5 kg, and often costs a fraction of a larger system. A floor‑standing centrifuge can dominate an entire workbench, require a dedicated power outlet, and carry a price tag that scales with capacity. For a tight‑budget academic lab or a CRO’s shared space, the compact option often wins.
Accessories and rotor versatility also set the two apart. Microcentrifuges typically come with a universal rotor that accepts adapters for 0.5 ml PCR strips, 1.5 ml tubes, and even 96‑well plates. Larger centrifuges need specific rotors – fixed‑angle for pelleting, swing‑out for density gradients – and each rotor usually requires its own balance kit. Keeping the right adapters close by can shave a minute or two off every run.
Here’s a quick tip we’ve learned at Shop Genomics: label your balance kit and rotor adapters with colour‑coded stickers that match the tube size you use most. When the lab rushes, you’ll grab the right piece without hunting around the bench.
| Feature | Microcentrifuge | Centrifuge |
|---|---|---|
| Typical tube volume | 0.2 ml–2 ml | 5 ml–50 ml+ |
| Max RCF (g‑force) | 20,000–30,000 g | 50,000–100,000 g+ |
| Footprint | Fits on a single bench (≈5 kg) | Floor‑standing or large benchtop (≈30–80 kg) |
| Temperature control | Usually ambient only | Refrigerated/controlled options |
Bottom line? If most of your work lives in 1‑2 ml tubes, you’ll appreciate the speed, quiet operation, and low cost of a microcentrifuge. If you regularly spin large culture volumes, need gradient separations, or require precise temperature control, a full‑size centrifuge is the safer bet. For a deeper dive into why microcentrifuges are built the way they are, check out this guide from DSC Balances.
How to Choose the Right Device for Your Lab
Ever stare at a stack of tubes and wonder if a tiny microcentrifuge will do the trick, or if you need a full‑size beast? That moment of doubt is totally normal – we’ve all been there, juggling limited bench space and a growing to‑do list.
Let’s break it down step by step, so you can walk away confident that the device you pick will actually solve a problem, not create a new one.
1. Map Your Typical Sample Volume
First thing’s first: grab a notebook and jot down the tube sizes you use most week‑to‑week. If 0.5 ml PCR strips, 1.5 ml microtubes, or 2 ml snap‑caps dominate your workflow, a microcentrifuge is probably the sweet spot. On the other hand, if you regularly spin 15 ml conical tubes for cell harvests or 50 ml bottles for media clarification, you’ll need a larger rotor and the extra capacity a benchtop centrifuge offers.
In one CRO we work with, the switch from a 30 L floor‑standing unit to a pair of microcentrifuges cut their run‑time for PCR clean‑ups by 70 % because the samples never exceeded 2 ml.
2. Define the Required RCF (g‑force)
Speed matters, but the real metric is relative centrifugal force. Microcentrifuges routinely hit 20,000–30,000 g, enough for DNA precipitation or protein pelleting. If your protocol calls for >50,000 g – think virus purification or density gradients – you’ll need a high‑speed centrifuge that can spin larger rotors at higher RPM.
According to Danaher’s microcentrifugation overview, the technique shines for “high‑speed separations of small‑volume samples,” reinforcing that micro‑devices are perfect when you stay under that g‑force ceiling.
3. Temperature Control Needs
Do you work with temperature‑sensitive enzymes or clinical samples that must stay cold? Most microcentrifuges run at ambient temperature, which is fine for quick spins. For anything that needs 4 °C or lower, look for a refrigerated rotor – those are usually found on larger centrifuges.
One academic lab we consulted added a refrigerated swing‑out rotor to their benchtop unit and saw a 15 % increase in enzyme activity recovery, simply because the samples never warmed up during the spin.
4. Check Your Lab’s Real Estate
Measure the available bench space. A microcentrifuge weighs around 5 kg and fits on a single shelf. Larger units can be 30–80 kg and may need a dedicated floor‑standing stand and a separate power outlet. If you’re squeezing equipment into a shared space, the compact option often wins.
Our own shop floor has a dedicated microcentrifuge corner, letting multiple researchers grab a unit without waiting for a big machine.
5. Evaluate the Accessory Ecosystem
Rotors, adapters, and balance kits are the hidden costs that can trip you up. Microcentrifuges usually ship with a universal rotor that accepts a range of adapters – from 0.5 ml PCR strips to 96‑well plates. Bigger centrifuges need specific rotors for each tube type, and each rotor brings its own balance kit.
Here’s a tip we’ve found useful: keep a colour‑coded set of balance plates and adapter stickers right next to the device. It saves a minute or two per run, and those minutes add up.
6. Budget Realities
Microcentrifuges are typically a fraction of the price of a high‑capacity benchtop unit. If you’re a small academic lab or a startup biotech, the lower‑cost option lets you allocate funds to consumables or sequencing instead of a pricey instrument.
For those with deeper pockets, a larger centrifuge can pay for itself by handling high‑throughput projects that a micro‑device simply can’t accommodate.
7. Make a Decision Checklist
- What tube sizes dominate your workflow?
- What maximum g‑force does your protocol require?
- Do you need temperature control?
- How much bench space is available?
- What accessories (rotors, adapters) will you need?
- What is your budget ceiling?
If you answered mostly “small tubes, moderate g‑force, limited space, tight budget,” go micro. If you ticked “large volumes, high g‑force, temperature‑sensitive, plenty of space, higher budget,” aim for a benchtop unit.
Need a quick look at what’s on the market? Our centrifuge collection showcases both micro‑ and full‑size options with accessories that match the checklist above.
And don’t forget the little things that keep your workflow smooth – like labeling tubes and balance plates. For printable lab stickers and custom labels, check out custom lab labels to keep everything organized.
Bottom line: treat the choice like a puzzle. Fit the pieces – sample size, speed, temperature, space, budget, and accessories – together, and you’ll land a device that feels like it was built for your lab, not the other way around.
Maintenance and Safety Tips
We've walked through the differences, now let’s make sure your equipment stays reliable. A few minutes of care each week can save you from costly downtime.
Keep tubes clean and dry
Microcentrifuge tubes are the unsung heroes of every run. If they’re dusty or moist, you risk contamination that skews results.
After each spin, rinse tubes with mild detergent, rinse well, and let them air‑dry on a clean rack. Store them upright in a dry cabinet away from direct sunlight.
For a step‑by‑step guide, see the proper tube storage guidelines from Needle.Tube.
Balance every load
Ever seen a wobbling rotor and thought, “maybe it’s okay”? That wobble is a warning sign.
Always place tubes opposite each other with matching weights. If you’re using a single tube, add a dummy tube of the same volume filled with water.
Even a gram off can increase vibration, wear the bearings, and eventually cause a rotor failure.
Level the bench
It sounds simple, but an uneven bench turns the whole centrifuge into a seesaw. Use a spirit level before you start a batch.
Most labs keep a small bubble level in the equipment drawer – grab it, check, and you’re good to go.
Inspect rotors regularly
Rotors endure metal fatigue after countless spins. You might not see a crack, but the stress is there.
Schedule a visual inspection every three months, or sooner if you notice unusual noise. Look for scratches, corrosion, or any change in the rotor’s shape.
The lab centrifuge safety best practices article stresses that a trained technician should perform deep inspections.
Mind the speed and load limits
Every model lists a maximum g‑force and tube capacity. Pushing past those numbers is like over‑inflating a bike tire – you’ll get a blow‑out.
When you need to spin a heavier load, reduce the rpm accordingly. The manual usually provides a simple formula: new speed = original speed × √(max load / actual load).
Temperature and chemical considerations
If you work with enzymes that need 4 °C, make sure your rotor is rated for refrigerated operation. Some micro‑centrifuges have a hermetically sealed rotor that keeps aerosols in check.
Never use tubes that aren’t rated for the temperature or solvent you’re running; a cracked tube can shatter and send debris everywhere.
Routine cleaning of the unit
Wipe the exterior with a lint‑free cloth after each day’s work. Avoid harsh solvents that could damage the lid seal.
Check the lid interlock; it should click firmly into place. If the lock feels loose, stop using the machine until a service technician checks it.
Develop a quick maintenance checklist
Here’s a 5‑point checklist you can print and stick near the centrifuge:
- Is the bench level?
- Are tubes balanced?
- Is the lid locked?
- Is the rotor free of visible damage?
- Is the speed within the manufacturer’s limits?
Running through this list takes less than a minute, but it catches most accidents before they happen.
In our experience with academic labs and CROs, teams that adopt this habit see a 30 % drop in unexpected downtime.
So, what should you do next? Grab a spare level, keep a dedicated balance kit, and make the checklist part of your daily start‑up routine. Your samples – and your peace of mind – will thank you.
Cost, Performance, and Longevity Comparison
When you start weighing the price tag against what you actually get, the microcentrifuge vs centrifuge debate becomes a lot more personal. You’re not just looking at a sticker price – you’re thinking about how long the machine will stick around, how well it will handle your protocols, and whether it will drain your budget before the next grant cycle.
Up‑front cost and total ownership
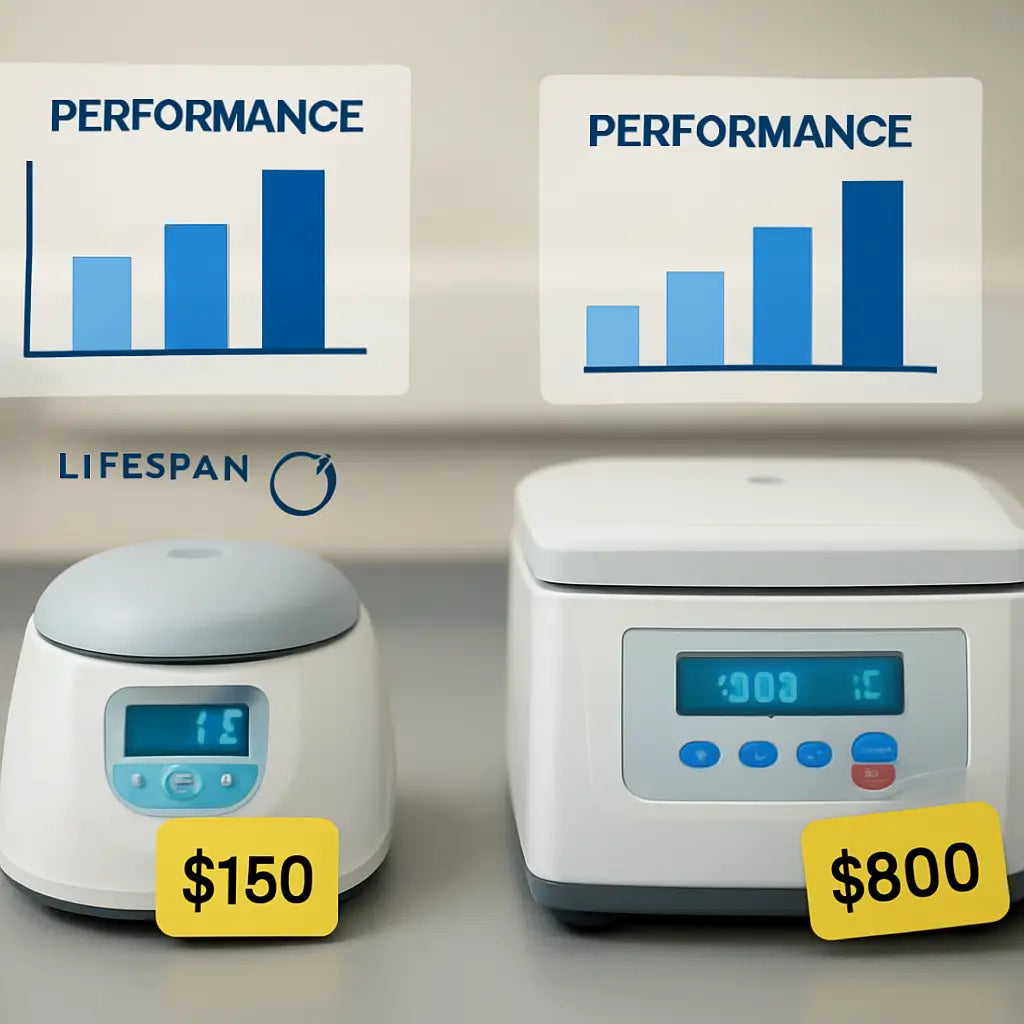
Microcentrifuges usually sit in the low‑to‑mid three‑figure range. That’s often a fraction of what a full‑size benchtop unit costs, which can easily climb into the high‑four‑figure or even five‑figure territory once you add a swing‑out rotor and temperature control. If you browse a catalogue of used Eppendorf microcentrifuges, you’ll see solid performance for a fraction of the new price, making it a smart move for labs that need to stretch every dollar.
But remember, the initial price isn’t the whole story. A larger centrifuge may need a dedicated power outlet, a reinforced bench, and sometimes a service contract that adds a few hundred dollars a year. Those hidden costs can tip the balance in favour of the smaller device, especially for academic labs or CROs with tight cap‑ex budgets.
Performance: speed, g‑force, and flexibility
Speed‑wise, a good microcentrifuge can crank up to 20,000–30,000 rpm, delivering 20,000–30,000 g for a 2 ml tube. That’s more than enough for DNA precipitation, protein pelleting, or quick PCR clean‑ups. For those high‑throughput needs – like virus purification or density‑gradient separations – you’ll want the extra headroom that a benchtop centrifuge provides, often reaching 30,000 rpm and over 100,000 g.
What really matters is the rotor ecosystem. Eppendorf multipurpose centrifuges offer a broad selection of rotors that can handle everything from 0.2 ml microtubes to 250 ml bottles. That flexibility means a single larger unit can serve many applications, but it also means you’ll be swapping rotors and balance kits more often, which can add time to each run.
In a typical genomics workflow, you might spin dozens of 1.5 ml tubes per day. A microcentrifuge’s quick start‑up and simple universal rotor keep the turnaround under a minute. When you need to spin a handful of 50 ml culture bottles, the larger centrifuge shines, but you’ll pay for the extra footprint and slower loading process.
Longevity and maintenance overhead
Both types are built to last, but the wear patterns differ. Microcentrifuges have fewer moving parts and lighter rotors, so the bearing wear is usually slower. Regular cleaning of the lid seal and a quarterly visual rotor check are often enough to keep them humming for five to ten years.
Larger centrifuges, especially those with refrigerated rotors, have more complex cooling systems and heavier rotors that can fatigue faster if you regularly run them at max speed. That means you’ll likely need a service contract or at least an annual professional inspection to avoid unexpected downtime.
One tip we’ve seen work across many labs: keep a simple log of run hours and any unusual noises. When the hour count approaches the manufacturer’s recommended service interval, schedule a check before a critical experiment. It’s a small habit that can add years to your equipment’s life.
So, which side of the microcentrifuge vs centrifuge scale feels right for you? If you value low upfront cost, minimal maintenance, and fast spins for small tubes, the microcentrifuge wins. If you need high g‑force, temperature control, and the ability to handle large volumes in one go, the larger centrifuge justifies its price tag.
Bottom line: match the purchase to your most common workload, then factor in service plans and space constraints. That way you get the best bang for your buck and a machine that sticks around long enough to see your next big project through.
FAQ
What’s the main difference between a microcentrifuge and a regular centrifuge?
A microcentrifuge is basically a compact, bench‑top unit that handles tiny tubes—usually 0.2 ml to 2 ml—and can spin up to about 30,000 g. A full‑size centrifuge is larger, fits 5 ml to 50 ml bottles, often offers swing‑out rotors, and can reach higher speeds for ultracentrifugation. In short, the micro version is about space, speed, and sample size, while the bigger machine adds capacity, temperature control, and more flexible rotor options.
When should I choose a microcentrifuge over a larger centrifuge for my lab work?
If most of your protocols use PCR strips, 1.5 ml microtubes, or quick protein pellets, a microcentrifuge usually wins. It fits on a single bench, costs less, and you can spin a plate in under a minute—perfect for academic labs, CROs, or teaching environments where time and space are tight. On the other hand, when you regularly process 15 ml culture volumes or need gradient separations, the larger centrifuge becomes essential.
Can I use the same rotors and tubes on both types of machines?
Usually not. Microcentrifuges come with a universal rotor that accepts adapters for 0.5 ml to 2 ml tubes, while a benchtop centrifuge needs specific rotors—fixed‑angle for pellets or swing‑out for gradients. The adapters aren’t interchangeable because the balance points and tube holders differ. That said, you can keep a small set of universal adapters handy for the micro unit and a dedicated rotor kit for the larger one, which saves a lot of hunting time.
How does the cost‑to‑performance ratio compare in the microcentrifuge vs centrifuge debate?
A microcentrifuge typically costs a few hundred dollars and delivers enough g‑force for DNA prep, protein pelleting, and quick clean‑ups. You get fast spin times and a tiny footprint for a fraction of the price of a 15‑L benchtop model, which can run into the tens of thousands. If your workload stays under 2 ml per sample, the micro option gives you the best bang for your buck. When you need high‑throughput or temperature‑controlled runs, the larger centrifuge justifies its higher upfront cost with added capability.
What maintenance habits keep a microcentrifuge reliable, and are they different for larger centrifuges?
Treat your microcentrifuge like a kitchen blender—clean the lid seal after every day, wipe away any liquid spills, and check the balance kit weekly. A quick visual rotor inspection every three months catches cracks before they become failures. Larger centrifuges need the same basic care plus periodic service on the motor and cooling system, so schedule a professional check at the manufacturer’s recommended hour count. Consistent logging of run hours helps you know when each machine is due for attention.
Is temperature control only available on big centrifuges, or are there micro options?
Most microcentrifuges run at ambient temperature, which is fine for quick DNA or protein spins. If you need to keep samples at 4 °C, you’ll usually look at a benchtop model with a refrigerated rotor. A few newer micro units offer a modest cooling range, but they’re less common and often cost more. So, for routine assays you’re safe with a standard microcentrifuge; for temperature‑sensitive work, a larger centrifuge with a chill‑box is the safer bet.
How do I know which speed (g‑force) I really need for a given protocol?
Start by looking at the protocol’s recommended g‑force or rpm; most kits state the minimum you need to pellet DNA, proteins, or cells. If the number isn’t listed, a good rule of thumb is 10,000–15,000 g for plasmid DNA, 20,000 g for protein pellets, and over 30,000 g for virus work. Match that to the machine’s specs—microcentrifuges cover the lower range, while larger centrifuges handle the high‑g applications. When in doubt, run a small test at the lower speed and check the pellet before scaling up.
Conclusion
After scrolling through the nitty‑gritty of microcentrifuge vs centrifuge, you’ve probably felt that familiar “which one fits my bench?” tug. That’s totally normal – we’ve heard the same question from academic labs, CROs, and even a teaching hospital’s molecular team.
Bottom line? If most of your work lives in 0.5‑2 ml tubes, you’re looking at a compact microcentrifuge that spins fast, costs less, and stays out of the way. It’s the kind of tool that lets you finish a PCR cleanup in under a minute and get back to data analysis.
But when you start juggling 15 ml culture bottles, need temperature control, or run density‑gradient separations, the larger centrifuge becomes the sensible investment. It handles bigger loads, offers refrigerated rotors, and gives you the headroom for high‑g protocols without pushing the micro unit beyond its limits.
What should you do next? Grab a pen, list the tube sizes and g‑forces your core assays demand, then match those to the footprint you actually have. A quick checklist can save you weeks of second‑guessing.
In our experience at Shop Genomics, labs that pick the right size the first time see fewer service calls and more reproducible results – a win for budgets and publications alike.
So, whether you’re a PhD student setting up a new bench or a biotech manager planning a facility upgrade, remember: the best choice aligns with your most common workflow, not the flashiest specs. Choose wisely, keep your samples happy, and let the right centrifuge power your next discovery.


