
Ever stood in front of a gel box and wondered why the bands look fuzzy, or why the gel cracks when you try to lift it? That moment of frustration is all too familiar for anyone who’s ever run a DNA or protein gel.
But the good news is, making a reliable agarose gel isn’t rocket science – it’s more like following a recipe you’ve cooked a hundred times.
First, you pick the right agarose concentration. For most DNA fragments between 0.5 and 5 kb, a 1% gel gives crisp, easy‑to‑read bands; larger fragments need a lower percentage, while tiny PCR products benefit from 2% or higher.
Next, you dissolve the agarose in your chosen buffer – usually TAE or TBE – by heating it in a microwave or on a hot plate. A quick tip: cover the tube with a loosely fitted lid to keep splatters down, then swirl until the solution is completely clear.
While the liquid cools to about 50 °C, you can add a staining dye if you prefer a safe, non‑UV option – SYBR Gold or GelRed work well and save you the hassle of post‑run staining.
When the mix reaches that sweet spot, pour it into a casting tray, insert the comb, and let it solidify for 15–20 minutes. You’ll know it’s ready when the gel feels firm to the touch but still slightly elastic.
Now you’re set for loading samples. Remember to heat your samples just enough to melt any residual agarose, then load them gently – a steady hand and a good pipette tip make all the difference.
In our experience, the little things – like using a fresh comb or checking the buffer pH before you start – can save you a lot of wasted runs. It’s those tiny tweaks that turn a good gel into a great one.
So, if you’ve been hesitant because a previous gel turned out blurry or broken, take heart – with the right concentration, proper heating, and a few practical tips, you’ll be pulling sharp, clean bands in no time. Let’s dive into the step‑by‑step guide that follows.
TL;DR
If you’ve ever stared at fuzzy bands or cracked gels, this guide shows you how to make agarose gel step‑by‑step, turning guesswork into reliable, crystal‑clear results every time.
We’ll walk you through choosing the right concentration, mixing and cooling tips, pouring tricks, and loading hacks so your next electrophoresis run feels smooth and stress‑free.
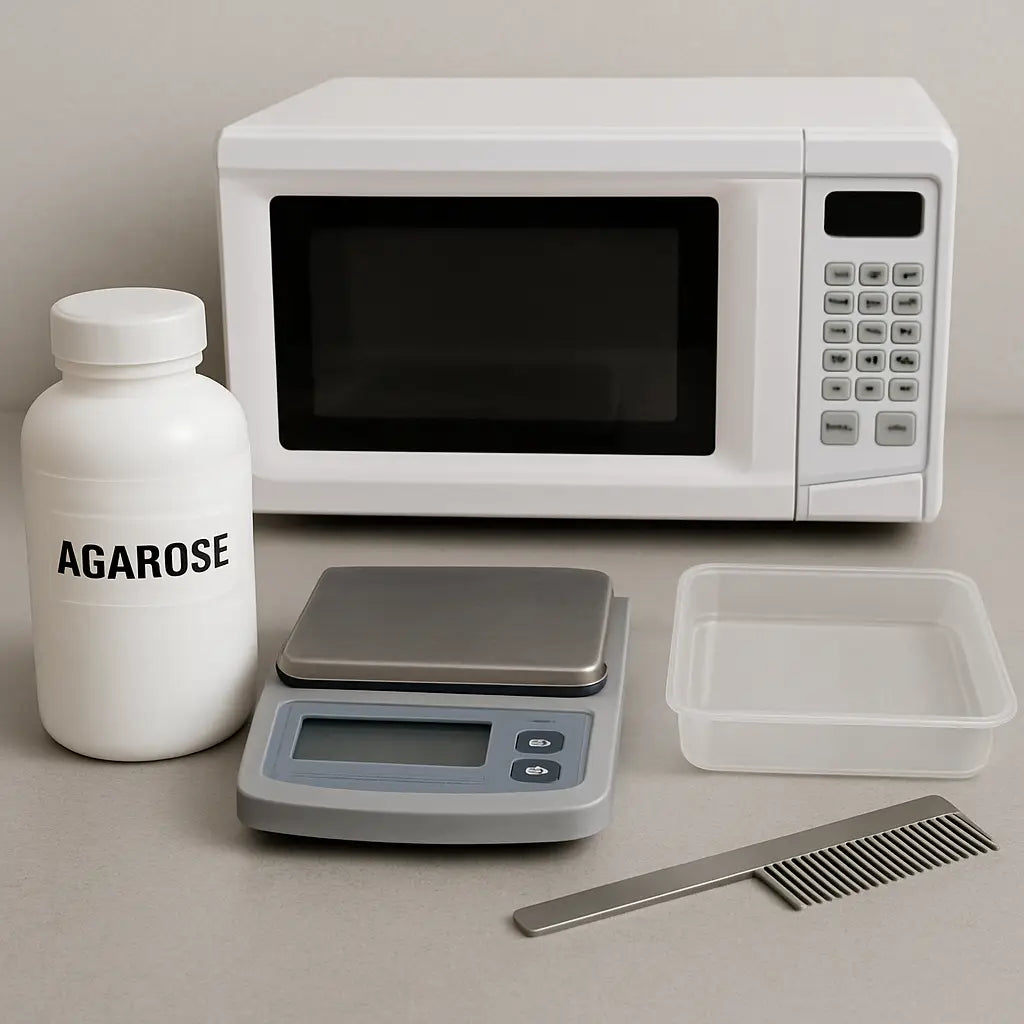
Step 1: Gather Materials and Equipment
Before you even think about heating agarose, take a moment to look at your bench. Do you have a clean, flat casting tray? A fresh comb? If anything looks cracked or dusty, set it aside – a tiny flaw can turn a perfect gel into a shattered mess.
First up, the basics:
- Agarose powder (high‑grade, low‑E‑column is best for clean bands)
- Running buffer – typically 1× TAE or 1× TBE
- Microwave or hot plate with a heat‑proof flask
- Measuring tools – a digital scale for the agarose, a graduated cylinder for the buffer
- Protective gear – lab coat, gloves, safety glasses
- Optional: non‑UV safe dye (SYBR Gold, GelRed) for in‑gel staining
Does that list feel familiar? Most labs – whether a university core facility or a CRO – keep these items within arm’s reach. If you’re setting up a new station, you might wonder where to source reliable agarose tablets. That’s where platforms like Shop Genomics make it easy to order the exact grade you need, with fast shipping to keep your workflow moving.
Now, let’s talk about the equipment you’ll actually touch. A good casting tray should be level; any tilt will cause the gel to pool unevenly and your wells will be off‑center. I’ve seen a colleague waste an entire batch because the tray was wobbling on a loose bench leg. A quick fix? Place a piece of silicone mat underneath – cheap, but it adds stability.
Next, the comb. Plastic combs are cheap, but they can warp when the gel cools. Metal combs last longer and give you cleaner well edges. If you’re running many gels a week, consider investing in a reusable metal comb – it’s a small expense that saves time.
So, how do you actually assemble everything?
Step‑by‑step checklist
1. Measure your agarose. For a 100 mL 1% gel, weigh 1 g of agarose. Use the scale for precision – a 0.1 g error can change the gel’s firmness.
2. Mix with buffer. Add the agarose to 100 mL of 1× TAE/TBE in a heat‑proof flask. Swirl gently to avoid clumps.
3. Heat until clear. Microwave in short bursts (30 seconds), stirring between bursts. Watch for boiling over – it happens fast.
4. Cool to ~50 °C. Let the solution sit for a minute or two, or place the flask in a water bath. This temperature is warm enough to stay liquid but cool enough not to melt the comb.
5. Add dye (optional). If you’re using a non‑UV dye, sprinkle it in now and give a quick swirl.
6. Set the tray and comb. Place the casting tray on a flat surface, pour a thin layer of buffer to create a base, then lower the comb into position.
7. Pour the gel. Slowly pour the molten agarose, avoiding bubbles. If bubbles appear, use a sterile tip to pop them gently.
8. Let it solidify. Wait 15–20 minutes. You’ll feel a gentle firmness when you tap the side of the tray.
Once the gel is set, carefully lift the comb straight up. If the comb sticks, a quick dip in warm buffer can loosen it.
Wondering how to keep everything organized when you’re juggling multiple projects? A simple scheduling board can help you line up buffer prep, gel casting, and electrophoresis runs so nothing gets left out. Think of it like a technician’s calendar – it saves you from the dreaded “where did I put that comb?” moment.
Below is a quick video that walks you through the pouring step – pause whenever you need to double‑check your temperature.
After the video, take a breath and double‑check your checklist. A clean, level gel is the foundation for crisp, readable bands.
When everything’s ready, you’ll feel confident moving on to the mixing step. And if you ever hit a snag – like a cracked gel or a stubborn comb – remember that a little extra preparation (fresh buffer, stable tray, proper cooling) usually solves the problem before it even starts.
Step 2: Calculate Gel Concentration and Prepare Buffer
Now that you’ve got your tray set up, the next big question is: how much agarose do you actually need? The answer hinges on the fragment sizes you’re trying to separate and the buffer you’ll run in. If you’re unsure, picture this – a 1 % gel is the sweet spot for most 0.5‑5 kb DNA fragments, while a 0.7 % gel stretches out larger pieces and a 2 % gel squeezes out tiny PCR products. In our experience, picking the right percentage saves you a lot of wasted runs.
Pick the right agarose percentage
Start by looking at the size range of your DNA. For a mixed‑size library, you might run two gels: a low‑percentage gel for the big pieces and a higher‑percentage one for the small amplicons. The miniPCR guide reminds us that the agarose concentration is the most important variable for resolution (see choosing the right agarose percentage). If you’re working in an academic lab, you’ll often see 0.8‑1.2 % recommended for routine cloning checks.
Do the math: how much agarose?
Here’s a quick recipe you can write on a lab notebook:
- Decide volume: most casting trays hold 50 mL of gel solution.
- Multiply the desired % (as a decimal) by the total volume. For a 1 % gel in 50 mL, that’s 0.01 × 50 = 0.5 g agarose.
- If you prefer tablets, grab the EZ Pack tablets from Shop Genomics - Tablets. One tablet usually contains 1 g, so you’d need half a tablet – just weigh it out for precision.
Tip: always weigh agarose on a balance that’s been calibrated today. A 0.01 g error can shift your gel from 1 % to 0.9 %, which subtly changes band migration.
Mix with the right buffer
Next, choose TAE or TBE. TAE gives you a lower buffering capacity but runs faster; TBE is more stable for longer runs or high‑voltage conditions. For most teaching labs, TAE is the go‑to because it’s gentle on the DNA. Add the agarose to the appropriate volume of cold buffer, then heat as you did in Step 1 until the solution is clear.
While the mixture is heating, think about labeling. Clear, durable labels on your gel plates and buffer bottles prevent mix‑ups later. If you need custom lab‑grade stickers, JiffyPrintOnline offers affordable printable labels that stick even to wet surfaces. A quick link to their service can save you a messy afternoon.
Tips and tricks
1. Temperature check. Let the melted agarose cool to around 50 °C before adding any dye or loading buffer. Too hot and you’ll melt the comb; too cold and the gel will start to set before you pour.
2. Buffer pH sanity. Verify the pH is still around 8.0 after you’ve autoclaved or microwaved it. A drift of 0.2 units can make bands look fuzzy.
3. Plan your run. Scheduling the gel run ahead of time helps you allocate staff and equipment. If your lab runs multiple gels a day, a technician‑scheduling guide like the one from cinod.fr can streamline the process and keep everyone on the same page.
4. Use a calibrated pipette. When you finally add loading dye, a 10 µL pipette gives you consistent volumes, which translates to even wells and less “smeared” looking results.
5. Record everything. Jot down the exact agarose %, buffer type, and any additives. Future you (or a new grad) will thank you when a mysterious band shift pops up weeks later.
By calculating the gel concentration and preparing the buffer with these steps, you set the stage for crisp, reproducible bands. The math is simple, the chemistry is straightforward, and the little organizational habits make all the difference when you finally load your samples and watch the DNA separate like a well‑choreographed dance.
Step 3: Mix Agarose with Buffer and Heat
Okay, the powder’s measured, the buffer’s ready – now it’s time to bring them together and watch the magic happen.
Set the temperature right
First, pour your cold TAE or TBE into a heat‑proof beaker. The volume should match the amount you calculated in Step 2. Most labs use a 250 mL beaker for a 50 mL gel; it gives you room to stir without splashing.
Turn the microwave to medium power (about 70 % of full) and heat in 30‑second bursts. Swirl the beaker after each burst – you’ll see tiny bubbles form, then disappear as the agarose starts to melt.
And here’s a little secret: if you watch the solution turn from milky to crystal‑clear, you’re on track. Anything still hazy after a minute or two probably needs a few more seconds.
Add the agarose
While the buffer is heating, sprinkle the weighed agarose on top. If you’re using EZ Pack tablets, break them into smaller pieces – that speeds up dissolution.
Don’t dump the powder all at once. A slow pour lets the heat penetrate evenly and prevents clumps that later turn into “air pockets” in your gel.
Once the agarose is in, keep the microwave on short bursts. You’ll hear a faint “pop” when the last bits melt; that’s the sound of a good gel forming.
Watch for the clear point
When the mixture is completely transparent, you’ve hit the sweet spot. Too hot, and you risk melting the comb when you pour; too cool, and the gel will start to set before you finish.
Most of us aim for around 55‑60 °C. Grab a quick‑read thermometer or, if you’re feeling old‑school, dip a clean tip of a pipette – the liquid should feel warm, not scalding.
And if you need a buffer that helps dissolve agarose slices later on, Zymo Research’s Agarose Dissolving Buffer is a handy option for recovery steps after electrophoresis.
Optional: add dye now
If you like to see the gel glow without a post‑run stain, this is the moment to add SYBR Gold or GelRed. A few microliters per 50 mL is enough – too much can quench fluorescence.
Stir gently with a glass rod; you don’t want to introduce bubbles that later look like ghost bands.
Cool just enough to pour
Take the beaker off the heat and set it on a bench covered with a silicone mat. Let it sit for 2–3 minutes, then give it a quick swirl. You’re looking for a temperature that feels like a warm cup of tea – around 50 °C.
Now you’re ready to pour into the casting tray, insert the comb, and watch those neat, crisp lanes form.
Remember, the whole “mix and heat” step is the foundation of a clean run. A few extra seconds of patience here saves you hours of troubleshooting later.
Tips for consistency
And one more thing: always wipe the beaker rim with a lint‑free tissue before you pour. A tiny droplet of gel on the side can dry and stick to the comb, creating a nasty ridge that looks like a phantom band.
If you work in a busy lab, label the beaker with the final percentage and buffer type while the mixture is still warm. That way, when you come back from a quick coffee break you won’t have to guess whether it’s a 0.8 % TAE or a 1 % TBE.
Finally, keep a spare glass rod handy for a quick remix if you notice any specks floating just before you pour. A smooth, bubble‑free gel is the secret sauce for crisp, reproducible results.
Step 4: Choose Gel Concentration – Comparison Table
Now that you’ve mixed and cooled your agarose, the real decision is which percentage to pour. It feels a bit like picking the right lens for a camera – too low and everything looks blurry, too high and you lose the big picture.
So, how do you know which concentration matches the DNA fragments you’re chasing? The answer lives in three simple variables: fragment size range, desired resolution, and buffer choice. Let’s break each one down in plain language.
Fragment size versus agarose %
If you’re working with big pieces – say 5 kb and up – a low‑percentage gel (0.6–0.8 %) gives the DNA room to wiggle through the pores. For the typical 0.5–5 kb range, 1 % is the sweet spot that most labs default to. And when you need razor‑sharp bands for tiny PCR amplicons under 300 bp, crank it up to 2 % or even 2.5 %.
But here’s a trick many forget: the buffer matters. TBE holds its buffering capacity better at higher voltages and tends to sharpen bands below 1 kb, while TAE runs faster but can run out of buffer on long gels.
When to choose low‑melt agarose
Sometimes you’ll want to cut out a band and do an in‑gel enzymatic reaction. Low‑melt agarose (around 0.5 %) stays soft at 37 °C, letting you recover DNA without melting the whole gel. It’s a niche choice, but for downstream cloning it can save you a day.
Think about your lab’s workflow: academic students often run quick checks, clinical labs need reproducibility, biotech startups might be scaling up. Matching the gel to that context prevents wasted runs.
Quick decision checklist
- What’s the largest fragment you expect? (Pick the lowest % that still resolves it.)
- Do you need high‑resolution for <1 kb? (Lean toward 2 %+ and TBE.)
- Will you do downstream extraction? (Consider low‑melt agarose.)
- Is your run time limited? (TAE runs faster, but watch buffering.)
In our experience at Shop Genomics, labs that keep a small stash of 0.6 %, 1 %, and 2 % agarose tablets can swap out the right gel in under a minute – no more guessing.
Comparison table
| Gel % | Ideal fragment size | Recommended buffer | Typical use |
|---|---|---|---|
| 0.6–0.8 % | 5 kb – 25 kb | TAE or TBE | Large genomic fragments, pulse‑field prep |
| 1 % | 0.5 kb – 5 kb | TAE (fast) or TBE (sharp) | Standard cloning checks, routine diagnostics |
| 2 %–2.5 % | ≤0.3 kb | TBE | Small PCR products, high‑resolution sizing |
| 0.5 % low‑melt | Any, but often >1 kb | TAE | In‑gel extractions, enzymatic reactions |
Notice how the buffer column lines up with the resolution needs. If you’re unsure, start with 1 % TAE – it’s forgiving and works for most teaching labs. Then, as you get comfortable, switch to TBE for those tight bands.
Want a deeper dive into why those percentages matter? Qiagen’s gel analysis guide explains the non‑linear relationship between fragment size and migration, and why low agarose concentrations are essential for large DNA pieces.
Finally, a practical tip: write the chosen % on the side of the casting tray with a waterproof marker before you pour. It sounds trivial, but when you come back from a coffee break, that little reminder stops you from accidentally mixing up a 0.8 % and a 2 % gel – a mistake that can waste an entire afternoon.
And remember, a clean gel saves you hours of re‑running.
With the table in front you, picking the right concentration becomes a quick, confidence‑boosting decision instead of a guesswork exercise. Ready to pour? Grab the right agarose, set your buffer, and you’ll be watching those crisp bands appear in no time.
Step 5: Cool the Solution and Add Loading Dye
Now the agarose is melted, you’ve got a clear liquid, and it’s time to bring the temperature down just enough so you can handle it without turning the lab into a sauna. This is the moment where a lot of beginners either rush it and end up with a lumpy gel, or over‑cool it and waste precious time waiting for it to re‑liquefy.
Find the sweet spot – about 50‑55 °C
Grab a quick‑read thermometer or, if you’re old‑school, dip the tip of a clean pipette. The liquid should feel warm, like a cup of tea, not scalding. If it’s hotter than 60 °C, set the beaker on a silicone mat and let it sit for a minute or two. If you’re in a hurry, a gentle swirl in a cold water bath can shave off a few seconds – just be sure the water doesn’t splash into the agarose.
Why does this matter? At ~50 °C the agarose stays fluid enough to pour smoothly, but it’s cool enough that your comb won’t melt and your loading dye won’t degrade.
Add the loading dye – the secret sauce for easy sample loading
Loading dye does three things: it adds density so samples sink into the wells, it provides a visual marker so you can watch the sample migrate, and it contains a tracking dye that lets you see how far the run has progressed.
Most labs use a 6× loading buffer that’s already mixed with bromophenol blue and xylene cyanol. If you’ve got a pre‑made 6× stock, just add 1 µL per 5 µL of sample later – you’ll mix that with your DNA after the gel has set.
But here’s a quick tip: add the loading dye to the cooled agarose *before* you pour, not to each sample individually. This way every well gets a little extra density automatically, and you won’t have to worry about forgetting a tip.
Measure out the dye with a pipette – about 0.5 µL of 6× dye per 10 mL of gel is enough. Give the mixture a gentle swirl; you don’t want bubbles, and you certainly don’t want to introduce air that will look like phantom bands later.
Quick sanity check before you pour
Look at the surface – it should be completely clear, no specks, no haze. If you see a stray particle, use a clean glass rod to nudge it to the side, then skim it off with a pipette tip. A clean surface equals a clean gel.
Now label the beaker with the agarose % and buffer type while the solution is still warm. Trust us, after a coffee break you’ll thank yourself for that tiny note.
Pouring time – keep it steady
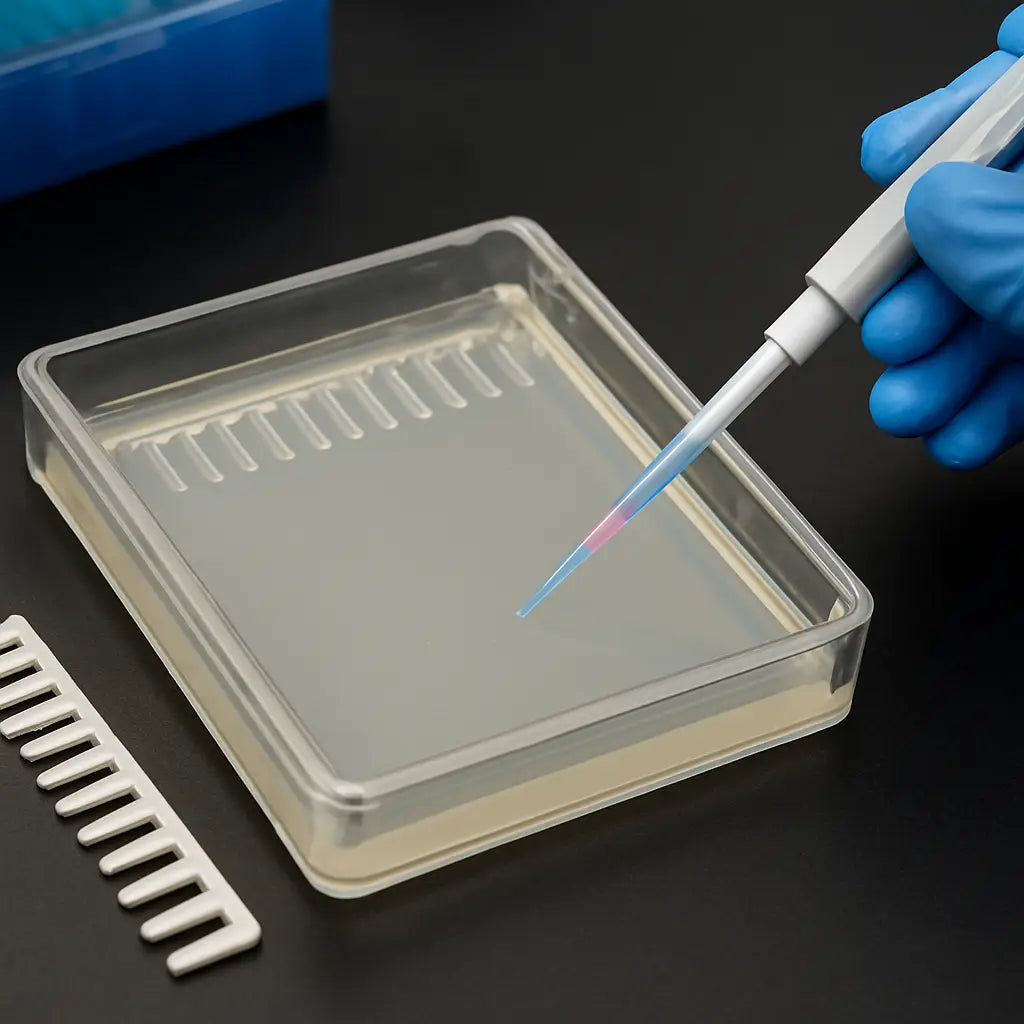
Set the casting tray on a level surface, slide in the comb, and start a slow, steady pour. Aim for a thin, even stream down the middle – this minimizes the chance of creating a ridge at the edges.
While the gel is setting (about 10–15 minutes), you can prep your samples with the same loading dye you just added to the gel. Mix your DNA or protein sample with 1 µL of 6× loading buffer per 5 µL of sample, vortex briefly, and keep it on ice until you’re ready.
And remember: the gel is solid enough when you gently press the surface with a gloved fingertip – it should feel firm but give a tiny give, like a soft rubber band.
Once the gel is set, carefully remove the comb. If you see any tearing, it’s usually because the gel was too cold when you tried to lift the comb. That’s a sign to let the gel sit a minute longer before removing the comb next time.
Now you have a perfectly cooled agarose gel with loading dye already mixed in, ready for you to load samples without worrying about sinking or uneven migration. Your next step – actually loading the wells – will feel like sliding a smooth piece of paper into a slot.
Step 6: Cast the Gel and Insert the Comb
Okay, the agarose is at that perfect 50‑55 °C sweet spot and you’ve already mixed in your loading dye. Now comes the part that feels a little like pouring concrete for a sidewalk – you want it smooth, level, and bubble‑free.
Prepare the casting tray
First, double‑check that your tray sits flat on a level bench. A wobble will create a slope, and you’ll end up with wells that are deeper on one side. If you’re using a glass tray, give it a quick wipe with a lint‑free tissue; any dust will turn into a pesky speck later.
Slide the comb in gently, making sure each tooth sits snugly. A fresh plastic comb (the kind we ship in our electrophoresis kits) is less likely to crack, especially if you’re running a 2 % or higher gel.
Mind the temperature
Why does temperature matter so much? If the gel is too hot, the comb can melt or warp; too cold, and the agarose begins to set before you finish the pour, trapping bubbles inside.
Grab a quick‑read thermometer or, if you’re comfortable, dip the tip of a clean pipette – it should feel like a warm cup of tea, not scalding. If it’s above 60 °C, set the beaker on a silicone mat for a minute or two. If it’s below 45 °C, give it a gentle swirl in a warm water bath (just make sure no water splashes in).
Pour without bubbles
Here’s a little trick that saved us countless runs: tilt the tray slightly and start the pour at the edge, letting the liquid flow down the side before filling the middle. The slow, steady stream pushes air out rather than trapping it.
If you see a bubble forming, grab a 200 µL pipette tip and gently tap it against the side of the beaker. The tip will draw the bubble toward the edge where you can pop it with a clean tip. For high‑percentage gels (3–4 %), you’ll notice more viscosity – that’s normal, but it also means bubbles stick around longer. A forum discussion on high‑percentage gels explains how a low‑power microwave burst followed by a short rest can reduce bubble formation (see details).
Insert and remove the comb
Once the surface looks glossy and you’ve let it sit for about 10 minutes, it’s time to set the comb for real. Gently press the comb down until the teeth are fully immersed – you’ll feel a tiny resistance when the gel has solidified enough to hold the comb in place.
When you’re ready to lift the comb, do it slowly. A quick yank can tear the wells, especially in low‑melt agarose. If the gel feels a bit cold, give it an extra 30 seconds; the rubber‑y feel you’re looking for is a slight give, like a soft rubber band.
Quick sanity check
Run a fingertip test: lightly touch the surface with a gloved finger. It should feel firm but give a tiny bounce. If it’s still tacky, let it sit another minute – the extra time rarely harms downstream runs.
Finally, label the tray with the agarose percentage and buffer type using a waterproof marker. It sounds trivial, but we’ve seen graduate students scramble for a missing label and end up mixing a 0.8 % TAE with a 2 % TBE run – a nightmare you can avoid with a quick note.
Now your gel is ready for the next step – loading the samples. You’ll notice the wells are clean, evenly spaced, and free of bubbles, which means your bands will stay sharp and your run will feel almost effortless.
FAQ
How do I know when the agarose is ready to pour?
When the solution turns completely clear and you can see the faint glow of the dye (if you added one), you’re in the sweet spot. Give it a quick temperature check – around 50‑55 °C feels like warm tea, not scorching. If you still see a milky haze, keep heating in short bursts and stir gently; any cloudiness means the agarose isn’t fully dissolved yet.
What temperature should the gel be when I insert the comb?
The comb works best when the gel is just cool enough to hold its shape but still fluid enough to flow around the teeth. Aim for about 45‑50 °C; you’ll feel a comfortable warmth on the back of your hand. If it’s hotter than 55 °C, the comb can warp or melt, and if it’s below 40 °C the gel may start to set and trap bubbles.
Can I reuse the comb and casting tray for multiple gels?
Absolutely – most labs wash and reuse plastic or acrylic combs dozens of times. Just rinse the comb with distilled water, give it a quick dip in 70 % ethanol, and let it air‑dry before the next pour. The casting tray should be inspected for cracks; a small chip can create an uneven surface that distorts bands. A gentle wipe with a lint‑free tissue before each use keeps debris from turning into phantom bands.
How long can I store a poured agarose gel before I run it?
You can keep a solidified gel at 4 °C for up to 24 hours without noticeable loss of resolution. Wrap the tray in plastic wrap or place it in a sealed container to prevent the gel from drying out. If you need longer storage, consider casting the gel in a buffer‑filled tray and sealing it; that can extend usability to a few days, though you may see a slight drop in sharpness for very high‑percentage gels.
What’s the best way to avoid bubbles when I pour?
Start the pour at the edge of the tray and let the liquid flow down the side before filling the middle – the slow stream pushes air out. If a bubble does appear, gently tap the side of the beaker with a pipette tip; the bubble will migrate to the edge where you can pop it with a clean tip. Tilting the tray slightly while pouring also helps air escape.
Do I need to add a DNA stain before or after the run?
If you’re using a safe, non‑UV stain like SYBR Gold or GelRed, you can mix a few microliters into the agarose before it solidifies. That way the bands light up as soon as the run finishes, saving a post‑run staining step. For labs that prefer traditional ethidium bromide, it’s usually added after electrophoresis in a staining tray – just follow your safety guidelines.
Why does my gel crack and how can I prevent it?
Cracking often comes from temperature shock or uneven cooling. Pour the gel on a level bench, let it set at room temperature for 10‑15 minutes, then move it to a cooler area – don’t slam it straight into a fridge. Also, make sure you’re using the right agarose percentage; very high‑percentage gels (above 3 %) are more brittle and benefit from a slower cooling curve.
Conclusion
So you’ve walked through every step of how to make agarose gel—from measuring the powder to pouring a bubble‑free cast. By now you know why a gentle heat pulse, a quick temperature check, and a tidy comb are worth the extra minute.
Remember, the sweet spot is around 50 °C when you pour, and a clear, bubble‑free surface means crisp, readable bands. If a bubble does sneak in, a light tap with a pipette tip usually does the trick.
What’s the biggest win? Consistency. Keeping a notebook of agarose %, buffer type, and any additives saves you from mysterious shifts later on. In our experience, labs that label every tray and beaker avoid the dreaded “wrong gel” mix‑up.
So, what’s next? Grab your next set of samples, load them with confidence, and let the electric field do the storytelling. If you ever need fresh agarose tablets or a reliable electrophoresis system, Shop Genomics has you covered—no surprise, just the tools you already trust.
Bottom line: a well‑prepared gel is the foundation for every DNA or protein run. Follow the checklist, stay patient, and you’ll spend less time troubleshooting and more time analyzing. Happy electrophoresing!


