
Let’s talk about that moment when you’re about to set up a reverse transcription PCR and you realize you’ve got a mountain of steps staring back at you.
You’ve probably felt that mix of excitement and dread – excitement because you know you’re one step away from turning RNA into measurable DNA, dread because a missed step can ruin hours of work.
In the world of genomics, getting those reverse transcription PCR steps right isn’t just a nice‑to‑have; it’s the backbone of everything from gene expression profiling in a university lab to diagnostic assays in a clinical setting.
So, what actually happens? First, you isolate high‑quality RNA, then you treat it with DNase to wipe out any contaminating DNA. Next, you set up the reverse transcription reaction using a reliable reverse transcriptase, primers, dNTPs, and the right buffer.
After cDNA synthesis, you move straight into the PCR amplification – that’s the “PCR” part of RT‑PCR. You’ll add your cDNA to a mix of forward and reverse primers, a thermostable DNA polymerase, MgCl2, and the usual buffer components.
The thermal cycler then runs through denaturation, annealing, and extension cycles – typically 30‑40 cycles – and finally you get your amplified product, ready for analysis by gel electrophoresis, qPCR detection, or sequencing.
Does any of that sound familiar? Maybe you’ve already done it a dozen times, or maybe you’re staring at the protocol for the first time and wondering where to start.
Here’s a quick reality check: the quality of your RNA and the efficiency of the reverse transcription step set the ceiling for everything that follows. A sloppy RNA prep or a sub‑optimal RT mix can give you weak signals, even if your PCR is perfect.
That’s why many labs – from academic research groups to biotech startups – trust proven reagents and reliable equipment to keep those steps consistent.
In the next sections we’ll break down each step, share troubleshooting tips, and point out where the right tools can save you time and money.
TL;DR
If you’ve ever stared at a protocol and wondered which reverse transcription pcr steps actually matter, you’re not alone—getting RNA right sets the whole experiment’s tone.
Follow our quick‑check guide, focus on high‑quality RNA, reliable enzymes, and clean cDNA prep, and you’ll see strong, reproducible signals without endless troubleshooting later.
Step 1: RNA Extraction – Getting Pure Template
Ever opened a tube of frozen tissue and thought, “If I mess up the RNA here, the whole RT‑PCR is doomed”? Yeah, we’ve all been there. The good news is that a clean RNA prep isn’t a magic trick – it’s a series of small, repeatable actions you can master.
First thing’s first: protect your RNA from RNases. Those pesky enzymes are everywhere – on your gloves, bench tops, even in the air. Wear fresh gloves, use RNase‑free pipette tips, and keep a dedicated RNase‑away solution handy. A quick wipe of the work surface with a 0.1% DEPC‑treated water solution does wonders.
Step‑by‑step extraction
1. Homogenize the sample quickly. Whether you’re using a bead‑beater or a mortar, aim for a fine slurry within 30 seconds. The faster you break cells, the less time RNases have to chew up your nucleic acids.
2. Add lysis buffer. Most commercial kits provide a guanidinium‑thiocyanate buffer that denatures proteins and inactivates RNases. If you’re buying reagents, check out reverse transcription reagents – they’re formulated to give you a high‑yield, DNA‑free lysate.
3. Phase separation (optional). For phenol‑chloroform methods, you’ll see a clear aqueous layer after centrifugation. Pull that layer carefully; any carry‑over organic solvent will hurt downstream steps.
4. Bind RNA to a silica column. Load the cleared lysate onto the spin column, spin, and wash with the supplied buffers. The key is to follow the exact spin times – too short, and you lose material; too long, and the column dries out.
5. Elute in RNase‑free water. Warm the water to 60 °C before adding it to the column; this helps release the last bits of RNA. Aim for a final volume of 30‑50 µL – enough for a few RT reactions, but not so dilute that you can’t measure it accurately.
Now, a quick sanity check: use a spectrophotometer or a NanoDrop to look at the A260/A280 ratio. A value around 2.0 tells you the sample is pretty pure. If it’s lower, you probably have protein contamination; if it’s higher, there might be phenol lingering.
So, what should you do if the ratio looks off? Run a quick agarose gel. Intact ribosomal bands (28S and 18S) mean your RNA survived. Smears? That’s a sign of degradation – go back, chill everything, and consider adding an RNase inhibitor in future runs.
One tip many labs overlook: label every tube with a durable, water‑resistant label. Mis‑labelled samples are a nightmare when you’re juggling dozens of extractions. That’s where custom lab labels from JiffyPrintOnline come in handy – they stick well and won’t fade during the freeze‑thaw cycles.
Another hidden gem is keeping a digital lab notebook for each extraction batch. Note the tissue weight, buffer volumes, spin times, and any hiccups. When you later troubleshoot a low‑yield cDNA, you’ll have a clear trail to follow.
And if you ever need help polishing the write‑up for a manuscript or a grant, StudyInFocus offers academic tutoring that can guide you through the data interpretation and reporting steps.
Bottom line: a pure RNA template is the foundation of every reverse transcription PCR step. Treat it with care, double‑check your numbers, and you’ll set the stage for strong, reproducible signals downstream.

Step 2: Reverse Transcription Reaction – Making cDNA
You've just coaxed pure RNA out of the column, and now the real magic begins – turning that fragile messenger into a sturdy cDNA copy you can actually work with. It feels a bit like watching a shy friend step into the spotlight, right?
First thing’s first: pick the right primer mix. Oligo(dT) works great if you’re only after poly‑A mRNAs, but most labs – especially those handling plant or microbial samples – reach for a blend of random hexamers and oligo(dT) to capture everything. That combo lets you dodge the 3′‑end bias while still pulling in the longer transcripts.
Step‑by‑step reaction setup
1. Assemble on ice. Grab a low‑retention tube, add RNase‑free water, your dNTP mix, and the primer cocktail. Keep it cold; enzymes hate premature activity.
2. Add the RNA template. Typical reactions use 0.5–2 µg total RNA. If you’re working with low‑input samples – say, a handful of FFPE sections – consider using a more processive reverse transcriptase that can chew through degraded templates.
3. Heat‑denature (optional). For GC‑rich or highly structured RNAs, a quick 65 °C hit for 5 minutes followed by an ice snap helps melt secondary structures. Then drop the tube back on ice before adding the enzyme.
4. Add reverse transcriptase and buffer. Most kits provide a 2× RT buffer that already contains DTT and RNase inhibitor. Mix gently – no vortexing, just a few taps.
5. Incubate. The temperature window depends on your enzyme. A common sweet spot is 50 °C for 30 minutes; this higher temp helps dissolve stubborn folds without killing the enzyme. If you’re using a classic MMLV, stick to 42 °C for 60 minutes.
6. Stop the reaction. Heat the mix to 70 °C for 10 minutes (or follow the manufacturer’s deactivation step). This kills the reverse transcriptase and stabilizes the newly‑made cDNA.
That’s it – you now have a cDNA:RNA hybrid ready for downstream PCR. Most labs just pull the tube straight into the PCR master mix, but if you need pure cDNA for sequencing, a quick cleanup with a spin column or magnetic beads does the trick.
So, what should you watch out for next?
One common hiccup is leftover RNase that silently chews your cDNA during the incubation. Keep everything RNase‑free, use barrier tips, and don’t skip the inhibitor that comes with most reverse transcriptase kits.
Another trap: forgetting to check your primer concentration. Too much random hexamer can generate a sea of short cDNA fragments, while too little leaves you with low yield. A good rule of thumb is 50 ng/µL of total primer mix for a 20 µL reaction.
Quick checklist before you hit “Start”
- RNA is on ice, quantified, and free of DNA (DNase step done).
- Primers are fresh, thawed on ice, and mixed at the right ratio.
- Reaction buffer is at the correct pH; don’t forget the DTT.
- Enzyme is added last, and the tube is briefly spun down.
- Incubation temperature matches the enzyme’s spec sheet.
In our experience, labs that treat the RT step as a “set‑and‑forget” often end up with weak signals later on. Taking a minute to double‑check each component pays off in cleaner qPCR curves and more reliable downstream data.
If you need a reliable reverse transcriptase that handles GC‑rich templates, the Thermo Fisher guide on reverse transcription setup breaks down enzyme choices and primer strategies in plain language.Thermo Fisher guide on reverse transcription setup
Remember, the reverse transcription reaction is the bridge between your RNA world and the DNA‑centric tools that follow. Build that bridge sturdy, and the rest of your reverse transcription PCR steps will flow smoothly.
Step 3: qPCR Setup & Primer Design – Targeting Your Gene
Now that you’ve got clean cDNA, it’s time to think about the real star of the show: the primers. If you’ve ever stared at a spreadsheet of gene IDs and wondered which sequence will actually light up the qPCR machine, you’re not alone. The right primer pair can turn a shaky experiment into a clean, reproducible signal.
Pick the right primer type for your workflow
In a two‑step reverse transcription pcr steps workflow, you have the freedom to use either gene‑specific primers or a universal mix during the RT step. For qPCR, though, you’ll almost always want gene‑specific primers that flank an intron. That way, any contaminating genomic DNA will give you a bigger product that’s easy to spot on the melt curve.
One‑step kits force you to use the same primers for RT and PCR, which is great for speed but limits flexibility. If you need to run multiple targets from the same cDNA batch, stick with the two‑step approach and design a fresh pair for each gene.
Primer design checklist
- Length: 18‑24 bases each.
- GC content: 40‑60 % for stable binding.
- Melting temperature (Tm): Aim for 58‑62 °C, and keep the forward/reverse Tm within 1 °C of each other.
- Amplicon size: 70‑200 bp works best for SYBR‑Green chemistry; longer amplicons can still be used with probe‑based assays.
- Intron spanning: Place one primer on the exon‑exon junction or design the amplicon to cross an intron so that genomic DNA yields a larger product.
- 3′‑end stability: End each primer with a G or C to boost polymerase extension.
- Avoid runs of 4+ of the same nucleotide and secondary structures that cause dimers.
Tip: Run your candidate sequences through a free tool like Primer‑BLAST to double‑check specificity against the whole transcriptome. In our experience, a quick in‑silico check saves hours of troubleshooting later.
Setting up the qPCR reaction
Here’s a simple, repeatable mix for a 20 µL reaction using a SYBR‑Green master mix:
| Component | Final concentration | Notes |
|---|---|---|
| 2× SYBR‑Green Master Mix | 10 µL | Provides polymerase, dNTPs, MgCl₂, and fluorescent dye. |
| Forward Primer | 0.4 µM (200 nM final) | Adjust if you see primer‑dimer peaks. |
| Reverse Primer | 0.4 µM (200 nM final) | Same concentration as forward. |
| cDNA template | 1‑2 µL (≈10‑20 ng) | Keep the amount consistent across wells. |
| RNase‑free water | to 20 µL | Fill the volume. |
Mix gently, spin down, and load the plate. A typical cycling program looks like this:
- 95 °C for 2 min (initial denaturation).
- 40 cycles of:
- 95 °C for 15 s (denature).
- 60 °C for 30 s (anneal/extend) – adjust if your primer Tm differs.
- Melting curve: 65 °C to 95 °C, increment 0.5 °C.
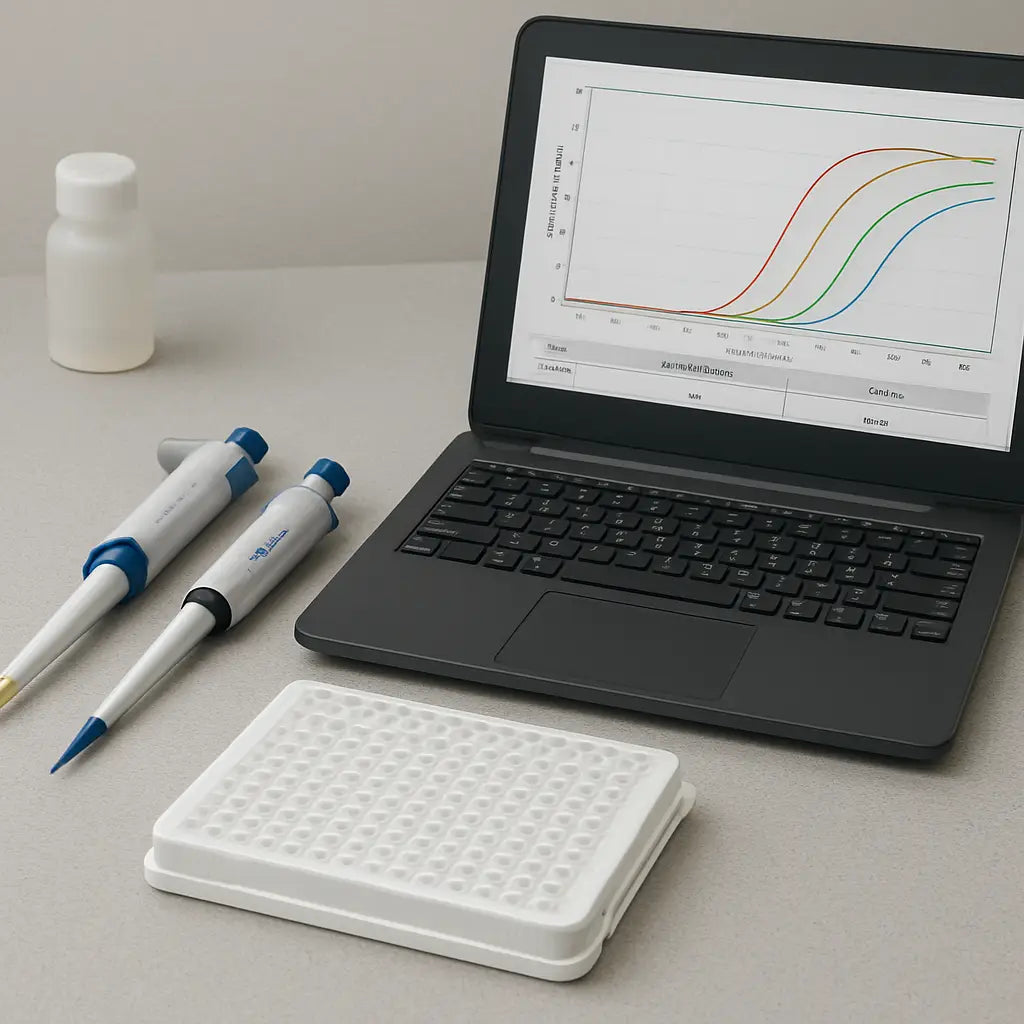
Watch the melt curve like a detective watching a crime scene. A single sharp peak means you’ve amplified the right product; a shoulder or extra peak flags primer‑dimer issues.
Common pitfalls and quick fixes
Does your Ct drift wildly between replicates? That’s often a sign of pipetting inconsistency or uneven template distribution. Use a multichannel pipette and pre‑mix your master mix thoroughly.
Seeing a “no‑template control” (NTC) amplify? You probably have primer‑dimer formation. Drop the primer concentration to 150 nM each, or redesign the primers to reduce 3′ complementarity.
Worried about genomic DNA contamination? Remember the intron‑spanning design tip, and always include a DNase‑treated control. If the control still shows amplification, add a second DNase step before cDNA synthesis.
Choosing the right equipment
For labs that run dozens of plates a day, a reliable thermal cycler with a uniform temperature profile is essential. Shop Genomics carries a range of models that deliver the precision you need without breaking the budget.
And if you’re setting up a new qPCR workflow from scratch, consider a dedicated real‑time cycler that supports multiplex detection. That lets you hit several genes in one well, cutting reagent cost and sample use.
So, what’s the next move? Grab your primer design spreadsheet, run the sequences through a specificity check, assemble the master mix, and watch those clean amplification curves roll in.
Need a deeper dive into primer best practices? Qiagen’s RT‑PCR guidelines walk through the science behind each design rule.
Step 4: Thermal Cycling Conditions – Amplifying cDNA
Alright, you’ve just got clean cDNA sitting in a tube – now it’s time to turn that single‑strand copy into millions of copies you can actually measure. The trick isn’t magic, it’s a well‑tuned thermal cycling program.
Why the three steps matter
Every cycle is a mini‑story: 95 °C melts the double‑helix, a cooler annealing step lets your primers find their perfect spot, and 72 °C lets the polymerase extend the new strand. Miss one temperature by a degree and you’ll see weaker curves or a noisy melt profile.
In our experience, labs that stick to the “standard” 30‑35 °C window for annealing often waste time chasing primer‑dimer peaks that never existed – the real culprit was a too‑high annealing temperature.
Typical two‑step program (cDNA synthesis + PCR)
1. Reverse transcription (if you’re doing one‑step): 50 °C for 10‑15 min, then 95 °C for 2 min to inactivate the RT.
2. Denaturation: 95 °C, 15 s.
3. Anealing/extension: 60 °C, 30 s (adjust ±2 °C based on primer Tm). Polymerase works while the temperature sits, so you get both steps in one.
4. Repeat: 38‑40 cycles.
5. Final melt: 65 °C → 95 °C, 0.5 °C increments.
That recipe gives you a clean, single‑peak melt in most SYBR‑Green assays.
Real‑world tweak: high‑GC targets
If you’re amplifying a GC‑rich gene (think of a plant transcription factor), the standard 60 °C anneal often stalls. Raise the annealing temperature to 62‑64 °C and extend the time to 45 s. Adding 5 % DMSO to the master mix can also help melt stubborn secondary structures.
One biotech startup we’ve spoken to reported a 2‑cycle Ct improvement on a 200 bp GC‑rich amplicon after switching to a 62 °C anneal and 0.5 µL of 100 % DMSO.
Speed versus fidelity
Modern fast‑cycling thermal cyclers can crank the denaturation step down to 5 s and still keep efficiency. But if you’re using a standard Taq polymerase, a 15 s denature is safer – it guarantees complete strand separation, especially when you have complex cDNA pools.
For high‑throughput labs that need both speed and reliability, consider a master mix designed for probe‑based detection, like Jena Bioscience’s SCRIPT RT‑qPCR ProbesMaster high‑ROX. The mix pairs a thermostable reverse transcriptase with a hot‑start polymerase, and it even includes a passive ROX reference dye for built‑in baseline normalization.
Expert tip: “hot‑start” matters
Hot‑start polymerases stay inactive until the first 95 °C hit. This prevents primers from extending during the initial warm‑up, dramatically cutting primer‑dimer formation. If you notice a baseline fluorescence rise in no‑template controls, switch to a hot‑start mix.
Quantabio’s qScript XLT One‑Step RT‑qPCR ToughMix bundles a hot‑start enzyme with a reverse transcriptase that tolerates 55 °C, letting you run the entire reaction in a single tube with excellent specificity.
Checklist before you hit “Start”
- Verify primer Tm and set annealing 2‑3 °C below the lowest Tm.
- Confirm the polymerase’s recommended extension time (usually 30 s per 100 bp).
- Program a melt curve to catch nonspecific products.
- Use the same ramp rate for all cycles – consistency beats speed.
- Record the exact program in your lab notebook; reproducibility starts with documentation.
And finally, don’t forget to run a “no‑RT” control side by side. If you see amplification there, you still have genomic DNA lurking – a second DNase treatment is the quick fix.
With the right temperatures, cycle numbers, and a few smart tweaks, you’ll turn that tiny cDNA batch into a robust signal that tells you exactly how much gene expression you’re looking at.
Step 5: Data Analysis & Interpretation – Making Sense of Ct Values
After you’ve finally watched those curves climb, the next question is: what do those numbers actually mean for your experiment?
That moment when the machine spits out a Ct (threshold cycle) and you wonder if 22 is good, bad, or just… confusing, is the exact spot we want to demystify.
What is a Ct value, anyway?
A Ct is simply the cycle at which the fluorescence crosses a preset threshold. The lower the Ct, the more starting template you had; a higher Ct means fewer copies.
Think of it like a race: the first runner to reach the finish line (the threshold) wins. If your sample is a sprinter, it finishes early (low Ct). If it’s a marathoner, it takes longer (high Ct).
Quick sanity check
- Are your no‑template controls flat? Anything Ct ≤ 35 in a NTC usually signals contamination.
- Do technical replicates differ by less than 0.5 cycles? Bigger gaps often point to pipetting errors.
- Is the melt curve clean? Multiple peaks mean you amplified more than one product.
These three quick eyes‑tests can save you hours of head‑scratching later.
Step‑by‑step: From raw Ct to meaningful fold change
1. Average the replicates. Take the mean Ct for each gene in each condition. If you have three wells, add them up and divide by three.
2. Calculate ΔCt. Subtract the Ct of your housekeeping gene (the internal control) from the Ct of your target gene. This normalizes for any variation in input cDNA.
3. Calculate ΔΔCt. Subtract the ΔCt of your control sample from the ΔCt of your experimental sample. This tells you how the expression changed relative to the baseline.
4. Convert to fold change. Use the equation 2^-ΔΔCt. A result of 1 means no change; 2 means a two‑fold increase; 0.5 means the expression dropped by half.
If you need a refresher on each of these steps, the Bitesize Bio guide walks through the double‑delta Ct method in plain language.
Common pitfalls and how to dodge them
‑ Ignoring primer efficiency. The 2‑fold assumption only holds when both primers amplify at ~100 % efficiency. Run a standard curve once a month and adjust the equation if efficiency deviates.
‑ Using the wrong reference gene. A housekeeping gene that fluctuates under your treatment will skew everything. Validate at least two stable genes before committing.
‑ Over‑correcting. Some people try to “normalize” Ct values again after ΔΔCt—don’t do it. One round of normalization is enough.
Mini‑checklist before you export the data
- All NTCs are undetermined or Ct > 38.
- Technical replicates differ by ≤ 0.5 Ct.
- Reference gene is stable across conditions.
- Primer efficiency is between 90 % and 110 %.
- ΔΔCt calculation follows the 2^-ΔΔCt rule.
Crossing off each item gives you confidence that the fold‑change numbers you report are trustworthy.
Turning numbers into a story
Now that you have a fold‑change table, think about the story you want to tell. A 4‑fold up‑regulation of a stress‑responsive gene in drought‑treated plant leaves? That’s a headline. A modest 1.2‑fold shift in a housekeeping gene? Probably noise.
Plot the values as a bar graph with the control set to 1. Add error bars from the standard deviation of the replicates. This visual cue helps reviewers see the biological relevance at a glance.
And if you’re working in a clinical lab, remember that regulatory guidelines often require a minimum of three biological replicates and a clear description of the ΔΔCt method in the methods section.
Final tip from the shop floor
When you’re ordering new reagents or a thermal cycler, choose kits that provide a built‑in efficiency calculator or pre‑validated primer sets. It reduces the math you have to do and keeps the focus on the biology.
That’s it—your roadmap from raw Ct numbers to a polished, interpretable result. With these steps, you can turn a bewildering spreadsheet into a clear story that convinces your PI, your grant reviewers, or your client that the data are solid.
Step 6: Troubleshooting Common Issues – Keeping Your Run Smooth
We've gotten your RNA, made cDNA, and set up the qPCR. But what if the curves look spiky, the Ct values jump around, or you see a mysterious band on the melt curve? That's the moment every researcher dreads, and it's usually fixable with a systematic check.
1. Verify the RNA template first
Even a tiny amount of degradation can cripple reverse transcription. Grab a quick NanoDrop read – you want A260/280 ≈ 2.0 and A260/230 > 2.0. Then run a 1 % agarose gel; sharp 28S/18S bands mean you’re good. If you see smearing, rewind to the extraction step and consider a fresh DNase treatment.
2. Look for leftover inhibitors
Phenol, ethanol, or high salt can poison the RT enzyme. A common tell‑tale sign is a delayed Ct shift of > 3 cycles compared to a clean control. To rescue the reaction, do a 1:10 dilution of the RNA or run a spin‑column cleanup. In our experience with agricultural labs, a simple ethanol‑wash step recovered over 80 % of failed runs.
3. Check reverse transcriptase activity
Enzymes lose activity after a few freeze‑thaw cycles. If your Ct values are consistently high across all targets, swap the RT mix for a fresh aliquot. Warm the master mix to 37 °C for a minute before adding – that helps the enzyme wake up. The Thermo Fisher reverse transcription troubleshooting guide lists temperature‑sensitivity tips you can follow.
4. Primer‑dimer and specificity problems
When the no‑template control (NTC) lights up, you’re probably looking at primer‑dimer. Reduce primer concentration to 150 nM each, or redesign the pair to avoid 3′ complementarity. Running a melt curve is your best friend: a single sharp peak means clean amplification; multiple peaks scream “non‑specific product.”
5. Optimize thermal‑cycling parameters
Start with a gradient PCR ranging from 58 °C to 62 °C and pick the temperature that gives the lowest Ct with a clean melt. For GC‑rich templates, add 5 % DMSO and bump the annealing up by 2 °C. A 30‑second extension per 100 bp is usually enough for SYBR‑Green mixes.
6. Instrument health check
Aging optical heads can cause baseline drift. Run a calibration plate supplied by the manufacturer every month. If the fluorescence baseline is rising in every well, clean the optical window with lint‑free wipes and isopropanol. For high‑throughput cores, schedule a service visit at least twice a year.
7. Create a troubleshooting checklist
- RNA purity ≥ 2.0 (260/280) and no smear on gel.
- DNase on‑column step completed.
- Fresh RT enzyme, no more than three freeze‑thaws.
- Primer concentration 150‑200 nM, no 3′ complementarity.
- Annealing temperature 2‑3 °C below lowest primer Tm.
- Include NTC, no‑RT, and positive control in every run.
- Document cycling program, lot numbers, and any deviations.
When you hit a snag, walk through the list from top to bottom. Most problems resolve by the time you reach step four. If you still see trouble, consider running a serial dilution of your cDNA – a linear Ct drop confirms that the template, not the instrument, is at fault.
Remember, troubleshooting is less about “magic fixes” and more about systematic elimination. By treating each variable as a hypothesis, you’ll keep your runs smooth and your data reliable.
A quick tip many labs overlook: keep a log of every reagent lot number. When a mysterious drop appears, you can trace it back to a single batch.
Conclusion
We've walked through every reverse transcription pcr step—from pure RNA extraction to the final data read‑out—so you can see how each piece fits together.
Remember, the quality of your RNA sets the ceiling, the RT mix is the bridge, and the thermal cycler is the engine that turns a tiny copy into a measurable signal. If any one of those links is loose, the whole experiment wobbles.
What helps most in the long run? Treat every run like a mini‑experiment: log reagent lot numbers, run a calibration plate each month, and keep a simple checklist handy. Those habits have saved countless labs—whether a university core or a biotech startup—from late‑night troubleshooting.
In practice, you’ll find that a clean optical window, fresh reverse transcriptase, and an annealing temperature a couple of degrees below the lowest primer Tm will keep your Ct values tight and your melt curves clean.
So, what’s the next step? Grab the checklist we just outlined, give your equipment a quick visual check, and run that first sample with confidence. And if you ever need a reliable thermal cycler or high‑quality reagents, Shop Genomics has options that fit budgets of academic labs and CROs alike.
Keep iterating, stay curious, and let the data speak for you—your next successful RT‑PCR is just a few careful steps away.
FAQ
What are the most critical reverse transcription PCR steps I shouldn't skip?
Skipping any of the core reverse transcription PCR steps usually ends in a dead‑end experiment. First, always verify RNA purity – a 260/280 ratio around 2.0 tells you you’ve kept RNases at bay. Next, treat the sample with on‑column DNase; even trace genomic DNA can inflate Ct values. Finally, use fresh reverse transcriptase and set the RT incubation temperature exactly as the kit recommends. Those three checkpoints keep your cDNA clean and your curves reliable.
How do I choose the right primer design for reverse transcription PCR?
Good primers are the backbone of any RT‑PCR run, so spend a few minutes getting them right. Aim for 18‑24 bases, 40‑60 % GC, and a melting temperature between 58 °C and 62 °C; keep forward and reverse Tm within one degree. Design the amplicon to span an intron or sit on an exon‑exon junction – that way any contaminating genomic DNA shows up as a larger product on the melt curve. Running the sequences through a free tool like Primer‑BLAST lets you check for off‑target hits before you order.
What temperature should I use for the reverse transcription incubation?
The sweet spot for reverse transcription depends on the enzyme, but most modern kits work best around 50 °C for 30 minutes. That temperature is hot enough to melt secondary structures in GC‑rich RNA without denaturing the reverse transcriptase. If you’re using a classic M‑MLV enzyme, drop it to 42 °C and extend the incubation to an hour. Always follow the manufacturer’s sheet – a few degrees off can shave two or three Ct cycles off your signal.
Why is a no‑RT control important and how do I interpret it?
A no‑RT control tells you whether residual genomic DNA is sneaking into your qPCR. Run the same reaction without adding reverse transcriptase; any amplification you see means the DNase step didn’t clear the template completely. If the no‑RT shows a Ct > 38 or stays undetermined, you’re good to go. But a low Ct, say 25, signals you need another DNase round or a cleaner RNA prep before you trust your gene‑expression numbers.
How can I troubleshoot high Ct values in my RT‑PCR run?
When Ct values creep up, start by checking RNA integrity – a smeared gel or low A260/280 ratio means you’ve got degradation or contaminants. Dilute the RNA 1:10; if the Ct drops, inhibitors were likely present. Verify that the reverse transcriptase hasn’t been through too many freeze‑thaws, and make sure you’re adding the enzyme last, right before the brief spin. Finally, confirm the annealing temperature is a couple of degrees below the lowest primer Tm – too low can cause non‑specific binding and push Ct higher.
What checklist should I use before starting a reverse transcription PCR experiment?
Here’s a quick pre‑run checklist that keeps most labs from scrambling: 1) Verify RNA purity (A260/280 ≈ 2.0, A260/230 > 2.0) and run a quick gel. 2) Perform on‑column DNase and note the lot number. 3) Thaw reverse transcriptase on ice, avoid more than three freeze‑thaws. 4) Prepare primer mixes at 50 ng/µL and double‑check concentrations. 5) Set the RT incubation temperature per the enzyme’s spec sheet. 6) Program the qPCR cycling conditions and include NTC, no‑RT, and a positive control. Tick each box and you’ll walk into the run with confidence.


