
Ever stared at a blank membrane after a western blot and thought, “Where did my proteins go?” You’re not alone – that moment of doubt hits every researcher, whether you’re in a university lab or a biotech startup.
What makes the difference between a clean, crisp band and a disappointing smear is how carefully you follow each of the western blot steps. It’s not magic; it’s a series of tiny decisions that add up, like choosing the right coffee beans for that perfect morning brew.
First, you’ll want to confirm your sample concentration. A quick Bradford assay or BCA test tells you if you’re loading too much or too little protein. In our experience, adjusting the concentration to 1‑2 µg/µL cuts background noise dramatically.
Next comes gel casting. Imagine you’re pouring batter into a pan – too thin and it spreads, too thick and it stays uneven. A 10 % acrylamide gel works well for most 30‑80 kDa proteins. Remember to degas the solution for a minute; trapped bubbles create those dreaded “ghost” bands.
When you load the samples, use fresh loading dye and a low‑heat pipette tip to avoid introducing bubbles. A junior researcher at a CRO once told us that labeling each lane with a clear, colour‑coded sticker saved hours of confusion later. (That’s where a reliable label‑printing service can be handy.)
During electrophoresis, keep the voltage steady – 120 V for 1‑1.5 hours is a good rule of thumb. If the run stalls, check the buffer’s pH; it should sit around 8.3. A quick pH strip can save you from a ruined membrane.
Transfer is where many get stuck. Set the transfer time based on membrane type: 1 hour at 100 V for PVDF, or 30 minutes at 30 V for nitrocellulose. Our lab technicians swear by pre‑chilling the transfer buffer – it improves protein binding and reduces background.
Finally, block the membrane and add primary and secondary antibodies. Use a blocking solution with 5 % non‑fat milk or BSA; the choice depends on your antibody’s host species. Incubate at 4 °C overnight for the best signal‑to‑noise ratio.
Want a step‑by‑step walkthrough that ties all these tips together? Check out How to Run a Western Blot: A Step‑by‑Step Guide for Beginners for a friendly, video‑backed guide that walks you through each stage.
Take a moment now to write down the exact voltage, time, and buffer composition you’ll use for your next run. That simple checklist often turns a shaky experiment into a reproducible success.
TL;DR
Mastering western blot steps means prepping samples, running a clean gel, transferring proteins efficiently, and blocking before antibody detection.
Follow our checklist—set voltage, time, and buffer pH, chill transfer buffer, and incubate antibodies overnight—to turn shaky experiments into reproducible results for any lab, big or small, in your lab today.
Step 1: Sample Preparation
Before you even think about loading a gel, you’ve got to get your lysate right. That moment when you stare at a cloudy tube and wonder if you missed a step? We’ve all been there, especially in busy CRO labs where the clock’s always ticking.
Start by keeping everything ice‑cold. Chill your centrifuge buckets, pre‑chill your lysis buffer, and work in a cold room if you can. The colder you stay, the less protease activity you’ll see later on.
Pick a lysis buffer that matches your downstream goal. For most 30‑80 kDa proteins, a simple RIPA buffer with protease inhibitors does the trick. If you’re dealing with membrane proteins, add a mild detergent like NP‑40. And don’t forget to vortex gently – you want to break cells, not shear your protein.
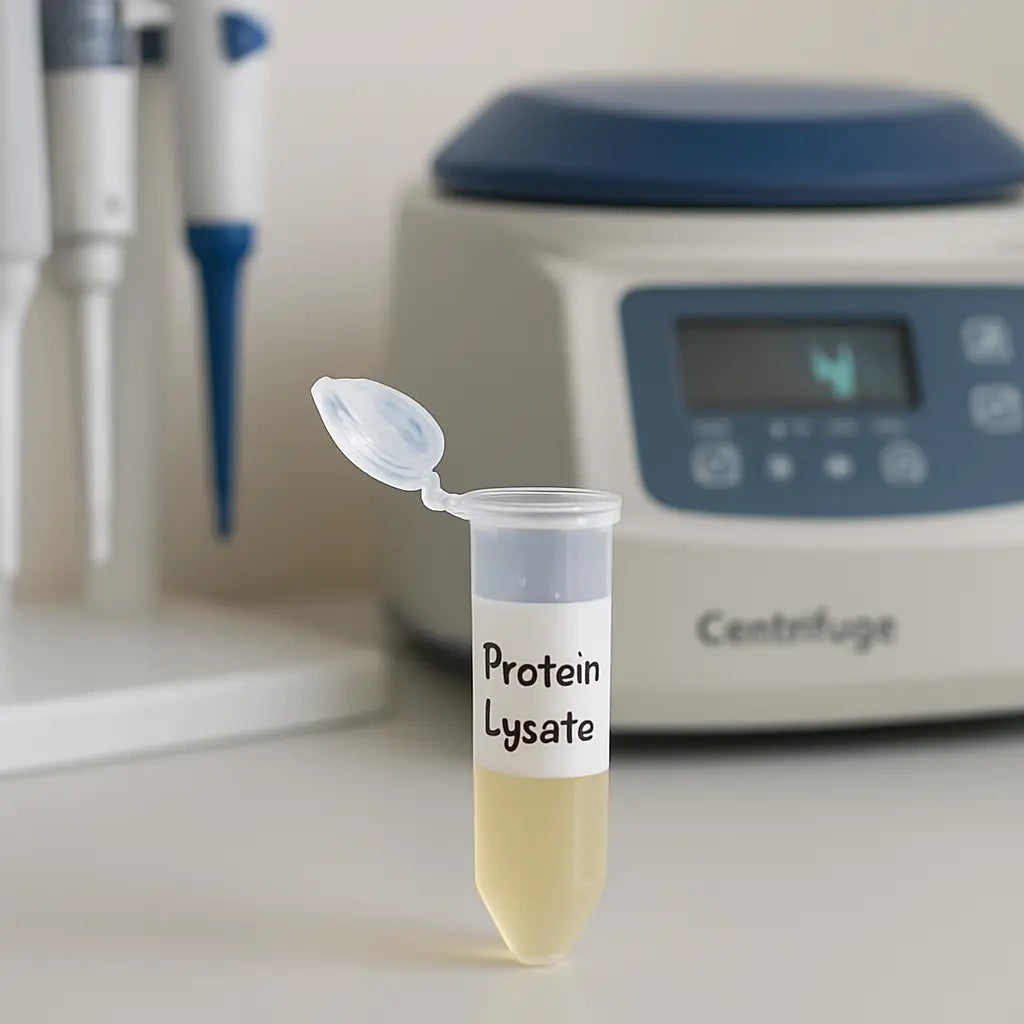
Once you’ve lysed the cells, give the mixture a quick spin at 12,000 g for 10 minutes. The pellet is debris; the supernatant is your precious protein soup. Transfer the supernatant to a fresh, pre‑chilled tube.
Now comes the concentration check. A Bradford or BCA assay is quick, but the BCA is a bit more forgiving if you have detergents around. Aim for 1–2 µg/µL – that range usually gives you clean bands without overloading the gel.
Tip: If the assay reads low, you can concentrate the sample with a centrifugal filter (10 kDa cutoff works for most). Just remember to rinse the filter with buffer to avoid carry‑over of salts that could affect electrophoresis.
Next, add your loading dye. Fresh dye is key; old dye can precipitate and create bubbles. Mix 1 µL of 5× dye per 4 µL of sample, then heat at 95 °C for 5 minutes. That brief heat denatures the proteins and adds a neat blue marker for tracking.
And here’s a little sanity‑check: before you load, spin the sample one more time for 1 minute at max speed. It clears out any remaining foam that could ruin your lane.
We like to keep a small “sample map” on a sticky note – lane 1 is the ladder, lane 2 is your control, lanes 3‑6 are treatments. Writing it down prevents that “oops, I loaded the wrong tube” panic later.
Ready to load? Use low‑retention tips and avoid air bubbles. Press the tip against the well wall, then gently release the sample. If a bubble forms, a quick tap on the side of the gel can push it out.
So, what should you double‑check before you move on to electrophoresis? Temperature, concentration, and that you’ve labeled everything clearly. A quick glance now saves hours of troubleshooting later.
After the video, take a moment to write down the exact buffer composition you used – especially the pH. A pH of 7.4–8.0 is ideal for most western blots; if it drifts, you’ll see smeared bands later.
Finally, store your prepared samples on ice if you’re running the gel within an hour, or at -20 °C for longer holds. Thaw them gently on ice before loading; no rush‑heat‑up here.
That’s the whole sample‑prep story in a nutshell. Get these basics right, and the rest of the western blot steps – gel casting, transfer, blocking – will flow much smoother.
Step 2: Gel Casting
Alright, you’ve got your samples quantified and ready – now it’s time to turn that liquid into a solid road for proteins to travel.
Gel casting feels a lot like pouring batter for a cake. Too thin and the batter spreads; too thick and it never rises. The sweet spot for most 30‑80 kDa proteins is a 10 % acrylamide solution, but you can tweak the percentage if your target is smaller or larger.
Gather your ingredients
Grab the following: acrylamide/bis‑acrylamide mix, 1.5 M Tris‑HCl (pH 8.8 for the resolving gel), 10 % SDS, distilled water, ammonium persulfate (APS) and TEMED. If you’re buying in bulk, Shop Genomics stocks high‑purity reagents that keep batch‑to‑batch variability low, which is a lifesaver for reproducible western blot steps.
Measure everything on a clean bench. A common mistake is to add too much water and end up with a floppy gel that tears when you remove the plate. For a 10 % gel, the recipe for a 5 mm thick slab in a mini‑gel cassette looks like this:
- 4 mL 30 % acrylamide/bis‑acrylamide
- 2.5 mL 1.5 M Tris‑HCl (pH 8.8)
- 0.1 mL 10 % SDS
- 2.4 mL distilled water
- 50 µL 10 % APS
- 5 µL TEMED
Mix the liquid components first – acrylamide, Tris, SDS and water. Stir gently; you don’t want to introduce bubbles.
Degas the solution
Now, pop the tube into a vacuum desiccator for about a minute. Those tiny air pockets become the “ghost” bands you hate seeing on a membrane later. If you don’t have a desiccator, a quick 30‑second tap on the bench and a brief pause usually does the trick.
Once the solution looks clear, add APS and TEMED. These are the polymerisation triggers, so work fast. You’ll notice the mixture turning cloudy within seconds – that’s the gel forming.
Pour the gel
Place the glass plate on a level surface. Using a pipette, fill the space between the plate and the spacer with the resolving gel solution. Stop just a millimetre shy of the top; you’ll add the stacking gel later.
Insert a clean comb, making sure the teeth are fully submerged. If any bubbles cling to the comb teeth, gently tap the side of the plate or use a small needle to pop them.
Seal the plate with a lid or cling film to keep dust out. Let it sit at room temperature for 30–45 minutes. You’ll see the gel solidify into a uniform slab – no more wobbling when you try to lift it.
Cast the stacking gel
While the resolving gel sets, prepare a 4–5 % stacking gel using the same recipe but with 0.5 M Tris‑HCl (pH 6.8) and less acrylamide. Pour this thin layer on top of the cured resolving gel, pop the comb back in, and let it polymerise for another 15 minutes.
When the gel is fully set, carefully remove the comb. You’ll notice a nice, clean well – the perfect pocket for your loaded samples.
Tips to avoid common pitfalls
Ever wondered why your first run gave a smeared ladder? Most of the time it’s a bubble that slipped in during casting. A quick visual check after the gel cures can save you a whole experiment.
Another hiccup: the gel detaches from the glass plate. That usually means the plate wasn’t dry enough before pouring, or the APS concentration was too low. A dry plate and fresh APS make the bond rock solid.
Finally, label the gel cassette with the percentage and date. In busy core facilities, that tiny note prevents mix‑ups when dozens of gels line the bench.
Now you’ve got a ready‑to‑run gel, and you’re one step closer to clean, crisp bands. The next western blot steps will flow much smoother when the gel is cast right the first time.
Step 3: Electrophoresis
Setting up the chamber
Now that your gel is cured and the wells are ready, it’s time to slide the cassette into the electrophoresis tank. First, rinse the inner walls with a little running buffer – that little rinse gets rid of dust that can spark a weird current.
Place the gel cassette snugly, making sure the wells face the black (cathode) side. Most tanks have a small arrow on the side; follow it so the proteins will migrate toward the positive (anode) end.
Fill the chamber with 1× running buffer until the gel is just covered. If the buffer looks cloudy, give it a quick swirl – a clear solution means the ions are ready to carry your proteins.
Choosing voltage and run time
Here’s where the magic (or the mess) happens. A good rule of thumb for a standard 10 % gel is 120 V for 1 – 1.5 hours. You can start at 80 V for the first 10 minutes to let the proteins stack nicely, then crank it up.
Why the two‑step approach? The low‑voltage start prevents the stacking gel from overheating, which can cause “smiling” bands later on. Once the proteins have packed tightly, the higher voltage pushes them through the resolving gel at a steady pace.
If you’re using a mini‑gel system, the voltage may need to be a bit lower – check the manufacturer’s manual for the exact range. In our experience, staying within the recommended window saves you from a burnt gel and a ruined blot.
Monitoring the run
Keep an eye on the dye front. Most labs add bromophenol blue to the loading buffer; when it reaches about two‑thirds of the gel length, you’re almost done. If the front runs too fast and hits the bottom edge, shut the power off immediately – that usually means you set the voltage too high.
While you’re waiting, use the pause to double‑check your downstream steps: Is the transfer buffer ready? Have you labelled the membrane? A quick mental checklist at this stage prevents a frantic scramble later.
Troubleshooting common hiccups
Seeing a faint smear? It could be a bubble trapped under the gel. Gently tap the side of the tank or, if you have a syringe, pop the bubble with a tiny needle.
Band distortion? Often it’s a pH issue. The running buffer should sit at pH 8.3; a quick pH strip can save you from a whole night of re‑running.
Unexpected “smiling” bands – the top of the gel looks brighter than the bottom – usually mean the gel overheated. Lower the voltage or run a shorter initial low‑voltage phase.
Wrapping up the electrophoresis step
When the dye front stops moving, turn off the power and carefully lift the cassette out. Avoid pulling the gel out by the comb; instead, lift from the sides to keep the slab intact.
Give the gel a quick rinse with fresh buffer, then you’re ready to move on to the transfer step. A clean run here means clearer bands later, and that’s the goal for every researcher – whether you’re in a university lab, a CRO, or a biotech startup.
Take a moment now to note the voltage, run time, and any observations in your lab notebook. Those details become the foundation of a reproducible western blot protocol you can share with colleagues or include in a methods section.
Step 4: Transfer Methods Comparison
Now that the gel is clean and your samples are ready, the real test begins: moving those proteins onto a membrane. Do you ever wonder why some labs swear by a 1‑hour wet blot while others finish in five minutes with a dry system? The answer lies in the transfer method you pick, and each one has its own quirks.
Wet (tank) transfer – the classic workhorse
Wet transfer is the “old‑school” approach most textbooks teach. You soak the gel in transfer buffer, sandwich it between filter paper and a nitrocellulose or PVDF membrane, then plunge the whole stack into a tank filled with the same buffer. The electric field pulls proteins out of the gel and onto the membrane.
Step‑by‑step:
- Equilibrate the gel in transfer buffer for 10 minutes.
- Pre‑wet PVDF with methanol, then rinse with water.
- Assemble the sandwich (filter‑gel‑membrane‑filter) on a rubber spacer.
- Set the power supply to 80 V constant voltage for 1 hour (or 0.5 A constant current).
- Cool the tank with ice or a circulating water bath to avoid overheating.
Why it works: the large volume of buffer keeps the system stable, giving transfer efficiencies of 80–100 % for proteins 14–116 kDa (Thermo Fisher’s overview of western blot transfer methods). It’s especially reliable for high‑molecular‑weight targets because the gel stays hydrated.
But the downside is time and hands‑on effort – you’ll need a tank, a lot of buffer, and at least an hour of run time.
Semi‑dry transfer – speed with a little compromise
Semi‑dry systems place the gel‑membrane sandwich between two plate electrodes, and the buffer is limited to what’s soaked into the filter papers. Because the current travels straight through the gel, you can finish most 30‑kDa to 150‑kDa proteins in 10–30 minutes.
Quick checklist:
- Cut filter paper and membrane to the exact gel size; no overhangs.
- Fully equilibrate the gel and membrane in the same transfer buffer you’ll use for the run.
- Set the power supply to 10–25 V constant voltage (or 0.2–0.4 A constant current).
- Run for 10 minutes for small proteins, up to 30 minutes for larger ones.
- Keep an eye on temperature; some rigs have built‑in cooling.
Real‑world tip: a CRO in a biotech startup told us that swapping the standard 0.45 µm nitrocellulose for a 0.2 µm PVDF in a semi‑dry run rescued a faint 25‑kDa band that kept slipping through.
What you lose: semi‑dry transfer can be less efficient for proteins >300 kDa, and the limited buffer means you have to optimise methanol concentration carefully.
Dry transfer (iBlot) – the “press‑button” solution
Dry transfer kits like the iBlot 3 eliminate bulk buffer altogether. Instead, a proprietary gel stack saturated with ions sits between the gel and membrane, and a short high‑current pulse (often <5 minutes) does the work.
To give it a try:
- Place the gel on the supplied transfer stack, membrane on top, and close the cassette.
- Select the preset program that matches your molecular weight range (e.g., “Medium‑Range” for 25‑100 kDa).
- Press start – the instrument handles voltage, current, and timing automatically.
- When the timer ends, remove the membrane and proceed to blocking.
What researchers love: virtually no buffer prep, tiny footprint, and reproducible results that rival wet transfer. What to watch: the cost per run is higher, and very large proteins (>150 kDa) sometimes need a follow‑up wet transfer to achieve full recovery.
Choosing the right method for your lab
Think about three practical questions before you click “run”:
- How much time do you have? If you’re on a tight schedule, semi‑dry or dry may save the day.
- What size proteins are you after? For >200 kDa, stick with wet or add a longer wet step.
- What’s your budget for consumables? Dry kits are convenient but pricey; wet transfer just needs buffer and filter paper.
| Method | Typical Time | Best For | Key Pros / Cons |
|---|---|---|---|
| Wet (tank) | 1 h – overnight | High‑MW proteins, reproducibility | High efficiency, but time‑consuming; requires buffer tank. |
| Semi‑dry | 10–30 min | Mid‑range MW (30‑150 kDa) | Fast, less buffer; may lose very large proteins. |
| Dry (iBlot) | 3–5 min | Rapid screening, low‑MW targets | Convenient, no buffer prep; higher consumable cost. |
Bottom line: there’s no one‑size‑fits‑all answer. In our experience at Shop Genomics, we’ve seen academic labs lean on wet transfer for robustness, while CROs often adopt semi‑dry or dry systems to meet tight project timelines. Whatever you choose, jot down the voltage, time, and buffer composition in your notebook – those little details become the secret sauce for reproducible western blot steps.
Step 5: Blocking
Okay, you’ve just transferred your proteins onto the membrane – now comes the part that most people skim over, but it’s the secret sauce for a clean blot.
Why blocking matters
The membrane is a protein‑magnet; nitrocellulose and PVDF love to grab anything that wanders by. If you skip blocking, your detection antibodies will stick to empty spots and you’ll end up with a ghostly background that drowns out the real signal.
Think of it like spreading butter on toast before adding jam – the butter blocks the dry spots so the jam stays where you want it.
Choosing a blocker
Most labs start with 5 % non‑fat milk diluted in either TBS or PBS. Milk is cheap, easy to make, and works great for many rabbit or mouse antibodies.
But if you’re using a phospho‑specific antibody, milk’s casein can cross‑react and create extra bands. In that case, 2–5 % BSA (bovine serum albumin) in TBS is a safer bet.
For especially stubborn backgrounds, commercial formulations like StartingBlock™ or other proprietary blockers can give you that extra boost, as Thermo Fisher notes in their blocking‑buffer guide (Thermo Fisher).
Buffer base: TBS vs PBS
Most blocking solutions sit in Tris‑buffered saline (TBS) because phosphate in PBS can inhibit alkaline phosphatase (AP) detection systems. If you’re using a HRP‑based secondary, either buffer works, but keep the pH around 7.4.
One trick we’ve seen labs in academic cores swear by: add 0.05 % Tween‑20 to the blocking buffer. It reduces non‑specific stickiness without stripping away your primary antibody – just don’t go above 0.2 % or you’ll start washing the signal away.
How long to block?
Typical blocking times range from 30 minutes at room temperature to an overnight incubation at 4 °C. If you’re in a hurry, a 30‑minute block with gentle rocking usually does the job. For delicate antigens or when you’re using low‑affinity antibodies, an overnight block gives the blocker more time to coat every nook and cranny.
Pro tip: prepare a fresh batch of blocker each week. Stale milk develops proteins that can precipitate and actually increase background.
Step‑by‑step checklist
- Warm your blocking solution to room temperature (or 4 °C for overnight).
- Fully submerge the membrane in the blocker; make sure no air bubbles cling to the surface.
- Rock gently on a low‑speed orbital shaker for 30 minutes (or seal the container and place on the bench overnight).
- After blocking, discard the solution and rinse briefly with TBS‑Tween (0.1 % Tween‑20) to remove excess blocker.
- Proceed to primary antibody incubation immediately, or store the blocked membrane in blocking buffer at 4 °C for up to 24 hours.
Does that sound like a lot? It’s actually the easiest part of the western blot steps – you just need a timer and a bit of patience.
Troubleshooting common background issues
If you still see speckles after probing, check the detergent concentration. Too much Tween can strip weak antibodies; too little lets stray proteins stick.
Another hidden culprit is the quality of your water. Hard water leaves mineral deposits that show up as faint bands under chemiluminescence. Use filtered or deionised water for all buffers.
Lastly, remember that some antibodies simply don’t play well with milk. Switch to BSA or a commercial blocker, and you’ll often see the background drop dramatically.
So, what’s the next move? Grab your favorite blocker, set a timer, and give those empty membrane spots a good “coat.” A solid block will make the difference between a blurry mess and a crisp, interpretable blot.
Step 6: Detection and Analysis
Now the membrane is ready, but the real story starts when you actually see light on the blot. If you’ve ever stared at a blank film wondering why nothing showed up, you know the frustration.
Pick the right detection chemistry
Most labs lean on chemiluminescence because it’s sensitive enough to catch even picogram‑level proteins. The principle is simple: an enzyme‑conjugated secondary antibody (usually HRP) reacts with a luminol‑based substrate and emits photons that your camera or film records.
Thermo Fisher explains that chemiluminescent substrates give a large linear response range and let you re‑probe the same blot, which is a huge time‑saver. If you’re working with phospho‑specific antibodies, you might swap milk for BSA in the blocking step, but the detection chemistry stays the same.
Mix and apply the substrate
Most commercial kits come as two‑component solutions – a peroxide buffer and a luminol enhancer. Equal parts are mixed right before use; the reaction is short‑lived, so have your membrane in hand.
Tip: work in low‑light and keep the substrate on ice until you’re ready. A gentle rock for 30‑60 seconds ensures the whole membrane is soaked without creating bubbles that could mask bands.
Capture the signal
Here’s where the rubber meets the road. If you’re still using X‑ray film, expose a series of strips (5 s, 15 s, 1 min) to find the sweet spot. Digital CCD cameras let you tweak exposure to the thousandth of a second, which means you can see faint bands without over‑exposing the strong ones.
Remember to check the signal decay curve: a good substrate will peak around five minutes and then plateau for a few hours. If the light fades in seconds, you probably added too much HRP or the substrate was old.
Quick checklist
- Prepare fresh substrate just before use.
- Keep the membrane wet, but avoid excess liquid pooling.
- Set the camera to auto‑exposure or test a range of times.
- Save the raw image files (TIFF) for downstream quantification.
Does this feel like a lot of fiddling? Think of it like tuning a guitar – a small turn can change the whole tone.
Analyze the blot
Once you have a clean image, the next step is quantification. Load the file into a free tool like ImageJ or a lab‑licensed software package. Draw a rectangle around each band, measure the integrated density, and subtract the background measured from an empty region of the membrane.
For relative comparison, normalize each target band to a loading control (e.g., β‑actin) that you probed on the same blot. If you need absolute amounts, run a serial dilution of a known protein standard on the same gel and build a calibration curve.
Pro tip for CROs and biotech labs: keep a master spreadsheet where you log antibody dilutions, substrate lot numbers, exposure times, and the resulting signal intensity. Over time you’ll spot patterns – maybe a particular HRP substrate works better for low‑abundance targets, or a certain secondary antibody gives a cleaner background.
And what about re‑probing? Because chemiluminescent reagents can be stripped off, you can wash the membrane with mild stripping buffer, re‑block, and probe for another protein. Just be gentle; harsh stripping can strip away your original proteins.
Finally, archive your data. Save the original image, the processed version, and a PDF of the analysis notes. When you write up the methods section, include the substrate name, lot number, exposure time, and the imaging system you used – reviewers love those details.
That’s the last leg of the western blot steps. With a solid detection plan, you’ll turn those faint bands into clear, publishable results.
Conclusion
After you’ve walked through each western blot step, the whole process starts to feel like a familiar routine rather than a mystery.
Do you remember the first time you saw a faint band and thought, “What did I miss?” That moment is what drives us to fine‑tune every buffer, voltage, and incubation time.
Key takeaways
• Sample prep matters – a clean lysate gives you clean lanes.
• Gel casting is the foundation; bubbles are the enemy.
• Keep an eye on voltage and run time; the dye front tells the story.
• Choose the transfer method that fits your protein size and schedule.
• Block wisely and pick the right detection chemistry for crisp signals.
In our experience working with academic labs and CROs, a quick checklist at the start of each run saves hours of re‑running. Jot down voltage, buffer pH, and antibody lot numbers – those tiny notes become your safety net.
So, what’s the next move? Grab your notebook, write down the exact parameters for today’s blot, and treat the checklist like a lab‑partner you can trust.
When you stick to these western blot steps, reproducibility becomes second nature, and you’ll spend less time troubleshooting and more time interpreting real data.
FAQ
What are the essential western blot steps I shouldn’t skip?
Every successful blot starts with clean sample prep, then gel casting, electrophoresis, transfer, blocking, antibody incubation, and finally detection. Skipping any one of these creates gaps – for example, a sloppy block will drown your signal in background. Treat each step like a mini‑checklist: measure protein concentration, verify gel polymerisation, watch the dye front, confirm membrane wetting, and use fresh blocking buffer. Those tiny habits keep the whole workflow reproducible.
How long should I block my membrane, and does temperature matter?
Most labs block for 30 minutes at room temperature with gentle rocking. If you have time, an overnight block at 4 °C gives the blocker more time to coat every nook, especially for low‑abundance targets. Just remember: milk works for most antibodies, but switch to BSA if you’re probing phospho‑proteins. The key is consistency – note the exact time and temperature in your notebook so you can repeat it later.
Why does my transfer sometimes give faint bands, and how can I fix it?
Faint bands usually mean incomplete protein transfer. Check three things: buffer composition (add a touch more methanol for PVDF), voltage/time (100 V for 1 hour works for most 10 % gels), and temperature (keep the tank cool to avoid overheating). If you’re using a semi‑dry system, make sure the filter papers are fully soaked. A quick test run with a pre‑stained ladder can reveal whether the problem is the transfer or the gel.
Can I reuse the same gel for multiple blots?
In theory you could, but each run depletes protein and introduces bubbles, so reproducibility drops fast. Most labs cast a fresh gel for every experiment, especially when comparing treatment groups. If you’re on a tight budget, run a duplicate gel side‑by‑side and keep one as a backup. Just label it clearly and store it at 4 °C for no more than a day.
What’s the best way to choose between wet, semi‑dry, and dry transfer methods?
Think about protein size, time, and budget. Wet transfers are reliable for high‑molecular‑weight proteins (>200 kDa) but need a tank and buffer. Semi‑dry is faster (10‑30 minutes) and works well for 30‑150 kDa targets, though you might lose the biggest proteins. Dry kits are the quickest (3‑5 minutes) and great for screening, but the consumable cost is higher. Match the method to your project’s priority.
How do I avoid background noise when using chemiluminescent detection?
Background often comes from excess secondary antibody or old substrate. Dilute the secondary to the manufacturer’s recommended range (usually 1:5,000–1:10,000) and wash the membrane with TBS‑Tween (0.1 % Tween‑20) three times, 5 minutes each. Prepare the substrate fresh, keep it on ice, and apply it just before imaging. If you still see speckles, a quick 5‑minute soak in 0.05 % Tween‑20 during the block can help.
Is it okay to store a blocked membrane for later use?
Absolutely – you can keep a blocked membrane in blocking buffer at 4 °C for up to 24 hours without losing performance. For longer storage, wrap it in a sealed bag with a bit of fresh blocking solution and freeze at –20 °C; just thaw slowly and re‑block briefly before adding primary antibody. This trick saves time when you’re juggling multiple experiments in a busy lab.


