
Ever stared at a price list for a UV‑Vis spectrophotometer and felt your head spin? You’re not alone – the numbers can jump from a few hundred dollars to six‑figures, and the reasons behind that spread aren’t always obvious.
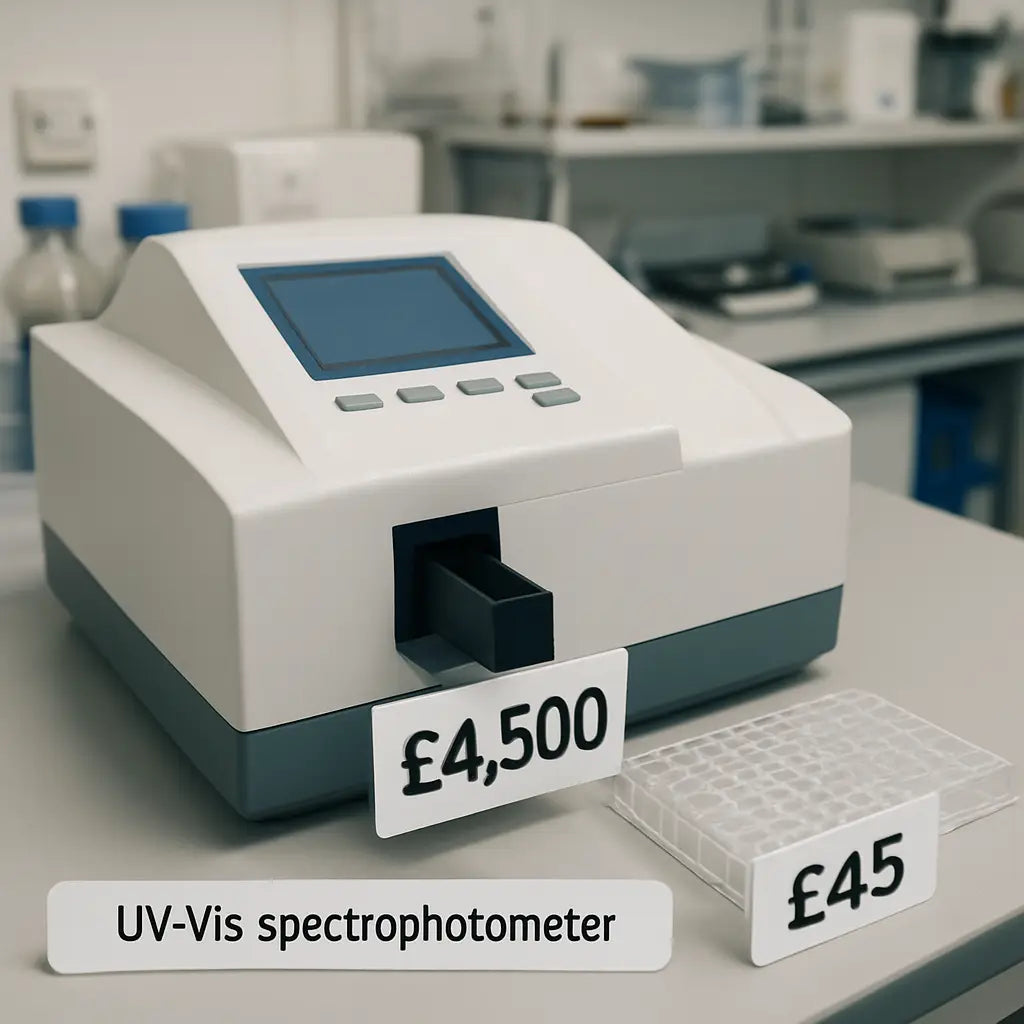
What we’ve seen in labs across universities, biotech start‑ups, and government research centres is that the price hinges on three things: sample volume capacity, wavelength range, and built‑in accessories like cuvette ports or microplate modules. A small‑bench model that reads 190‑1100 nm in a single cuvette can sit around $400, while a high‑throughput microplate reader with temperature control can easily top $10,000.
Take the Accuris™ MR9610 UV‑Vis Microplate Reader, for example. It starts at $367.78 and gives you the flexibility of both cuvette and 96‑well plate formats. That price point makes it a realistic option for a midsize academic lab that needs to run dozens of assays daily without blowing the budget.
On the other side of the spectrum, a research team studying protein‑DNA interactions might opt for a spectrophotometer with a built‑in fluorometer add‑on. Those hybrid units often carry a premium because they combine two measurement techniques in one chassis, cutting down on space and calibration headaches.
So, how do you decide what you really need? First, list the sample types you’ll measure most often – liquids, solids, or micro‑volumes. Second, think about throughput: are you running a few samples a week or a full plate every hour? Third, check what accessories are already in your lab; sometimes a simple cuvette holder is enough, and you can skip the pricey plate reader upgrade.
Here’s a quick three‑step checklist you can use right now:
- Define the wavelength range required for your assays.
- Calculate the maximum number of samples per run.
- Match those needs against the price tiers you see on product pages.
When you line up your needs with the price tiers, you’ll notice a sweet spot – typically between $500 and $2,000 – where most labs get reliable performance without paying for features they’ll never use.
And remember, budgeting isn’t just about the sticker price. Factor in service contracts, calibration kits, and even the cost of lab‑form supplies. Those little expenses add up, but they keep the instrument humming accurately for years.
Bottom line: by breaking down the features, matching them to your workflow, and adding up the hidden costs, you can navigate the UV‑Vis spectrophotometer price landscape with confidence.
TL;DR
Choosing the right uv vis spectrophotometer price means matching wavelength range, sample throughput, and needed accessories to a budget that usually lands between $500 and $2,000 for most labs.
Use our three‑step checklist—define range, calculate max samples, compare tiers—to pinpoint a cost‑effective model and avoid hidden fees like service contracts or calibration kits.
What Determines the uv vis spectrophotometer price?
Ever wonder why two UV‑Vis spectrophotometers with the same wavelength range can cost half as much as each other? It’s not magic – it’s a handful of practical choices that add up.
Wavelength range and detector technology
First, the range you need matters. A basic 190‑1100 nm unit with a simple photodiode can sit around £400‑£800. Push the range into the deep‑UV (<200 nm) or add a dual‑beam design, and you’re looking at a three‑figure jump because the optics get more specialised and the detector more sensitive.
Sample handling – cuvettes vs plates
If your lab runs a handful of cuvette measurements each week, a bench‑top model will do. But if you’re cranking out 96‑well plates every hour, you’ll need a microplate reader add‑on, a motorised tray, temperature control, and that extra hardware can easily double the price. That’s why the Accuris™ MR9610 UV‑Vis Microplate Reader starts at a modest £300 and scales up with accessories.
Software, connectivity and extras
Modern units often bundle software licences, USB or Ethernet interfaces, and even cloud‑based data logging. A licence that lets you export data directly to your LIMS saves time, but each licence is a separate line item. Ask yourself if you really need a fancy dashboard or if a simple spreadsheet will do.
So, what should you ask yourself before you click “add to cart”?
Practical checklist
- Do you need deep‑UV? If not, stick to the standard range.
- How many samples per run? Cuvette‑only or plate‑reader?
- Do you need built‑in temperature control for kinetic assays?
- Will you use the instrument for both absorbance and fluorescence?
Answering these questions narrows the field and stops you from paying for features you’ll never use.
When you start budgeting, remember the hidden costs: calibration standards, service contracts, and consumables. A lab that forgets to factor in the price of labelling stickers for sample tubes might be surprised later. Speaking of stickers, you might find custom lab labels at JiffyPrintOnline useful for keeping your workflow tidy.
Notice how the video walks through a typical pricing breakdown – it’s a handy visual if you’re a visual learner.
Another angle to consider is staffing. A high‑end spectrophotometer might need a dedicated technician or at least someone trained in routine maintenance. If you’re hiring, Get Recruited specialises in placing scientific staff, which can smooth the transition when you bring a new instrument into the lab.
Bottom line: the uv vis spectrophotometer price is a sum of its parts – optics, sample handling, software, and support. By matching each part to your actual workflow, you can land a model that feels just right for your budget.
How to Compare Prices Across Brands
When you start pulling price tags from different manufacturers, the numbers can feel like a code you haven’t cracked yet.
First, strip away the marketing fluff and ask yourself: “What am I really paying for?” Is it a broader wavelength range, a dual‑beam design, or just a fancy software bundle? Once you isolate the core feature, the comparison becomes a lot less intimidating.
Step 1 – List the baseline specs you need. Grab a notebook or a simple spreadsheet and write down the wavelength range, sample format (cuvette vs. microplate), throughput, and any mandatory accessories like temperature control. For most academic labs, a 190‑1100 nm range and a single‑beam cuvette holder are enough, while a CRO might need a 96‑well plate adapter and built‑in thermostat.
Step 2 – Capture the sticker price for each brand. Look at the official product pages, but also scan marketplaces that list both new and used units. LabX, for example, shows new UV‑Vis spectrophotometers ranging from $3,000 up to $60,000 and used models from $1,000 to $30,000, giving you a realistic price spectrum to work with.price ranges on LabX
Tip: Write the price next to the spec list you created in Step 1. If a model costs $4,200 but includes a motorised cuvette holder you don’t need, flag it for later removal.
Step 3 – Factor in recurring costs. Lamps, calibration kits, and service contracts can add 10‑15 % of the purchase price every year. A $5,000 unit with a $500 annual service fee will end up costing about $6,300 after two years, whereas a $3,800 model with a $300 service fee might only reach $4,600. Write those numbers down; they often flip the “cheapest” choice on its head.
Step 4 – Compare warranty and support. Some brands bundle a three‑year warranty, while others sell it separately. A longer warranty can save you from unexpected repair bills, especially if you run the instrument around the clock.
Step 5 – Use a side‑by‑side cost matrix. Create columns for “Base Price,” “Accessories,” “Annual Service,” “Warranty,” and “Total 3‑Year Cost.” Fill in the numbers for each brand you’re evaluating. The model with the lowest total cost over three years is usually the smartest buy.
Real‑world example: A regional agricultural testing centre needed to move from a basic $1,200 spectrophotometer to a dual‑beam unit with a plate adapter. They found a used model on Sper Scientific for $5,920 that included the adapter and a two‑year warranty. After adding $300 yearly service, the three‑year total was $6,820 – still less than the $8,500 brand‑new alternative they’d first considered.Sper Scientific UV‑Vis spectrophotometer listings
Notice how the “price tag” alone didn’t tell the whole story. By layering in accessories, service, and warranty, the cheaper‑looking option became the clear winner.
Step 6 – Check for upgrade paths. If your lab might need a temperature‑controlled plate reader in a year, see whether the brand offers a retrofit kit. Buying a platform that can grow with you avoids the cost of buying an entirely new instrument later.
Pro tip from our experience at Shop Genomics: we often recommend the Accuris MR9610 as a baseline entry point because its modular design lets you add a plate adapter later without replacing the whole chassis. That flexibility keeps the long‑term uv vis spectrophotometer price manageable.
Finally, give yourself a “budget buffer” of about 10 % for unexpected expenses – shipping, customs, or a spare lamp. When the buffer is built into your spreadsheet, the final number feels realistic rather than a surprise at checkout.
So, what’s the next move? Pull up your spec list, plug in the numbers, and let the cost matrix do the heavy lifting. You’ll walk away with a clear picture of which brand truly offers the best value for your lab’s needs.
Price Comparison Table: Top Models in 2026
When you start pulling numbers for the uv vis spectrophotometer price, the spreadsheet can feel like a maze. You’ve already seen how accessories and service fees shift the picture – now let’s line up the core hardware side by side.
Imagine you’re a mid‑size academic lab that needs a reliable bench unit for daily nucleic‑acid quantifications, but you also want the option to add a 96‑well plate adapter later. That’s the sweet spot many of our customers land in.
On the low‑end, Thermo Fisher’s GENESYS 50 dual‑beam model shows up around $2,100 list price, with a rugged single‑cell design that even tolerates accidental spills. The built‑in 7‑inch touchscreen means you don’t need a separate PC, and Wi‑Fi can be added if you like cloud logging. Thermo’s spec sheet confirms the 0.2‑nm resolution and dual‑beam optics that many quality‑control labs swear by.
Mid‑range buyers often gravitate to Sper’s SPSUV‑6100 series. Priced at $5,920 after discount, it delivers a full UV‑Vis range (190‑1100 nm) and a dual‑beam architecture that’s a step up from single‑beam units. The package includes a motorised 8‑position cell holder, which can shave minutes off a high‑throughput workflow. Sper’s product page lists the optional accessories that often push the total cost toward $7,000.
If you’re hunting for the most budget‑friendly entry that still leaves room to grow, the Accuris MR9610 microplate reader starts at a jaw‑dropping $367.78 for the single‑cuvette configuration. Its modular chassis lets you snap in a 96‑well adapter later without replacing the whole instrument – a design choice we’ve seen save labs up to $2,000 in upgrade fees.
So, how do you compare these three without getting lost in the numbers?
First, write down the “base price” you’ll actually pay today. Then add the cost of any must‑have accessories (cell holder, Wi‑Fi, plate adapter). Finally, factor in the three‑year service estimate – usually 10‑15 % of the purchase price each year.
Below is a quick table that puts those three models side by side. Use it as a starting point for your own cost matrix.
Take a look at the rows – notice how the “Upgrade Path” column highlights whether you can add a plate reader later. That’s the kind of flexibility that turns a modest “price tag” into a long‑term investment.
| Model | Base Price (USD) | Key Features | Upgrade Path | 3‑Year Total Cost* |
|---|---|---|---|---|
| Thermo GENESYS 50 | $2,100 | Dual‑beam, 0.2 nm resolution, touchscreen | Optional Wi‑Fi, external plate adapter | ≈ $2,800 |
| Sper SPSUV‑6100 | $5,920 | Full 190‑1100 nm range, motorised 8‑pos holder | Auto‑load plate module available | ≈ $7,500 |
| Accuris MR9610 | $368 | Single‑cuvette, modular chassis | Snap‑in 96‑well adapter, temperature kit | ≈ $1,200 |
*Estimated using 12 % annual service fee and assuming typical accessory purchases.
What does this mean for you? If your lab is just getting started, the MR9610’s low entry point and upgrade flexibility let you stay under $1,500 for the first three years. If you need higher throughput now, the SPSUV‑6100’s built‑in motorised holder may justify the higher upfront spend.
And if reliability is your top priority – say you run daily QC on pharmaceutical batches – the GENESYS 50’s rugged design and on‑board software can save you downtime, even if the three‑year total lands a bit higher.
Bottom line: match the base price to your immediate workflow, then layer on the upgrade and service costs. The model that looks cheapest on the sticker often isn’t the cheapest in practice, and that’s why a simple table like the one above is worth its weight in gold.
Budget‑Friendly Options Under $5,000
So you’ve seen the tables, the price tags, and you’re wondering if there’s a decent spectrophotometer that won’t break the lab’s budget.
Good news: there are solid models sitting comfortably under $5,000, and they still give you the accuracy you need for routine UV‑Vis work.
Here’s how we break it down so you can spot the sweet‑spot without getting lost in tech‑speak.
Single‑Cuvette Units – The Bare‑Bones Budget
If you mainly measure liquids in cuvettes – think DNA quantification or enzyme assays – a single‑beam unit can be as cheap as $350.
The Accuris MR9610 is a classic example; its core chassis is under $400 and you can add a 96‑well adapter later if your throughput grows.
Because it’s modular, you avoid paying for a motorised plate holder you won’t use right away – that alone can save you $1,500‑$2,000.
Just remember to budget ~12 % per year for lamp replacement and a basic service contract; that’s roughly $40‑$50 a year on a $350 unit.
Dual‑Beam Workhorses – A Little More, A Lot More Stability
Dual‑beam designs split the light path, which reduces drift and gives you cleaner data when you run dozens of samples a day.
The Thermo GENESYS 50 lands at about $2,100 out of the box – still well under the $5k ceiling.
What you get is 0.2 nm resolution, a built‑in touchscreen, and the option to add Wi‑Fi later for remote logging.
If your lab runs QC on pharma batches, that extra stability can translate into fewer failed runs – a hidden cost you’ll thank yourself for later.
Add a plate adapter for another $300‑$400 and you’ve got a hybrid that still sits under $3,000 total three‑year cost.
Mini‑Spectrophotometers – Compact, Cost‑Effective, Perfect for Teaching Labs
Some manufacturers now sell pocket‑size UV‑Vis units for $500‑$800 that are ideal for classroom demos or small‑scale research.
They usually lack a motorised holder, but they do include a USB connection so you can pull data straight into Excel.
For an academic department that needs to teach 30 undergraduates how absorbance works, buying three of these for $1,800 beats a single $2,100 bench unit any day.
Just keep an eye on the warranty – many of these come with a one‑year limited cover, so a cheap extended service plan (around $80 a year) is worth the extra peace of mind.
Because the devices are lightweight, you can even store them on a rolling cart and move them between labs as projects shift.
Putting the Pieces Together – A Quick Checklist
Before you click ‘add to cart’, run through this mental checklist:
- Wavelength range you need – does the model cover it?
- Sample format – cuvette only or plate ready?
- Upgrade path – can you add a plate adapter later?
- Service fee – 10‑15 % per year, factored in.
- Warranty length – longer warranty saves surprise repair costs.
If you need a plate adapter within the next 12 months, pick a modular model now – the upgrade cost is far lower than buying a brand‑new unit later.
If you’re on a shoestring budget, focus on single‑cuvette units and plan the plate upgrade as a separate purchase when your grant allows it.
Don’t forget the hidden service fee – 10‑15 % per year adds up, but it’s cheaper than a surprise lamp failure in the middle of a run.
Finally, think about future‑proofing: a model with a spare port for a temperature module will save you a $1,200 retrofit down the line.
Bottom line: you can get a reliable UV‑Vis spectrophotometer for under $5,000, you just need to match the core feature set to your current workflow and plan upgrades wisely.
With these pointers in hand, you’re ready to shop smart, stay under budget, and still get data you can trust.
High‑End Models and What You Pay For Premium Features
When the price tag jumps into the five‑figure range, you start wondering whether you’re buying a lab instrument or a piece of art.
High‑end UV‑Vis spectrophotometers usually bundle three kinds of premium goodies: ultra‑stable light sources, dual‑beam optics, and built‑in automation. Each of those adds a chunk to the uv vis spectrophotometer price, but they also shave minutes—or even hours—off your workflow.
Ultra‑Stable Light Sources
Think about a xenon flash lamp that never drifts more than 0.1 % over a year. That stability means you can trust your absorbance numbers from day one to day three hundred. The trade‑off? A xenon lamp can cost $1,200‑$1,800 extra compared with a basic deuterium‑halogen bulb.
One CRO we talked to installed a xenon‑based unit and saw a 20 % drop in failed runs because the lamp didn’t need recalibration every month. That saved them roughly $2,500 in service fees over two years.
Dual‑Beam Optics
Dual‑beam designs split the light into a sample path and a reference path. The result is less noise and better repeatability, especially when you’re running dozens of plates per run.
A recent model listed on Sper Scientific’s UV‑Vis lineup shows a dual‑beam spectrophotometer priced around $5,920. That’s about $2,000 more than a comparable single‑beam unit, but the upgrade often pays for itself when you factor in reduced repeat analyses.
Automation & Integrated Modules
Automation can mean a motorised 8‑position cell holder, a temperature‑controlled plate reader, or even a built‑in LIMS connector. Those features are the real “premium” in many high‑end price quotes.
For example, the MSE PRO™ double‑beam system offers a smart touch screen and optional auto‑load plate module. The base price is listed on the manufacturer’s site, and the auto‑load upgrade adds roughly $1,300. That upgrade cuts manual loading time from 30 seconds per well to under 5 seconds, which translates to a full‑day throughput boost in a busy biotech lab.
Here’s a quick checklist you can run before you decide whether those premium add‑ons are worth the extra dollars:
- Do you need sub‑0.2 nm resolution for fine‑structure analysis? If not, a standard optics package will do.
- Is your sample throughput higher than 100 wells per hour? Automation will likely save you money.
- Will temperature control improve assay reproducibility in your workflow? If you’re measuring enzyme kinetics, the answer is probably yes.
Actionable Steps to Evaluate Premium Features
1. List the “must‑have” features for your current assays. Write them on a sticky note.
2. Add a column for “nice‑to‑have” items like auto‑load or built‑in LIMS. Mark each with a cost estimate from the vendor’s spec sheet.
3. Calculate a three‑year total cost of ownership: base price + premium feature cost + 12 % annual service fee. Compare that number across at least two models.
4. Run a short pilot (many vendors will ship a demo unit). Measure the time saved per run and translate that into a dollar value using your lab’s hourly rate.
If the savings exceed the premium price within 12‑18 months, you’ve got a clear ROI.
Real‑World Example: Academic vs. Industry
An academic chemistry department bought a $6,500 dual‑beam spectrophotometer with a manual cell holder because their budget was tight. Six months later they added a $1,200 temperature module, and their reproducibility for kinetic assays improved enough to land a $50,000 grant.
Meanwhile, a biotech startup opted for a $9,000 unit that came pre‑equipped with an auto‑load plate adapter and cloud‑linked software. The startup saved an estimated $8,000 in labor costs during the first year, which they reinvested into R&D.
Both paths work; the key is matching the premium features to the actual pain points you face today.
Bottom line: high‑end uv vis spectrophotometer price isn’t just a sticker—it’s a bundle of stability, precision, and automation. Break down each premium element, run the simple ROI math, and you’ll know exactly whether that extra $2,000 or $4,000 is an investment or an expense.
Tips to Reduce the Total Cost of Ownership
Ever feel like the uv vis spectrophotometer price is just the tip of an iceberg you’ll keep paying for? You’re not alone. The hidden fees—lamps, service contracts, calibration kits—can sneak up on any lab, whether you’re at a teaching campus or a CRO.
Know What You Really Need
First thing’s first: sit down with your team and list the assays you run every day. Do you mostly measure single cuvettes, or are you already loading 96‑well plates? If you’re still on cuvettes, a basic single‑beam unit will keep the total cost low. But if you’re eye‑balling a plate‑based workflow, factor in the price of an auto‑load adapter now rather than adding it later at a premium.
Ask yourself: “What’s the smallest feature set that still meets my current throughput?” That question saves you from buying a $4,000 add‑on you won’t use for months.
Factor in the Service Fee Early
Most vendors charge roughly 10‑15 % of the purchase price each year for lamps, calibration kits, and a service contract. It sounds small, but over three years that adds up to almost half the original sticker price. When you’re budgeting, take the base price, then add a 12 % annual line item. It’s a simple spreadsheet trick—multiply the base price by 1.12, then again by 1.12, and so on.
Does that number still feel comfortable? If not, you might consider a model with a longer lamp life or a vendor that offers a pay‑per‑service option.
Choose a Modular Platform
Modularity is the secret sauce for keeping the uv vis spectrophotometer price from ballooning. A chassis that lets you snap in a temperature module or a plate adapter later means you only spend on upgrades when you actually need them. In our experience, labs that start with a modular unit end up saving 20‑30 % compared with buying a fully‑loaded model outright.
Look for a design that uses the same power supply and software across accessories—that way you won’t need a separate license or extra wiring.
Leverage Pilot Runs and Demo Units
Many suppliers will ship a demo unit for a short pilot. Use that time to measure how much labor you actually save with automation. Convert those minutes into dollars using your lab’s hourly rate, then compare that saving to the extra cost of the premium feature.
If the ROI flips positive within 12‑18 months, the higher upfront price is justified. If not, you’ve got data to negotiate a lower price or skip the feature altogether.
Negotiate the Warranty and Support
Warranty length can be a hidden cost saver. A three‑year warranty bundled in the price often beats buying a two‑year plan and paying extra for extensions later. When you’re in the checkout stage, ask the sales rep if they can extend the warranty at no extra charge—especially if you’re buying a modular system that will evolve over time.
And don’t forget support response time. A quick turnaround means less downtime, which directly protects your budget.
Build a Buffer for the Unexpected
Finally, add a 10 % contingency to your total cost of ownership estimate. Shipping delays, customs fees, or a surprise lamp failure can throw a wrench in even the best‑planned budget.
When you walk away with a clear, itemised total—base price, accessories, service fee, warranty, and buffer—you’ll feel confident that the uv vis spectrophotometer price you see online isn’t the whole story.
Bottom line: map out your real workflow, lock in service costs early, pick a modular system, test before you commit, and always leave room for the unknown. Those simple steps turn a daunting price tag into a manageable investment.
Conclusion
We’ve walked through the whole uv vis spectrophotometer price puzzle, from hidden service fees to the value of a modular chassis.
Does it feel overwhelming? It doesn’t have to be. Remember the three‑step habit: list your real workflow, add a 10 % contingency, and compare total three‑year costs—not just the sticker.
In our experience at Shop Genomics, labs that start with a single‑beam unit and upgrade only when the data demand grows end up saving 20‑30 % over a five‑year horizon.
So, what’s the next move? Pull up the spec sheet for the model you like, plug in the warranty, service and accessory costs, and watch the numbers settle into a realistic budget.
Whether you’re an academic researcher, a CRO, or a biotech startup, the right uv vis spectrophotometer price decision lets you focus on science instead of surprise invoices.
Ready to take the guesswork out of buying? Browse our curated selection and let us help you lock in a transparent, all‑in‑one quote that respects your budget.
Finally, keep your spreadsheet alive. Re‑visit the total cost every year, especially if you add a new module or your service contract changes. A habit of annual check‑ins turns a one‑time purchase into a long‑term partner for your research goals.
FAQ
Got questions about uv vis spectrophotometer price? You’re not alone. Below are the most common things we hear from labs like yours.
What are the biggest things that affect the uv vis spectrophotometer price?
The light source is the first driver – deuterium‑halogen lamps are cheap, while xenon flash lamps add a few hundred dollars but give better stability. Next up is the optical design: single‑beam units cost less, dual‑beam adds precision and a price bump. Wavelength range matters too; a 190‑1100 nm model costs more than a basic 200‑800 nm version. Finally, accessories such as plate adapters, temperature modules, and software licences can push the total price well beyond the sticker.
How do I calculate the three‑year total cost of ownership?
Start with the base price you’ll actually pay today. Then add any must‑have accessories – a motorised cuvette holder or a 96‑well plate adapter can be a few hundred dollars each. Next, estimate the annual service fee; most vendors charge 10‑15 % of the purchase price for lamp replacements, calibration kits, and support. Multiply that fee by three and add it to your subtotal. Finally, toss in a 10 % contingency for unexpected shipping or customs charges, and you have a realistic three‑year budget.
Is it worth buying a used uv vis spectrophotometer to save money?
Often, yes – especially if the instrument comes with a verified lamp life and a short‑term service contract. A used unit can be 30‑50 % cheaper, but you have to check the calibration status and whether the vendor offers a return window. For labs that don’t need the latest optics, a gently used single‑beam model can meet daily cuvette work while keeping the price well under $1,000. Just be sure the warranty or support option is still available.
What should I look for in a warranty or support plan?
A good warranty covers the light source, detector, and any included accessories for at least two years. Look for on‑site service or rapid‑ship replacement parts – downtime costs more than the warranty itself. Some vendors let you extend the warranty for a flat fee; that’s a smart move if you plan to keep the spectrophotometer for five years or more. And don’t forget to read the fine print about consumables; a free lamp replacement can shave a few hundred dollars off your total cost.
Can I upgrade a low‑cost model later, or do I have to buy a new instrument?
Modular designs make upgrades easy. If the chassis uses the same power and software platform, you can snap in a plate adapter, temperature kit, or even a newer detector without replacing the whole unit. The Accuris MR9610, for example, starts cheap but lets you add a 96‑well adapter later – a move that saves you the $2,000‑plus price tag of a brand‑new dual‑beam system. Always verify that the manufacturer lists the upgrade path on the spec sheet before you buy.
How do I choose the right wavelength range for my assays?
Match the range to the absorbance peaks of your samples. Nucleic‑acid quantification usually needs 190‑340 nm, while protein assays often go up to 600 nm. If you also run colourimetric or near‑infrared assays, look for a 190‑1100 nm model. Buying a broader range than you need can add $500‑$1,000 for extra optics, so it’s best to list the assays you run now and a couple you might add later, then pick a range that covers both.


