Picture this: you’re setting up a biology class, the students are buzzing with curiosity, and you’ve just handed them a banana. You know that fruit holds a trove of DNA, but turning that excitement into a hands‑on lesson can feel a bit daunting.
That’s where a banana DNA extraction classroom activity shines. It’s cheap, it’s safe, and the result—visible, fluffy DNA strands—sticks in their minds far longer than a textbook diagram. In fact, many teachers report that after pulling banana DNA, students can actually name the molecule in a later quiz without prompting.
Here’s a quick snapshot of why this activity works so well:
- Cost‑effective: bananas cost pennies per student.
- Non‑hazardous: no toxic chemicals needed if you swap ethanol for isopropyl alcohol.
- Scalable: a single batch can serve a whole class of 30‑plus learners.
Getting started is easier than you might think. First, gather your supplies: ripe bananas, dish soap, salt, water, a coffee filter, and a clear container. If you want to speed up the tissue breakdown, a reliable homogenizer can make a world of difference. In our experience, the Shop Genomics D1000 Hand‑Held Homogenizer slices through fruit pulp in seconds, giving you a consistent slurry without messy hand‑mashing.
Next, follow these steps:
- Peel and slice the banana, then place the pieces into the homogenizer (or a zip‑lock bag) with a splash of water, a pinch of salt, and a few drops of dish soap.
- Blend until you have a smooth mash; the soap helps break open cell membranes, while salt stabilises the DNA.
- Filter the mixture through a coffee filter into a clean tube to remove solids.
- Slowly add cold isopropyl alcohol down the side of the tube. DNA will precipitate as a white, stringy layer.
- Gently spool the DNA with a stir rod and place it in a labeled container for observation.
While you’re at it, don’t forget the little details that turn a good lab into a great one. Label each tube and container clearly—students love seeing their own names on the samples. For that, you might need custom stickers or labels. Custom printed labels for sample identification make the process smooth and professional.
Real‑world example: At a suburban high school, the science department paired the banana extraction with a short discussion on how forensic labs use similar techniques to isolate DNA from crime‑scene evidence. The students then wrote a brief reflection linking the classroom activity to real‑world applications, boosting both engagement and comprehension.
Finally, wrap up with a quick reflection: ask students what surprised them, which step seemed tricky, and how the DNA they extracted compares to what they learned about chromosomes. This solidifies the concept and encourages scientific thinking beyond the bench.
TL;DR
Quick recap: banana DNA extraction classroom activity lets students see real genetic material using cheap supplies—bananas, soap, salt, and isopropanol. You’ll spark curiosity, reinforce cell biology concepts, and build lab confidence in just a single class period. It fits within a typical class period and leaves students thrilled and inspired.
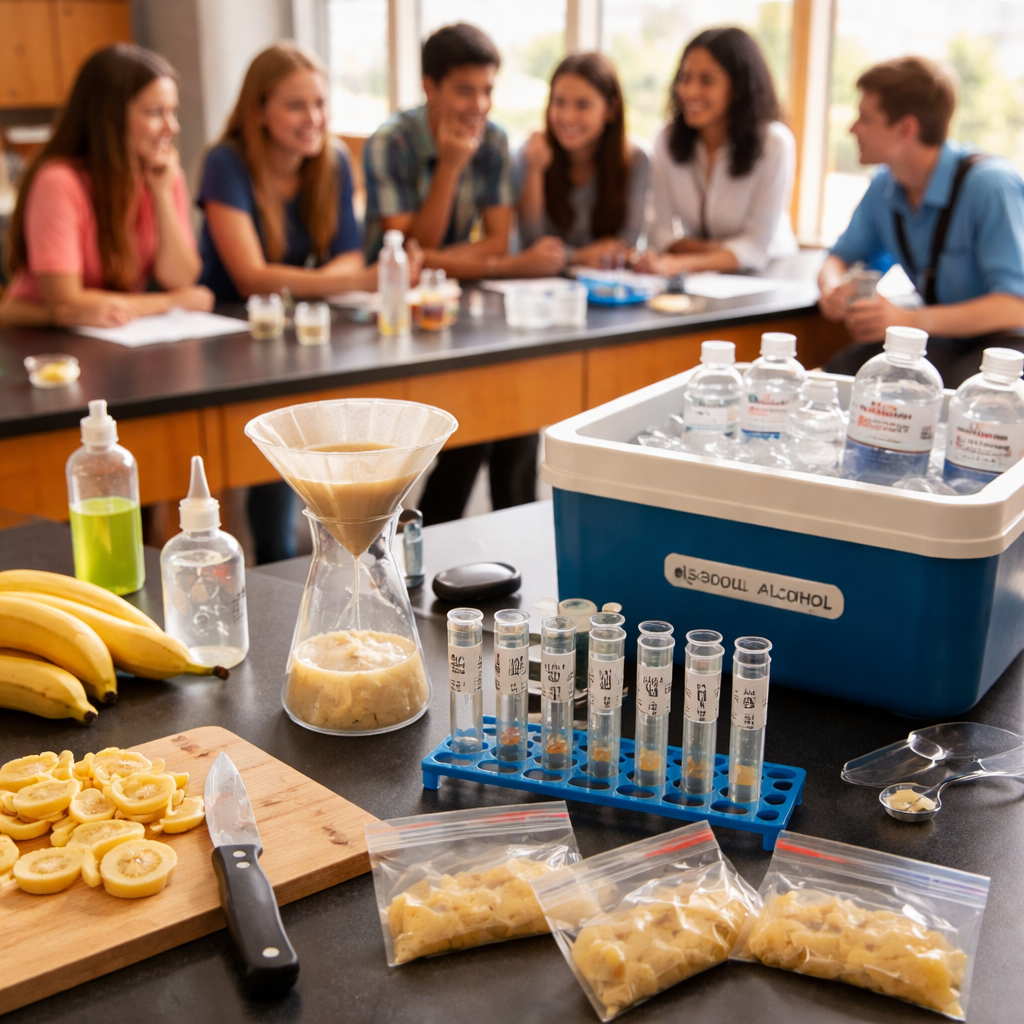
Step 1: Gather Materials and Set Up Workspace
You’ve probably stared at an empty lab bench and thought, “Where do I even begin?” That moment is totally normal, especially when you’re gearing up for a banana DNA extraction classroom activity. The good news? All you need are a handful of everyday items and a few smart organisational tricks, and you’ll feel ready to roll in no time.
Start by pulling together the core kit: ripe bananas (the softer the better), a clear container for the mash, a small cup of dish‑soap, a pinch of table salt, distilled water, and cold isopropyl alcohol for the DNA precipitation step. You’ll also want coffee filters or paper towels, a set of 15‑ml centrifuge tubes (or any clear plastic tubes), a disposable stir rod, and zip‑lock bags if you’re not using a homogenizer. For labeling each student’s sample, I always order custom printed labels – they stick well, look professional, and save a bunch of time during the cleanup.
Next, think about the physical space. Clear a stretch of bench or a cart so that every student has a defined spot. Lay out a tray of zip‑lock bags, a bowl of pre‑cut banana pieces, and a separate station for the filtration step. Keep the isopropyl alcohol on ice in a small cooler – that way it stays cold and the DNA strands will precipitate more efficiently. A quick safety check: make sure you have gloves, safety goggles, and a spill‑proof mat in case any alcohol drips.
Timing can be a sneaky obstacle. While the banana mash is sitting, you could be scrambling to set up the next station. I like to break the prep into 25‑minute chunks using a Pomodoro timer. One round for gathering supplies, the next for chopping the fruit, then a short break before you move to filtration. It keeps the workflow smooth and the students’ attention sharp.
If you’re running the activity with multiple classes or need to keep track of which tube belongs to which learner, a simple client management platform can double as a lab log. You can log each student’s name, the date, and any observations they make – all in one place, ready for a quick debrief at the end of the session.
Now that the space is set, it’s time for a quick demo. Pull up the short video below; it walks you through the exact way we arrange the materials on the bench, from banana slices to the final alcohol drop.
After the video, you’ll notice how the filtration funnel sits directly over the clean tube, making it easy to pour the mash without splashing. Give each group a pre‑measured amount of soap‑salt solution in a small cup – that way they don’t have to guess the right proportion. When the mash is filtered, slowly tip the cold isopropyl alcohol down the side of the tube; you’ll see a wispy white layer forming – that’s the DNA, ready to be spooled.
Finally, run through a quick checklist with the class: 1) All safety gear on? 2) Labels attached to each tube? 3) Alcohol is cold and ready? 4) Waste bin for banana pulp in place? When everyone nods, you’re good to go. The whole “gather and set‑up” stage should take about 10‑15 minutes, leaving plenty of class time for the actual extraction and a lively discussion afterward.
Step 2: Prepare the Banana Sample
With the workspace ready and safety gear on, it's time to prep the banana sample. This is where the idea becomes action, and you start to see that fluffy DNA emerge.
Banana cells have walls and membranes like every other plant cell. Our goal is to break those barriers just enough to release the DNA, but not so much that the strands get tangled in pulp. We'll do that with a simple lysis buffer, a gentle mash, and a quick filtration to keep the solids out of the DNA solution.
You can run this with small groups of 3–4 students or scale up with parallel stations so the class stays engaged. The trick is consistency so the results are comparable from one group to the next.
What you’ll need (quick setup)
- Ripe banana, peeled and chopped
- Distilled water, table salt, a few drops of dish soap
- Clear tubes or cups and coffee filters
- Cold isopropyl alcohol (isopropanol) or ethanol
- Stir sticks or wooden craft sticks for lifting and spooling
Next, make a simple lysis buffer. In a clean beaker, mix 100 mL distilled water with 1 g table salt, then add about 2 mL dish soap. This buffer helps burst cell membranes and keeps the DNA from clumping up as it emerges.
Chill the alcohol in the fridge for at least 30 minutes before you need it. Cold alcohol precipitates DNA more clearly, which is why we keep it cold. Safety note: gloves and goggles stay on as you handle the buffers and the alcohol.
Now the action starts. Place the banana pieces in a zip‑lock bag, add a splash of your buffer, and mash gently for 30–60 seconds. You’re aiming for a creamy slurry, not a smoothie. The soap will help break open the cells, releasing the DNA into the liquid.
So, what should you do next? Open a clean coffee filter over a tube and pour the mashed banana slurry through. The solids stay in the filter; the liquid with DNA goes into the tube.
Now, very slowly pour the chilled isopropyl alcohol down the side of the tube. You’ll see a white, stringy layer forming where the DNA precipitates. This is the moment your students can actually grasp what DNA looks like when it’s visible to the naked eye.
For a quick science reference and a little deeper context, here’s a reliable explainer that aligns with the banana DNA extraction classroom activity: ASU’s Banana DNA activity. It explains why mashing and buffers work together to release and protect DNA as it comes out of the cells. ASU Banana DNA activity.
Finally, spool the DNA gently with a rod and transfer it to a labeled test tube or container. Motivation tip: give each student a name tag on their tube so observations feel personal and professional.
In our experience, having each group label their tubes helps students own their results and discuss observations with confidence. And if you’re stocking up for a busy course, platforms like Shop Genomics make it easier to outfit multiple stations with affordable, reliable basics—tubes, filters, and essential storage—so the focus stays on learning rather than logistics.
Step 3: Lyse Cells and Extract DNA
Now the banana mash is sitting in your tube, looking like cloudy juice. The real magic happens when we break open the cells so the DNA can float free.
First, give the mixture a gentle swirl. The soap you added earlier is already softening the outer cell membranes, but a little physical agitation helps the detergent get inside.
Why the double attack works
Cell walls are like tiny bags made of starch and fibers. The detergent acts like a dish‑soap bubble, slipping between the lipids and pulling the bag apart. Adding a pinch of salt does two things: it helps the detergent pull away the lipids, and it makes the DNA less likely to stick to the debris.
That’s the science behind the basic steps of DNA lysis – break the membrane, neutralise proteins, and keep the DNA in solution.
So, how do we give the cells that extra push?
Physical lysis made easy
Grab a clean stir rod or a wooden craft stick. Insert it into the tube and stir slowly for 30 seconds. You’ll feel a slight resistance at first, then the mixture becomes smoother. If you have a vortex mixer, a short 5‑second spin does the trick, but the hand‑stir feels more personal for a classroom.
Tip: don’t over‑mix. Too much agitation can shear the DNA strands, turning those fluffy white strings into tiny fragments that are harder to see later.
Does this really matter? Absolutely – students love that “moment of visibility” when the DNA spools out as a white, stringy cloud. Keeping the strands intact makes that moment more dramatic.
Let the salt do its job
After you’ve given the cells a good stir, add a quarter‑teaspoon of table salt directly into the tube. The salt binds to proteins and other cellular junk, making them clump together and sink when you later add alcohol.
Give the tube a quick flick – think of flicking a soda can to get the bubbles moving. You’ll see a faint separation between the cloudy lysate and the heavier bits at the bottom. That’s the DNA staying in the liquid phase, ready for the next step.
What if the mixture looks too thick? Dilute with a splash of distilled water. It won’t hurt the DNA, and it makes the later alcohol layer easier to see.
Ready for precipitation?
Now you’ve got a clear lysate filled with DNA, proteins, and bits of banana pulp. The next step (Step 4) will coax the DNA out of solution with cold isopropyl alcohol, but before you get there, double‑check a few things:
- All reagents are at room temperature except the alcohol, which should be chilled for at least 30 minutes.
- Each student’s tube is labelled – a simple name‑sticker helps them own their sample.
- Safety goggles and gloves are still on – even though the chemicals are mild, the habit reinforces good lab practice.
And that’s it for lysis. You’ve turned a banana into a DNA‑rich soup, and you’ve set the stage for that satisfying “spool‑out” moment later.
If you want a step‑by‑step classroom guide that walks you through the whole extraction, check out the detailed classroom protocol from the University of Utah’s Genetics Education site.
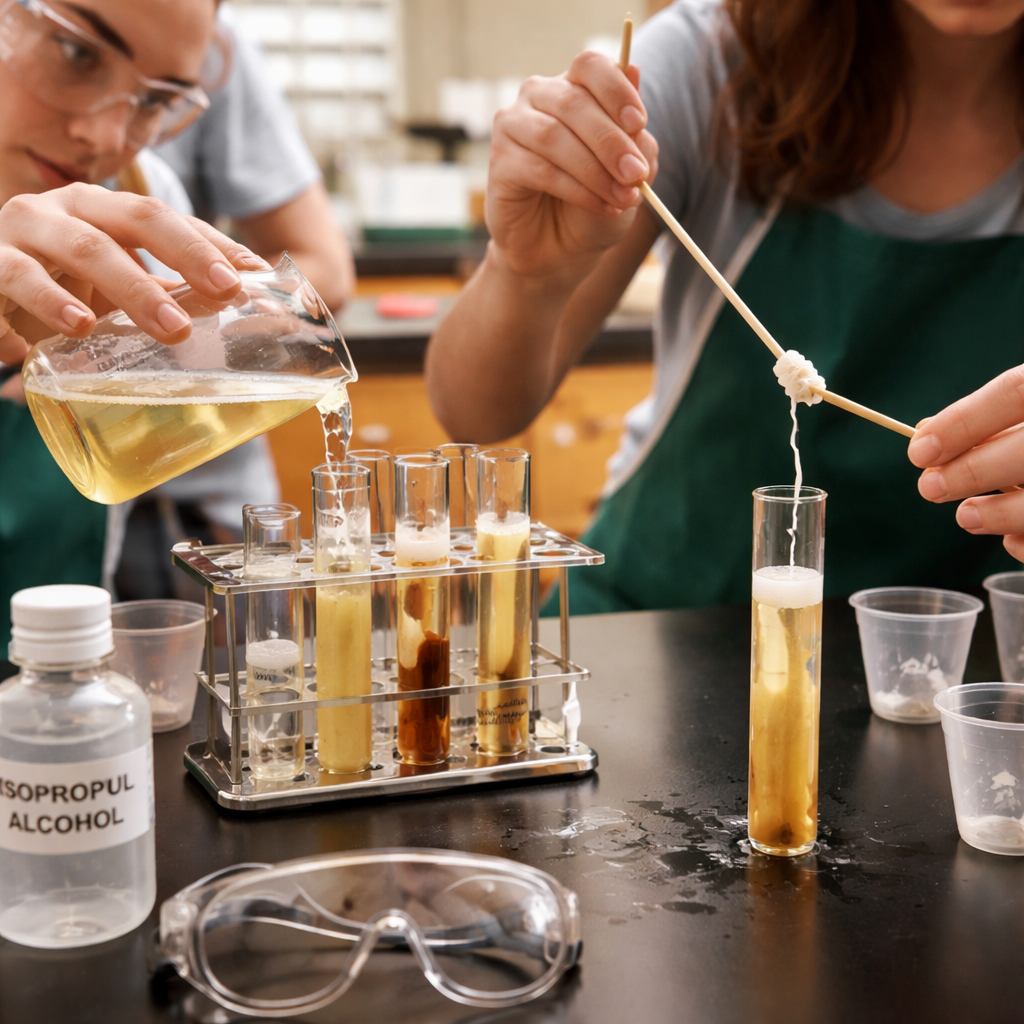
Step 4: Precipitate and Collect DNA
Now the lysate is ready, and the magic really begins – the DNA starts to come out of solution. You’ll feel a little thrill when the white, stringy layer appears, because that’s the moment you’ve been waiting for.
First, grab a fresh bottle of isopropyl alcohol that’s been chilling in the fridge for at least 30 minutes. Cold alcohol is the secret sauce; it makes the DNA clump together faster and gives that dramatic “cloud” you can see with the naked eye.
How to add the alcohol
Hold your tube at a slight angle and slowly pour the alcohol down the side. Aim for a volume that’s roughly equal to the aqueous lysate – if you have 3 mL of lysate, add about 3 mL of alcohol.
Don’t dump it in all at once. A steady stream lets two clear layers form: the denser water‑based lysate on the bottom and the lighter alcohol on top. The DNA loves the interface between them.
Does this really work? Absolutely. The salt you added earlier neutralises the negative charge on the DNA backbone, and the alcohol reduces the water’s ability to keep the strands dissolved. The result? DNA precipitates out like a fluffy spider‑web.
Let it sit
Once the layers are set, set the tube on a flat surface and let it sit for 2–3 minutes. You’ll start to see a milky, mucus‑like film at the boundary. That’s the DNA gathering together.
If you’re working with a whole class, give each group a timer. The anticipation of watching those strands form keeps the energy high.
Tip: If the film looks faint, give it another minute. Cold temperatures and a little patience usually rescue a shy precipitation.
Spooling the DNA
When the white layer is clearly visible, take a clean wooden stir rod or a craft stick. Gently dip the tip into the interface and slowly lift. You should see a glistening string curl around the stick – that’s your banana DNA.
Don’t yank it out. A gentle, steady pull keeps the strands intact and prevents them from breaking into tiny fragments.
Once you have a decent length, lay the DNA on a labeled micro‑tube or a small petri dish. Let the students add their name stickers – it makes the discovery feel personal.
What if the DNA looks broken? It could be from over‑mixing earlier or from using warm alcohol. In future runs, keep the stirring light and always chill the alcohol.
Cleaning up
After spooling, discard the remaining liquid down the sink with plenty of water. Rinse the tube and the stick with distilled water, then set them aside for the next class.
Safety reminder: Even though isopropyl alcohol is relatively mild, keep goggles on and make sure the area is well‑ventilated.
In our experience, having a quick “check‑list” on the bench – label, cold alcohol, timer, and gentle spooling – cuts down on confusion and lets the students focus on the awe of seeing DNA.
For a deeper dive into why the precipitation works the way it does, you can read the detailed protocol on the QUBES Hub interactive classroom DNA extraction guide. It breaks down the chemistry in plain language that works for junior‑high students.
Finally, take a moment to let the class observe the DNA strands, ask them what they think they’re looking at, and maybe even let them compare the length of their strings. That quick reflection turns a simple lab step into a memorable learning moment.
Step 5: Visualize DNA and Record Results
Let’s be honest: that first glimpse of the banana DNA is the mini‑victory your students remember. Now comes the part where you make the moment sticky—visualize it clearly and record what everyone sees.
We’ll walk through a simple, repeatable observation routine you can repeat for every group. You’ll want a clear, dramatic view of the DNA at the interface, plus an easy way to log what each group saw.
Before you start, remind students to keep tubes labeled and to jot quick notes right after they observe. The brain captures details best when fresh. This is where a sturdy, classroom‑friendly setup from Shop Genomics helps—durable tubes, safe spooling sticks, and label stickers make data collection painless for a class of 30+.
What you’ll see: a white, stringy layer forming where the cold alcohol meets the banana lysate. It might look like wispy threads or a delicate cloud. The exact length will vary with each group, but the visual cue is what matters for discussion.
Now, how do you record it? Give each student a simple observation log: color of lysate, whether the DNA appears as a tight spool or a loose network, and approximately how long their strands are. Older students can estimate length with a ruler or compare to a known reference, like a hair strand as a rough unit. The goal isn’t perfect measurement; it’s consistency and reflection.
Do this in steps: observe, pause for a moment, and write. The pause is your friend—let the room settle, then invite a quick share. Think about it this way: you’re turning a lab trick into a story you can retell in a quiz or a lab report.
For a kid‑friendly guide you can reference outside the classroom, this banana DNA activity provides clear visuals and steps that align with our activity flow. banana DNA extraction activity guide.
Tabulating your data helps everyone compare notes later. We’ll include a quick table below to help you decide what to track and how to capture it quickly during class.
| Feature | What to Log | Notes |
|---|---|---|
| Visible DNA form | String length, clarity of spool | Describe as tight spool or loose network |
| Interface color/appearance | Color/contrast at interface | Record any color changes due to lysate |
| Timing | Time from lysate to visible DNA | Note minutes for consistency |
| Safety/logistics | Goggles, gloves status | Yes/No; remind to pause if spills |
And that’s the heart of Step 5. You’re not just watching; you’re collecting evidence, building confidence, and prepping for discussion later—whether in a lab report or a brief class reflection.
Encourage quick peer‑to‑peer sharing after each group presents their observations. A short, focused exchange keeps energy up and helps students see patterns across groups—exactly what makes a banana DNA activity memorable for Educational Institutions and Research labs alike.
If you want a relatable reference, this kid‑friendly guide offers visuals that align with our flow and can be a handy classroom companion. banana DNA extraction activity guide.
Understanding the Science Behind Banana DNA Extraction
Ever wonder why a simple banana can become a mini‑lab for a whole class? It’s because the fruit packs a lot of cells, each with a tiny spool of genetic material just waiting to be coaxed out.
Let’s take a step back and picture the banana’s interior. Those soft, starchy blobs you mash up are actually plant cells wrapped in a thin wall, a flexible membrane, and a nucleus that houses the DNA. When we break those barriers, the DNA slips into the solution where we can see it with the naked eye.
Cellular basics
Plant cells have three main layers that keep DNA safe: the cell wall (made of cellulose), the plasma membrane, and the nuclear envelope. The wall is sturdy – think of it like a paper bag – while the membranes are more like a stretchy rubber glove. To get DNA out, we need to dissolve or tear each layer without shredding the long DNA strands.
That’s where the lysis buffer comes in. A mix of water, a pinch of salt, and a few drops of dish soap does three jobs at once: it softens the wall, dissolves the membrane, and keeps the DNA from clumping back together.
Why banana?
Bananas are the perfect teaching tool. They’re cheap, easy to peel, and have a high water content, which means the cells burst easily when you mash them. Plus, the DNA yield is enough to see a visible “string” without needing expensive equipment.
In fact, the ASU banana DNA activity guide explains that a single banana can provide several micrograms of DNA – plenty for a classroom demonstration.
The chemistry of lysis
Soap molecules have a hydrophobic tail and a hydrophilic head. When you add soap to the mashed banana, the tails slip into the fatty layers of the membrane, breaking them apart. Salt, meanwhile, neutralises the negative charges on the DNA backbone, keeping the strands from sticking to proteins or debris.
Think of it like this: the soap is a pair of scissors, the salt is a gentle hand that steadies the paper, and the water is the table you’re working on. Together they free the DNA while keeping it in a tidy solution.
Precipitating DNA
Once the cells are lysed, you add cold isopropyl alcohol (or ethanol) slowly down the side of the tube. Alcohol is less polar than water, so it reduces the DNA’s solubility. The salt‑balanced DNA clumps together and forms a milky, stringy layer right at the water‑alcohol interface.
Cold temperature speeds up this precipitation – it’s like chilling a soda so the bubbles form faster. The result is a visible white “spool” that you can twirl onto a wooden stick.
What the DNA looks like
Under good conditions the DNA appears as a translucent, slightly glistening thread. It may look like a thin noodle or a fluffy cloud, depending on how gently you handle it. The key is not to vortex the solution too hard; too much agitation can shear the strands into invisible fragments.
If you see a tight, rope‑like spool, you’ve done everything right. If it’s more of a mist, try chilling the alcohol a bit longer or adding a tiny bit more salt.
Practical tips for teachers
- Use a fresh banana for each group – older fruit can get mushy and give confusing results.
- Keep the alcohol at 4 °C or colder; a simple freezer‑quick chill works.
- Label each tube before you add alcohol so you don’t lose track of who’s DNA is whose.
- Encourage students to write down the exact time they add alcohol and when they first see the DNA – it builds scientific habit.
And remember, the science doesn’t stop at the visible strand. You can discuss how the same principles apply to forensic labs, crop genetics, and even medical diagnostics. It’s a neat bridge from a classroom curiosity to real‑world genomics.
So, what should you do next? Set up a quick “what’s happening at the molecular level?” pause after each step, let students predict the outcome, then watch the magic unfold. That moment of seeing DNA for the first time is the kind of experience that sticks in a student’s mind long after the lesson ends.
FAQ
What exactly is the banana DNA extraction classroom activity?
It’s a hands‑on lab where students mash a ripe banana, add a simple soap‑salt solution, filter the mash, and then pour cold alcohol to pull DNA out as a white, stringy spool. The whole thing takes about 30‑45 minutes and lets kids actually see genetic material without any expensive reagents.
Do I need special equipment to run this activity?
Not really. A zip‑lock bag, a coffee filter, a clear tube, and some stir sticks are enough. If you have a handheld homogenizer it speeds up the mash, but many teachers get great results with just a sturdy plastic bag and a fork. The key is keeping the alcohol cold and labeling everything.
How many students can I involve at once?
One banana can serve a group of three to four learners, so a class of 30 can run five stations in parallel. Just make sure each group has its own banana, tube, and label stickers. That way everyone gets a personal sample and you avoid mix‑ups when it’s time to spool the DNA.
What safety precautions should I take?
Even though the chemicals are mild, goggles and gloves are a must. Keep the alcohol away from open flames and make sure the workspace is well‑ventilated. A quick pre‑lab safety briefing covering goggles, gloves, and spill clean‑up saves a lot of hassle later. In our experience, a short checklist on the bench does the trick.
How can I turn the observation into a science lesson?
After the DNA appears, ask students to note the shape of the spool—tight rope or fluffy mist—and record the time it took to appear. Then discuss how salt stabilizes DNA and why cold alcohol makes it precipitate. You can link the idea to forensic labs or crop genetics, showing the real‑world relevance of what they just saw.
What common hiccups should I watch out for?
Over‑mixing can shear the strands into invisible fragments, so stir gently. Warm alcohol makes the DNA less visible, so chill it for at least 30 minutes. If the DNA looks faint, give it another minute or add a pinch more salt. Keeping a timer handy helps students see the process unfold without rushing.
Can I reuse the same supplies for another class?
Most of the glassware and tubes can be washed and sterilized for the next round. The soap‑salt buffer can be made fresh each time, and the alcohol should be stored in a sealed container in the fridge. Reusing labels isn’t recommended—students love seeing their own name on a fresh sticker for each experiment.
Conclusion
We’ve walked through every step of the banana DNA extraction classroom activity, from gathering supplies to spooling that fluffy white strand.
So, what’s the biggest win? You get a hands‑on moment that turns abstract genetics into something students can actually hold, and you do it with low‑cost, everyday items.
In our experience, a quick checklist on the bench – label, cold alcohol, timer, gentle stir – keeps the lesson flowing and prevents the usual hiccups.
And remember, the same simple setup scales up for larger labs or even for a summer outreach program. A fresh banana for each group, a few label stickers, and the right safety gear are all you need to repeat the magic.
Looking ahead, you could tie the activity to forensic case studies or plant‑breeding projects, showing how the same precipitation principle fuels real‑world research.
Want to make the next round even smoother? Platforms like Shop Genomics offer durable tubes, micro‑centrifuge adapters, and bulk label packs that fit right into your classroom inventory.
Take a minute after the lab to ask students how the DNA they saw might look under a microscope or in a sequencing pipeline – that reflection cements the learning.
Ready to run the experiment again tomorrow? Grab your checklist, double‑check the alcohol temperature, and let the next batch of curious minds discover DNA right at their fingertips.