
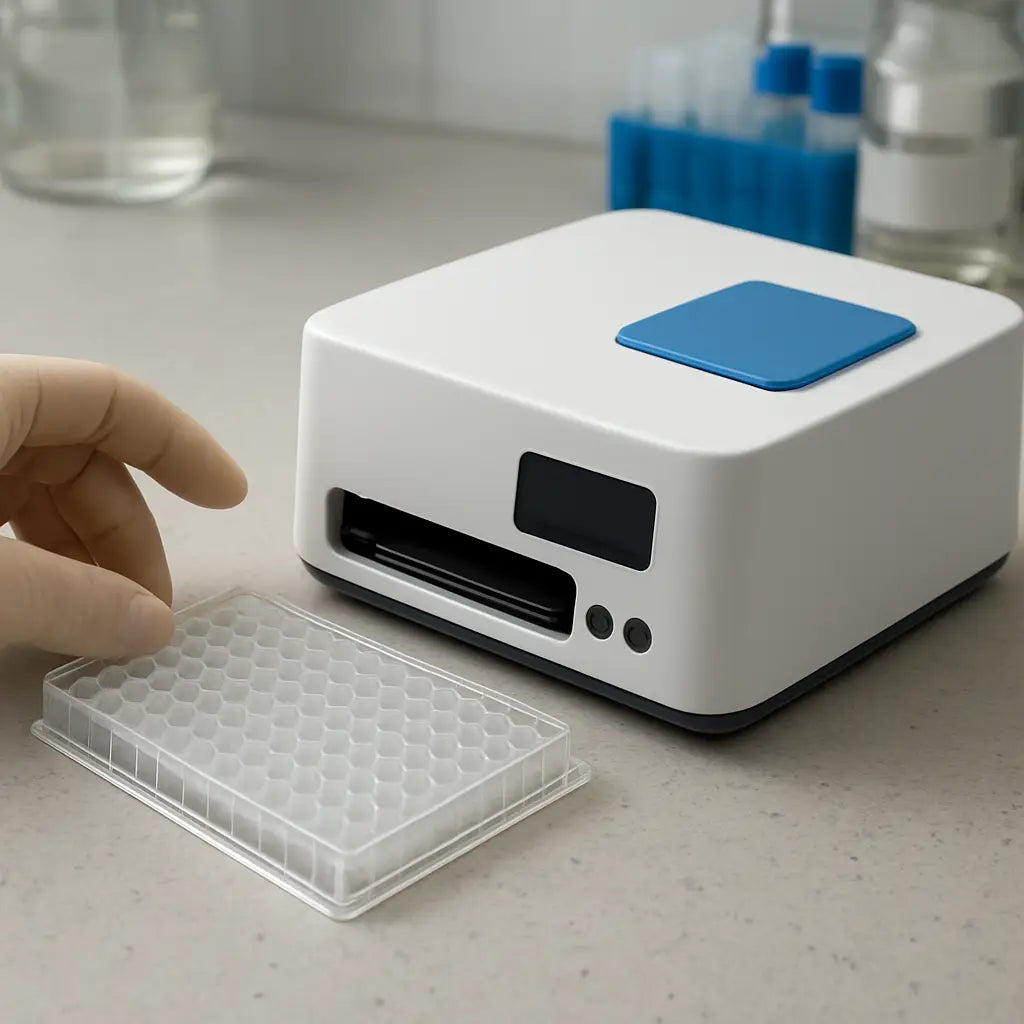
Ever walked into the lab, stared at the price tag on a brand‑new microplate reader, and thought, “There’s gotta be a cheaper way?” You’re not alone – the cost of high‑tech equipment can feel like a wall between your experiment and the data you need.
Imagine you’re setting up a qPCR assay for a small biotech startup. You need reliable absorbance readings, but splurging on a premium multimode reader would drain the budget before the first run. That’s where a cheap microplate reader steps in, delivering the core functionality without the premium price tag.
In our experience at Shop Genomics, we’ve seen labs of all sizes—academic groups, clinical teams, even field‑based environmental labs—make the switch to budget‑friendly readers and keep their projects moving. The key is to match the instrument’s specs to the assay’s needs, not to chase every extra feature.
So, what should you look for? First, check the wavelength range – most nucleic acid and protein assays sit comfortably between 340 nm and 750 nm. Second, verify the plate format compatibility; a 96‑well format is standard, but a 384‑well option can save reagents if you scale up. Finally, consider the software – a simple, intuitive interface means you spend less time troubleshooting and more time analyzing.
Here’s a quick checklist you can print out: • Wavelength coverage 340‑750 nm • 96‑well (or 384‑well) plate support • Simple data export (CSV or Excel) • Affordable price point (usually under $5,000) • Reliable vendor support and warranty. With those boxes ticked, you’ll find a cheap microplate reader that fits snugly into your budget and your workflow.
Ready to take the plunge? Start by browsing the affordable options on Shop Genomics, compare specs, and reach out with any questions. You’ll be surprised how quickly a modest investment can open the door to high‑throughput assays without breaking the bank.
TL;DR
If you need a cheap microplate reader that delivers reliable absorbance data without draining your budget, we’ve broken down the key specs, plate compatibility, and software simplicity you should prioritize. Follow our quick checklist, compare affordable models on Shop Genomics, and you’ll be ready to run high‑throughput assays immediately tomorrow.
Understanding What Makes a Microplate Reader Affordable
When you stare at the price tag on a new microplate reader, the first thought is usually, “Can I actually afford that?” And that feeling is totally normal. The good news is that affordability isn’t just about a low price tag – it’s about getting the right balance of features, durability, and support for the money you spend.
Focus on the core wavelength range
Most absorbance‑based assays you run in a 96‑well plate sit comfortably between 340 nm and 750 nm. If a reader covers that sweet spot, you can run nucleic acid quantifications, protein assays, and colourimetric reactions without paying for extra UV or fluorescence modules you’ll never use. In other words, strip the fancy extras and keep the essentials.
Think about a small biotech startup that only needs basic UV‑Vis measurements. They can skip a multimode reader that costs $10,000+ and instead pick a model that hits the 340‑750 nm range for around $3,500. That’s the kind of trade‑off that keeps the budget happy while still delivering reliable data.
Plate format compatibility matters
If you’re mostly working with 96‑well plates, there’s no need to pay a premium for a built‑in 384‑well adaptor. Some budget readers even let you add a 384‑well insert later, so you can upgrade only when you truly need higher throughput. This “pay‑as‑you‑grow” approach prevents you from over‑investing early on.
One tip: check whether the reader’s plate holder is adjustable. Adjustable holders mean you can switch between standard and deep‑well plates without buying a second device.
Software simplicity saves time (and money)
A clunky interface can turn a cheap reader into a hidden cost. If the software exports straight to CSV or Excel and lets you set up a protocol in a few clicks, you’ll spend less time troubleshooting and more time analysing. Look for readers that ship with a free, lightweight data‑analysis suite rather than a subscription‑based platform.
In our experience at Shop Genomics, we’ve seen labs avoid hidden fees by choosing readers that include a full software license in the purchase price. No surprise upgrades, no extra licences – just a clean, usable package.
Warranty and vendor support are part of the price
Even the cheapest unit can become expensive if it dies after six months and the manufacturer offers only a 90‑day warranty. Look for at least a one‑year warranty and responsive technical support. Some vendors even throw in a free calibration kit, which is a small but meaningful cost‑saver.
Imagine you’re a CRO handling multiple client projects. A reliable warranty means you won’t lose precious days waiting for a replacement, and your clients stay happy.
Real‑world example: DIY labs and cost‑cutting
Many academic labs repurpose a simple UV‑Vis reader for high‑throughput screening by pairing it with a basic plate shaker. The combination can be found on sites like Jiffy Print Online, where you’ll see how a modest investment in a sturdy reader and a separate shaker can outperform a single, overpriced multimode unit.
Another example comes from environmental testing labs that need to process dozens of water samples daily. They often choose a reader that integrates easily with a lab‑automation platform like XLR8Well. The platform adds workflow efficiency without requiring a high‑end reader, keeping the overall spend under $5,000.
So, what should you keep in mind when you’re hunting for a cheap microplate reader?
- Stick to the essential wavelength range (340‑750 nm).
- Match the plate format to your current needs; upgrade later if necessary.
- Prioritise simple, export‑friendly software.
- Check warranty length and vendor support reputation.
- Consider complementary accessories that add value without inflating the base price.
These checkpoints turn the buying process from a guessing game into a strategic decision. By focusing on what truly matters for your assays, you’ll find a reader that feels affordable, reliable, and ready to grow with your lab.
Take a moment to list the exact features you need on a piece of paper. Then compare that list against the specs of a few budget models. You’ll be surprised how quickly the right cheap microplate reader pops up – and how much smoother your experiments become.
Key Features to Look for in a Budget Microplate Reader
Ever stared at a spec sheet and wondered which numbers actually matter for your day‑to‑day assays? You’re not the only one. A cheap microplate reader can feel like a mystery box, but if you focus on a handful of core features, the choice becomes a lot less stressful.
Wavelength coverage that matches your assays
Most absorbance‑based protocols sit comfortably between 340 nm and 750 nm. If you’re doing ELISAs, protein quantification, or nucleic‑acid purity checks, that window is more than enough. A reader that only offers a narrow band (say 600‑700 nm) will leave you scrambling for workarounds. Look for a model that hits the full 340‑750 nm range right out of the box – that way you can run everything from Bradford assays to NADH measurements without buying add‑on filters.
For a quick rundown of why that range matters, see this guide on important features to consider for plate readers.
Plate format flexibility
Most labs start with 96‑well plates because the consumables are cheap and the layout is familiar. But if you’re scaling up a high‑throughput screen, a 384‑well option can cut reagent costs by up to 75 % per well. A budget reader that supports both formats gives you room to grow without swapping hardware.
Real‑world tip: a small biotech startup in Boston used a 96‑well reader for early method development, then switched to 384‑well mode on the same unit when their assay hit the validation stage – saving them several thousand dollars on plates alone.
Simple, reliable software
If the UI feels like you need a PhD in computer science, you’ll waste hours troubleshooting instead of analyzing data. Look for a one‑click export to CSV or Excel, clear plate map visualization, and built‑in baseline correction. Those basics are usually free on the cheaper models, but they’re worth double‑checking.
Actionable step: open the software demo (most vendors offer a short video) and try to perform a mock absorbance run. If you can’t find the export button within two clicks, move on.
Replaceable light source
Lamps are the workhorse of absorbance readers. A replaceable xenon or deuterium lamp means you won’t have to buy a whole new instrument when the light dims. LEDs are nice, but they often come with higher upfront costs and limited wavelength flexibility.
In our experience, labs that stick with a replaceable lamp see a 20‑30 % lower total cost of ownership over five years, because the lamp can be swapped for a few hundred dollars instead of a full service call.
Built‑in cuvette port (optional but handy)
Some budget readers include a cuvette adapter, letting you run single‑tube measurements without a separate spectrophotometer. This is a lifesaver for quick protein checks or when you need to verify a reagent’s concentration before loading a plate.
Imagine you’re a clinical lab running a small batch of serum samples. Pulling out a separate spectrophotometer adds time and cleaning steps. A cuvette port on your reader lets you keep everything in one workflow.
Warranty and support
Even a cheap instrument can go wrong. A one‑year warranty with an easy return policy is a baseline you should demand. If you’re buying refurbished, make sure the seller offers a short‑term warranty – it’s a good safety net for calibration drift.
Quick checklist you can print:
- Wavelength range 340‑750 nm
- Supports 96‑well and 384‑well plates
- One‑click CSV/Excel export
- Replaceable lamp (xenon or deuterium)
- Cuvette port (if you need single‑tube reads)
- At least a one‑year warranty or return window
By ticking these boxes, you’ll land a cheap microplate reader that does exactly what you need today, while leaving room for future upgrades. Whether you’re in an academic lab, a CRO, or a small biotech startup, focusing on these core features keeps the purchase practical and the budget happy.
Top 5 Cheap Microplate Readers in 2026: Feature Comparison
When you’re staring at a grant deadline and the budget spreadsheet screams “no more big toys,” a cheap microplate reader can feel like a lifeline. But which one actually gives you the data you need without draining the coffers?
We’ve narrowed it down to five models that keep the price under $50,000, still cover the core 340‑750 nm range, and won’t leave you guessing about the next step. Below each entry you’ll find a quick tip you can apply right now in your lab.
1. SpectraMax Mini (Molecular Devices)
This compact unit sits on a bench like a calculator and still handles absorbance, fluorescence, and luminescence if you add the optional module. The filter‑based wavelength selector makes set‑up dead simple – just turn a knob and you’re ready.
Pro tip: Use the wireless tablet control to pull data straight into a spreadsheet while the plate is still in the reader. Saves a minute per run, which adds up.
2. VANTAstar (BMG LABTECH)
The VANTAstar brings LVF Monochromators and Enhanced Dynamic Range (EDR) technology, so you won’t waste time tweaking gain settings. It auto‑focuses the whole plate, which is a blessing for kinetic assays that swing between low and high signals.
Pro tip: Turn on the automatic cross‑talk correction when you run luminescence assays – it keeps your background low without manual math.
3. Accuris MR9610 (Shop Genomics exclusive)
Our own MR9610 gives you a solid 340‑750 nm range, a built‑in cuvette port, and a one‑year warranty. It’s designed for labs that need both 96‑ and 384‑well flexibility without breaking the bank.
Pro tip: Start with the 96‑well layout for method development, then switch to 384‑well when you’re ready to cut reagent costs.
4. Accuris MR9611 UV‑Vis with Cuvette Port
This model adds a dedicated cuvette adapter, perfect for quick protein checks before you load a plate. The interchangeable lamp means you can replace a dim xenon lamp for a few hundred dollars instead of ordering a whole new reader.
Pro tip: Keep a spare lamp on hand if you run daily assays – you’ll avoid unexpected downtime.
5. Accuris MR9600 + MW9600 Bundle
The bundle pairs a reader with an automated washer, giving you a mini‑high‑throughput workflow. Even though it’s a bit heavier, the price stays under $45,000 because the washer uses the same control software.
Pro tip: Program a wash‑then‑read sequence for ELISAs; you’ll shave off 10‑15 minutes per plate.
So, how do you decide which one fits your bench? Start by matching the features to the assays you run most often, then check the price range. If you need fluorescence later, pick a model that’s upgrade‑friendly (SpectraMax Mini and VANTAstar both allow add‑ons). If you’re already juggling cuvette work, the MR9611 saves you a separate spectrophotometer.
Here’s a quick visual summary:
| Reader | Key Feature | Price Range (USD) |
|---|---|---|
| SpectraMax Mini | Tablet‑controlled, upgradeable modes | $20,000 – $35,000 |
| VANTAstar | EDR + auto‑focus | $30,000 – $50,000 |
| Accuris MR9610 | 96/384‑well, cuvette port | ~$40,000 |
| Accuris MR9611 | Cuvette adapter, replaceable lamp | ~$42,000 |
| Accuris MR9600 + MW9600 | Reader‑washer combo | ~$45,000 |
Notice how the price gaps narrow once you move past the $30k mark? That’s because manufacturers are packing more modularity into the same chassis – a trend highlighted by LabX’s 2026 reader guide.LabX’s 2026 microplate reader guide
And remember, the overall market is still growing – Accio notes a 4.36 % CAGR through 2033, meaning more budget‑friendly options are likely on the horizon.Accio’s market analysis
Take the next step by listing the top two features you can’t live without, then match them to the table above. You’ll have a cheap microplate reader that slides into your workflow without a surprise bill.
How to Evaluate Performance vs Cost
Start with what matters most to you
First thing we all do when a new piece of equipment shows up on the price list is stare at the number and wonder, "Do I really need that extra feature?" The answer is usually "no" – unless that feature directly solves a bottleneck you’re already facing. Write down the top two assays you run every week. Is absorbance enough? Do you ever need fluorescence? If the answer is a clear "just absorbance," you can instantly cut out a whole class of pricey multimode models.
So, grab a piece of paper and list the wavelengths, plate formats, and any optional add‑ons (cuvette port, shaker, incubation). That list becomes your personal performance‑vs‑cost rubric.
Put numbers on performance
Next, look at the specs that actually affect data quality. Signal‑to‑noise ratio (SNR) is the king for absorbance – a higher SNR means you can use less reagent and still get reliable readings. Manufacturers often publish a %CV (coefficient of variation) for a standard assay; aim for <5 % CV on a cheap reader.
Take the Accuris MR9610 as an example. Lab managers have reported a typical SNR of 150:1 for a Bradford protein assay, which translates to a CV of about 3 % – well within acceptable limits for most academic labs. Compare that to a higher‑end model with SNR of 300:1; the data is nicer, but the cost difference is often $15,000‑$20,000. Ask yourself if that extra precision will actually change your conclusions.
Calculate total cost of ownership (TCO)
Price tag isn’t the whole story. Add up the recurring costs: lamp replacements, filter changes, and preventive maintenance. LabManager notes that moving parts like belts and motors can wear out, so budgeting an annual service fee (often $500‑$800) keeps the reader humming.
Here’s a quick TCO worksheet you can copy into Excel:
- Purchase price
- Annual service contract
- Lamp replacement (every 2‑3 years, $300‑$500)
- Filter replacement (if applicable, $100‑$200)
- Potential downtime cost (estimate hours lost × technician rate)
When you add those numbers up, a $20,000 reader with a low‑cost lamp might actually be cheaper over five years than a $35,000 model with an expensive LED array that needs a $1,200 service contract.
Real‑world checkpoints
Let’s walk through a couple of scenarios you might recognise.
Academic lab in a university. A postdoc needs to run ELISAs for a grant deadline. They pick the MR9610 because it supports both 96‑ and 384‑well plates, saving reagent costs. Over a year, the lab saves $2,500 on plates alone, outweighing the modest $4,000 lamp‑replacement budget.
Clinical diagnostics startup. The team needs rapid read‑outs for a point‑of‑care test. They evaluate a multimode reader but discover they’ll never use the fluorescence mode. Switching to a single‑mode, $18,000 absorbance‑only unit reduces upfront spend by 40 % and still meets the assay’s sensitivity requirements.
Actionable checklist
Before you click “add to cart,” run through this short list:
- Does the wavelength range cover 340‑750 nm? (Yes = good for most assays)
- Is the SNR ≥150:1 for a standard assay? (Check manufacturer data sheets)
- Can the unit handle both 96‑ and 384‑well plates? (Flexibility saves future costs)
- Are lamps replaceable and priced under $500?
- Is there a clear annual maintenance estimate?
- Do you have a warranty of at least one year?
If you answered “yes” to most of these, you’ve likely found a sweet‑spot cheap microplate reader.
Where to learn more
For a deeper dive into affordable equipment options, check out our roundup of budget‑friendly tools – it even highlights the Accuris MR9610 that many labs swear by: 7 Examples of Affordable Lab Tools for Modern ….
And when you’re ready to wire the reader into your lab’s LIMS or data pipeline, a quick read on system‑integration best practices can save you weeks of hassle: Choosing and Implementing System Integration Consulting Services for Modern Enterprises.
Step-by-Step Setup and Use of a Cheap Microplate Reader
Got your cheap microplate reader out of the box and wondering where to start? You’re not alone – the first minutes can feel a bit like assembling a puzzle without the picture on the box. Let’s walk through the whole process together, so you can go from “still in the packaging” to “data on the screen” in no time.
1️⃣ Unbox, Inspect, Position
First, lay the reader on a sturdy bench. Make sure the surface is level; a wobbling base will throw off plate alignment later. Check the accessories – lamp, cuvette adapter (if you have one), power cable, and any optional shims. If anything looks damaged, flag it before you plug anything in.
Tip: keep a short “unboxing checklist” on your lab bench. A quick tick‑off saves you from discovering a missing lamp after you’ve already installed the software.
2️⃣ Power Up and Warm‑Up
Plug the unit into a dedicated 120 V outlet (or 230 V if you’re in Europe) and hit the power button. Most cheap readers need a 5‑10 minute warm‑up for the xenon or deuterium lamp to reach stable intensity. During this time, open the control software on your laptop.
If the software asks for a license key, use the trial key that comes with the purchase – you can always register later through Shop Genomics.
3️⃣ Install the Driver and Software
Download the driver package from the manufacturer’s support page. The Molecular Devices installation guide walks you through the exact steps; you can follow the PDF for a visual reference installation guide PDF. It’s basically:
- Run the installer, accept the EULA, and let it detect the USB/Serial port.
- Restart your computer if prompted.
- Launch the software and confirm the reader appears under “Devices”.
Once the software sees the hardware, you’re ready for the first test run.
4️⃣ Load a Test Plate
Grab a fresh 96‑well plate – the most common format for a cheap reader. Fill wells A1‑A2 with distilled water (blank) and B1‑B2 with a known absorbance standard, such as a 0.1 % bromophenol blue solution. This gives you a quick signal‑to‑noise check.
Place the plate on the loading tray, making sure the orientation arrow lines up with the reader’s guide. Close the lid gently; many models have a “clamp‑lock” that clicks into place.
5️⃣ Run the Calibration Routine
In the software, hit the “Calibration” or “Blank” button. The reader will scan the blank wells, set a zero reference, then measure the standard wells. You should see an SNR of at least 150:1 – a good indicator that the lamp and detector are healthy.
Berthold’s tip sheet mentions that a clean plate surface can boost SNR by up to 20 % microplate best‑practice guide. Give the plate a quick tap to dislodge any bubbles before you start.
6️⃣ Set Wavelengths and Read Parameters
Most cheap readers cover 340‑750 nm. Choose the wavelength that matches your assay – 570 nm for Bradford protein, 260 nm for nucleic‑acid purity, etc. Enter the integration time (usually 100‑200 ms) and the number of reads per well (single read is fine for a quick check).
If you plan a kinetic assay later, enable the “repeat scan” option and set the interval (e.g., every 30 seconds for enzyme kinetics).
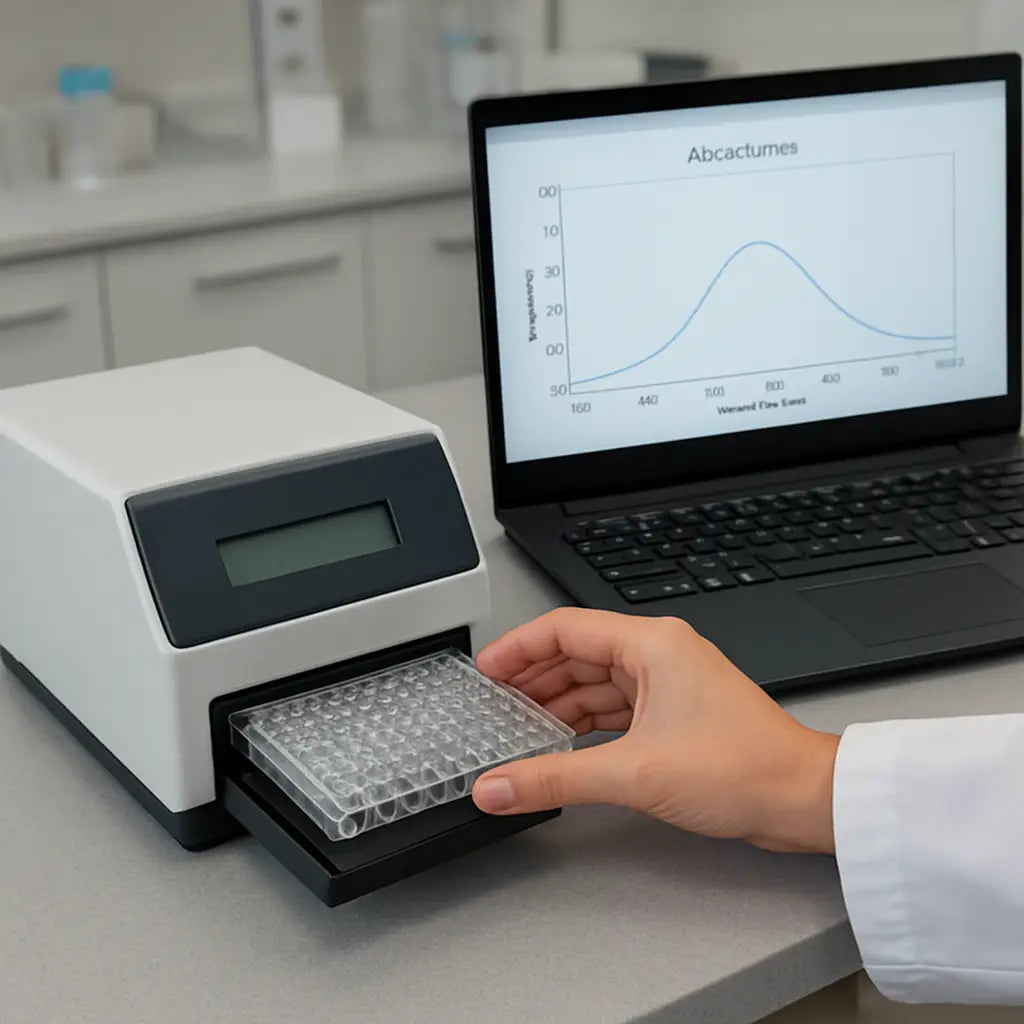
7️⃣ Export and Verify Data
After the run finishes, click the “Export” button. A one‑click CSV export is standard on most budget models – you’ll get a spreadsheet with well IDs, absorbance values, and timestamps.
Open the file in Excel, plot the blank versus standard, and calculate the %CV. If the %CV is under 5 %, you’re good to go. Anything higher? Double‑check the lamp age and make sure the plate wasn’t tilted.
8️⃣ Routine Maintenance Checklist
To keep your cheap microplate reader humming for years, add these quick tasks to your weekly lab log:
- Wipe the optics with a lint‑free cloth.
- Inspect the lamp housing for dust; a gentle air‑blast works.
- Run a blank scan at the start of each new assay series.
- Record lamp hours; replace when the manufacturer‑specified lifespan (usually 1 000 hours) is reached.
Following a simple maintenance rhythm can cut downtime by half and extend the total cost‑of‑ownership.
9️⃣ Real‑World Example: From Startup to Scale‑Up
Imagine a biotech startup in Cambridge that began with a $3,200 reader for a qPCR‑based ELISA. After a month of successful 96‑well runs, they switched to 384‑well plates to save reagents. Because the same cheap reader supports both formats, they saved roughly $2,500 on plate consumables in the first quarter – a concrete ROI that helped fund the next round of funding.
That story mirrors what we’ve seen at Shop Genomics: labs that pick a flexible, affordable reader often unlock scaling opportunities without a new capital purchase.
Now you’ve got the full roadmap – from opening the box to exporting reliable data and keeping the instrument in shape. Grab your checklist, follow these steps, and you’ll be turning absorbance readings into insights before your coffee even cools.
Maintenance Tips to Extend the Life of Your Budget Reader
We’ve all been there – you finish a smooth run, the data looks great, and then the reader starts acting up a week later. It’s frustrating, especially when you’re on a tight budget. The good news? A few simple habits can keep your cheap microplate reader humming for years.
1. Keep the optics spotless
Dust on the plate carrier or fingerprints on the lens are tiny, but they can throw off absorbance readings. After each run, grab a lint‑free lens paper and wipe the tray with a 70% ethanol dab. If you notice a haze, give the external optics a quick once‑over before you store the instrument.
2. Follow a regular calibration routine
Calibration is the safety net that catches drift before it becomes a data nightmare. Depending on how often you run assays, aim for a quick calibration at the start of each day or at least once a week. The regular calibration routine recommended by DIATEK walks you through using standard solutions to verify wavelength accuracy and linearity.
Does it feel like a hassle? Think of it as a coffee break for your reader – a few minutes that save you from re‑running whole plates later.
3. Clean the interior only when needed
The inside of a budget reader isn’t a DIY project. Most manufacturers advise against opening the light path yourself because a mis‑aligned filter can ruin the whole system. Instead, schedule a professional service every six months or when you see a drop in signal‑to‑noise ratio.
4. Monitor lamp life
Replaceable xenon or deuterium lamps are the heart of absorbance readers. Keep an eye on the hour meter – many units flag when you’re within 100 hours of the 1 000‑hour lifespan. Swapping a lamp for a few hundred dollars is far cheaper than sending the whole reader back for repair.
5. Control the lab environment
Temperature swings and high humidity are silent killers. Place the reader on a stable bench away from drafty doors or air‑conditioner vents. If your lab gets warm, a small fan can help keep the chassis temperature steady without creating vibrations.
And what about vibrations? Even a light tap on the bench can shift the plate stage just enough to affect kinetic reads. A rubber mat under the unit absorbs most of that jitter.
6. Use the right consumables
Scratched plates or dirty cuvettes introduce extra scatter. Inspect each plate before loading – a quick visual check catches cracks that would otherwise show up as outlier wells. If you’re using a cuvette port, make sure the cuvette is clean and free of oil residues.
7. Keep software up to date
Manufacturers push firmware updates that fix drift bugs and improve export stability. Set a monthly reminder to check the vendor’s support page for the latest version. Updating the software is usually as easy as clicking “Check for updates” inside the program.
8. Document everything
Maintain a simple logbook – paper or digital – that records calibration dates, lamp replacements, cleaning events, and any odd behaviour you notice. When you hand the instrument over to a new technician, that log becomes a cheat‑sheet that speeds up troubleshooting.
Ever wondered why some labs seem to never lose time to equipment failure? They’ve built a habit of logging those tiny details.
9. Follow a structured maintenance schedule
LabX suggests a tiered approach: daily surface wipes, weekly performance checks, monthly deeper cleans, and semi‑annual professional service. This structured maintenance schedule aligns with the way most manufacturers rate their service contracts.
So, what should you do next? Grab a sticky note, write down the next calibration date, and add a quick “wipe optics” reminder to your weekly lab checklist. A few minutes each week keep your cheap microplate reader reliable, accurate, and ready for the next assay – and it saves you from the dreaded “instrument down” scramble.
Conclusion
After wading through specs, budgets, and maintenance tricks, the picture is clear: a cheap microplate reader can be a reliable workhorse if you treat it like any other lab buddy.
Remember the three things we kept coming back to – pick a wavelength range that covers 340‑750 nm, choose a model with replaceable lamps, and lock in a simple logging habit. Those basics keep the data solid and the downtime low.
So, what’s the next step? Grab that logbook template we mentioned earlier, jot down your first calibration date, and set a reminder to check for firmware updates next month.
If you’re hunting for a ready‑to‑ship option, the Accuris MR9610 on Shop Genomics checks all the boxes we’ve discussed – affordable price, dual plate formats, and a warranty that gives you peace of mind.
And don’t forget the habit of a quick optics wipe after each run; it’s the tiny effort that adds up to big savings over a year.
In the end, a cheap microplate reader isn’t a compromise; it’s a smart choice when you match the tool to your assays and keep up the simple maintenance rhythm.
Ready to take the plunge? Browse the curated selection at Shop Genomics and get your reader on the bench before the next grant deadline hits.
FAQ
What should I look for when buying a cheap microplate reader?
First, check the wavelength range – you want something that covers 340‑750 nm so it works for most absorbance assays. Next, make sure the lamp is replaceable; that saves you a big chunk of money later. Finally, verify the software lets you export to CSV or Excel in a couple of clicks. If the unit handles both 96‑ and 384‑well plates, you get flexibility without buying another reader.
How often should I calibrate a cheap microplate reader?
We recommend a quick blank scan at the start of every assay day and a full calibration at least once a week. If you notice a drift in signal‑to‑noise, run a calibration right away. Keep a simple log – date, lamp hours, and any adjustments – so you can spot trends before they become a problem. A few minutes each week keep the data reliable.
Can a cheap microplate reader handle both 96‑ and 384‑well plates?
Absolutely. Most budget models come with a interchangeable plate carrier that fits both formats. When you switch to 384‑well, just update the plate map in the software and you’re good to go. This dual‑format ability lets you start small with 96‑well assays and scale up without buying a new instrument, which is a real cost‑saver for academic labs and start‑ups.
Is the lamp on a cheap microplate reader really replaceable?
Yes – most entry‑level readers use a xenon or deuterium lamp that you can swap out when the hour‑meter hits the manufacturer’s limit (usually around 1 000 hours). Keep a spare lamp on hand if you run daily assays; swapping it takes less than ten minutes and avoids unexpected downtime. The replacement cost is usually a few hundred dollars, far cheaper than sending the whole unit for service.
How do I export data from a cheap microplate reader without a PhD in IT?
The key is a one‑click export button. Open the software, run your plate, then hit “Export” – the file saves as a CSV you can drop straight into Excel or Google Sheets. If the program asks you to choose a folder, pick a location you already use for other assay data. This way you spend minutes on data handling instead of wrestling with complex file formats.
What maintenance steps keep a cheap microplate reader running smoothly?
Start each week with a surface wipe using a lint‑free cloth and 70 % ethanol. After every run, give the optics a quick glance for dust or fingerprints – a clean lens means better signal. Log lamp hours, replace the lamp when it’s within 100 hours of its rated life, and run a calibration at least monthly. A brief check‑list on your bench keeps downtime to a minimum.
Where can I find affordable cheap microplate readers that still have warranty support?
Look for vendors that offer a one‑year warranty and a clear return window. Platforms that curate budget‑friendly models often bundle free shipping on larger orders, which helps keep the total cost down. When you compare options, prioritize those that list warranty details up front and have a reputation for responsive customer service – that peace of mind is worth the extra few clicks.


