
Losing a sample because a freezer fails can cost more than you think.
That's why an affordable lab freezer alarm system is a must for any lab that can't afford a pricey backup.
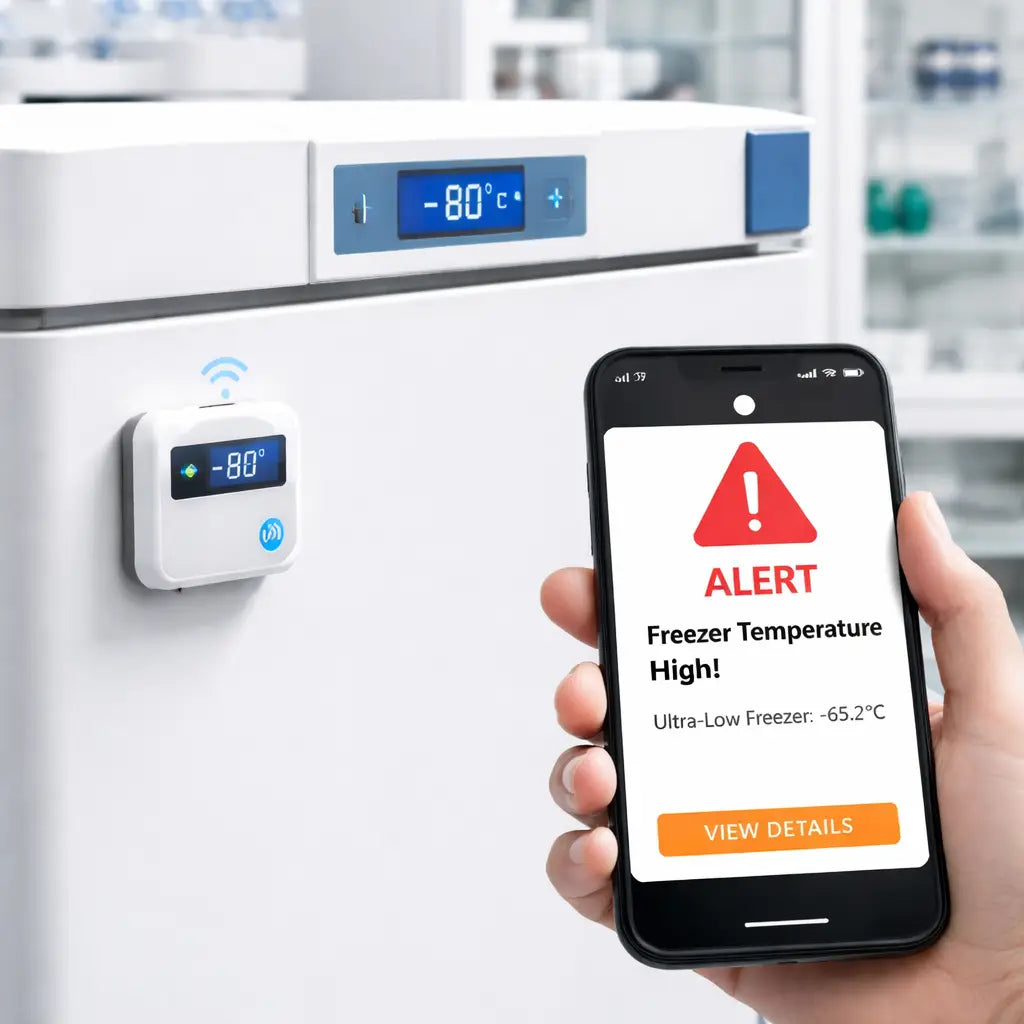
You need a device that warns you the moment temperature climbs, so you can act before the damage spreads.
Many researchers find that a simple alarm with a clear audible tone and a phone alert saves time and money.
Shop Genomics offers a range of budget‑friendly alarms that plug right into standard freezers, no major wiring needed.
The units are easy to set up: just attach the sensor, set the threshold, and let the system do the watching.
Because the alarm talks to you in real time, you can step away from the bench without worrying about a silent failure.
Imagine getting a text at 2 am that your ultra‑low freezer is warming – you grab a backup freezer and rescue the work before it's lost.
This guide will walk you through picking the right alarm, installing it, and keeping it reliable for years.
By the end, you’ll know how to protect your samples without breaking the lab budget.
Step 1: Assess Your Lab Freezer Needs
Before you buy anything, you need to know exactly what your freezer has to protect. A single missed sample can set back a whole project, so start with a clear picture of your risk.
Ask yourself what you store. Are you keeping DNA extracts at –80 °C, or just a few reagents at 4 °C? The temperature range you need will decide the type of alarm you can use. Small labs often only need a simple temperature threshold, while larger cores may want multiple points.
Look at the freezer’s specs. Does it have a built‑in alarm port, or will you need a plug‑in sensor? Check the capacity and how often the door is opened. A busy bench means more temperature swings, so a quicker alert is key.
Now match those needs to your budget. An affordable lab freezer alarm system can cost less than a fancy backup freezer, but you still want reliability. Compare the price of a basic sensor with the cost of a spare freezer – the alarm often wins on cost and space.
Think about how you’ll see the warning. A loud beep helps on the bench, but a phone alert lets you act from the office. You can even print clear labels for the sensor using custom print services so you never mix up cables.
Keep the setup simple. Many researchers use short work bursts to stay on top of checks. A quick Pomodoro timer guide can help you fit a five‑minute freezer check into a busy day.
Once you’ve listed the basics, you’re ready to install the alarm. Watch the short video below for a step‑by‑step demo of attaching the sensor and setting the threshold.
Seeing the sensor in action makes the next step feel less daunting.
Step 2: Compare Alarm Features and Prices
When you line up a few alarm options, the list can feel like a maze. You need a clear way to see what matters most for your lab.
Pick the core features
First, check the temperature threshold accuracy. A good affordable lab freezer alarm system should trigger a few degrees above your safe limit and stay steady even when the freezer door opens.
Second, look at how the alarm reaches you. Some units only beep, others send a text, an email, or both. If you work late, a phone alert can save a sample.
Third, think about power. Battery‑run sensors avoid a power‑outage blind spot, while plug‑in models may need a UPS.
Fourth, ask if the system logs data. A simple log lets you pull a report for audits without manual notes.
Finally, see if the vendor mentions GxP compliance. The EU‑PRY guide notes that GxP‑ready alarms help labs meet strict quality rules (freezer alarm feature guide).
How to rank them
Make a quick table on paper. Write each feature in the left column, then give each option a score from 1 to 5. Add the scores up and you’ll see which alarm gives the most bang for the buck.
Tip: If you need more than three sensors, consider a hub that can daisy‑chain up to seven units. It cuts the cost per sensor.
Price check
Now pull the price list. Some sellers charge a flat fee per sensor, others bundle a hub and a few sensors for a set price. Compare the total cost for the number of freezers you have.
Remember, a $20 sensor that only beeps may be cheaper, but if you lose a sample, the hidden cost is far higher.
Quick decision table
| Feature | Example Option | Note |
|---|---|---|
| Threshold Accuracy | ±0.5 °C sensor | Triggers early, reduces false alarms |
| Alert Method | SMS + Email | Works on phone and desktop |
| Data Logging | Cloud dashboard (IoT enabled) | Easy audit reports; see market trend toward IoT (industry report) |
When you finish the table, you’ll have a clear picture of which affordable lab freezer alarm system fits your budget and your lab’s safety needs.
Step 3: Install and Test Your Alarm System
Now that you know what to look for, it’s time to get the alarm into the freezer and make sure it talks to you.
Unpack and place the sensor
Take the kit out of the box. You’ll see a small probe, a mounting clip, a battery pack (or power plug), and a short guide.
Put the probe where the freezer’s air moves but away from the door seal – a spot near the middle of the chamber works best. The clip holds it steady without touching the walls.
Power up and pair
If the sensor runs on a battery, pop it in. If it needs a wall adapter, plug it into a nearby outlet.
Turn on the hub or Wi‑Fi dongle that came with the kit. Open the app on your phone and follow the on‑screen steps to pair the sensor. Most affordable lab freezer alarm systems finish pairing in under a minute.
Set the temperature threshold
Enter the safe limit you wrote down in Step 1 (for example –80 °C). Then set the alert a few degrees higher – –75 °C works for most ultra‑low units.
Choose how you want to be told: a beep, an SMS, an email, or any combo. The app lets you toggle each method.
Run a quick test
Grab a cup of warm water (about 20 °C) and place it next to the probe for a minute. The sensor should see a rise and fire an alert.
Check your phone. Did you get a text? Did the app flash a warning? If you hear a beep, that’s a good sign too.
Next, put the probe back and let the freezer cool for a few minutes. When it returns to the set point, the alarm should go silent.
Verify logging
Open the data log in the app. You should see a timestamp for the warm‑water event and a normal reading after cooling.
If the log is empty, double‑check the sensor’s Wi‑Fi connection. A simple reboot of the hub often fixes a missed packet.
Document the test
Write down the date, the threshold you used, and the result of each alert. Keep this note with your freezer’s SOP.
Many labs keep a quick checklist on the freezer door so anyone can repeat the test every six months.
Doing these steps once means the alarm will be ready the next time the temperature drifts. That’s the peace of mind an affordable lab freezer alarm system should give you.
Step 4: Maintain and Troubleshoot the Alarm
Keeping the alarm working is as easy as a quick check each month.
Set a simple schedule
Pick a day that works for you, maybe the first Monday of every month.
Open the app, look at the last alert, and write down the date.
Write a note on the freezer door. A short checklist helps anyone in the lab repeat the steps.
Battery and power check
Take off the sensor cover.
If you see a flat battery icon in the app, swap the cell.
For plug‑in units, make sure the cord isn’t twisted and the outlet still works. A quick plug‑in test with a lamp can save a surprise.
Run a fresh test
Grab a cup of warm water (about 20 °C) and hold it next to the probe for a minute.
The alarm should beep and send a text.
If you get no signal, restart the hub and try again.
Check the log
Open the data log in the app.
You should see a timestamp for the warm‑water event and a normal reading after cooling.
Missing entries could mean a Wi‑Fi hiccup.
Reboot the hub or move the router closer.
Troubleshoot common problems
Red beeps or flashing lights usually mean the temp rose above the set point.
That’s a clear sign the alarm did its job.
Ice buildup on the freezer walls can block airflow and cause false alerts.
Defrost the unit and clean the coil.
Water pooling may point to a blocked drain line.
Clear the line and wipe the interior dry.
Odd noises often signal a loose part.
Tighten any visible screws, but call a service tech if the sound persists.
For more detail on these issues, see this guide on common ULT freezer problems.
Document everything
After each check, note the date, battery status, and any fixes.
Keep the record with your SOP.
When you stick to this routine, the alarm stays ready and you avoid costly sample loss.

Conclusion
By now you’ve seen how an affordable lab freezer alarm system can guard your samples and keep stress low.
Pick a sensor that fits your freezer size, set the threshold a few degrees above the safe limit, and test it with a warm‑water cue. Record the result, then stick the checklist on the door. That simple loop stops surprises.
If you need a quick refresher on picking the right alarm, check out How to Choose an Affordable Lab Freezer Alarm in 2026 for step‑by‑step tips.
Don’t forget to back up the alarm logs. Storing the data in the cloud protects it from local failures – see this cloud backup guide for a short how‑to.
Follow these habits and you’ll keep your samples safe without blowing the budget.
FAQ
What is an affordable lab freezer alarm system?
An affordable lab freezer alarm system is a small sensor that watches the freezer’s temperature and lets you know when it climbs above a safe level. It usually plugs into a power source or runs on a battery, and it can send a beep, a text, or an email. The idea is to catch a problem early so you can move your samples before they get damaged, without spending a lot of money.
How do I pick the right sensor for my freezer?
First, note the lowest temperature your freezer needs to stay at. Choose a sensor that can read that range – many budget units cover down to –100 °C. Next, look at how it connects: Wi‑Fi hubs are handy for remote alerts, while a simple plug‑in works if you only need a local beep. Finally, check the battery life if you go wireless; a sensor that lasts a year or more keeps maintenance low.
Can I get phone alerts from the alarm?
Yes, most modern kits let you add a phone number during setup. The app on your phone talks to the sensor via Wi‑Fi and will push a text when the temperature passes the threshold you set. You can also choose email alerts if you prefer to keep a record in your inbox. Just make sure the sensor and your phone are on the same network when you first pair them.
How often should I test the alarm?
Run a quick test at least once a month. Grab a cup of warm water and hold it next to the probe for a minute – the alarm should fire and you should see a notification. Then let the freezer cool back down and confirm the alert stops. Write the date and result on a checklist taped to the freezer door so anyone can see the last test.
What if the battery runs out?
If the sensor is battery‑powered, the app will show a low‑battery icon before it dies. Swap the cell as soon as you see the warning – most cheap sensors use a standard AA or coin cell you can find at any store. After changing the battery, run a quick test to be sure the sensor talks to the hub again.
Do I need to back up the alarm logs?
Backing up logs is a good habit. Many kits store readings in a cloud dashboard, but you can also export a CSV file once a week and save it on a secure drive. Having a backup means you still have proof of temperature history if the internet goes down or the hub fails. It also helps with audits and quality checks.


