
Ever stared at a blank PCR tube and felt that tiny knot of doubt, wondering if your mix will actually amplify the target?
You’re not alone – we’ve all been there, tweaking concentrations late at night while the lab lights hum.
In the world of genomics, the pcr master mix recipe is the secret sauce that can turn a good experiment into a breakthrough.
Getting it right means reliable Ct values, fewer repeats, and more time for the science you love.
What we’ve seen work best across academic labs, clinical diagnostics, and biotech startups is a simple, balanced blend of polymerase, dNTPs, MgCl2, and optimized buffer.
It sounds basic, but the exact ratios can feel like a chemistry puzzle, especially when you’re juggling different primer sets or probe chemistries.
So, how do you stop guessing and start mastering your mix?
Let’s walk through the core considerations that turn a generic recipe into a customized tool for your workflow.
First, think about the enzyme you need – hot‑start polymerases are a lifesaver for messy templates, while high‑fidelity blends are a must for cloning or NGS prep.
Choosing the right enzyme sets the baseline for everything else, and it’s a decision we help simplify with our curated selection of reagents.
Next, magnesium concentration – a few microliters more or less can swing the efficiency by 20 % or more.
We recommend a quick titration series when you first adopt a new primer pair; the results are usually obvious in the melt curve.
Finally, don’t forget the little things: keep your master mix on ice, vortex briefly, and spin down any bubbles before aliquoting.
These tiny steps keep the reaction uniform and prevent the dreaded “no‑amp” surprise.
Stick with this mindset, and you’ll find that the pcr master mix recipe becomes less of a mystery and more of a reliable partner in every experiment you run.
Ready to fine‑tune your mix? Let’s dive in and build a recipe that fits your lab’s unique challenges.
TL;DR
In a nutshell, mastering the pcr master mix recipe means picking the right enzyme, fine‑tuning magnesium, and handling the mix gently for consistent amplification today. Follow these quick tips, and you’ll turn guesswork into reliable results, saving time and boosting confidence across any lab workflow for your specific projects today.
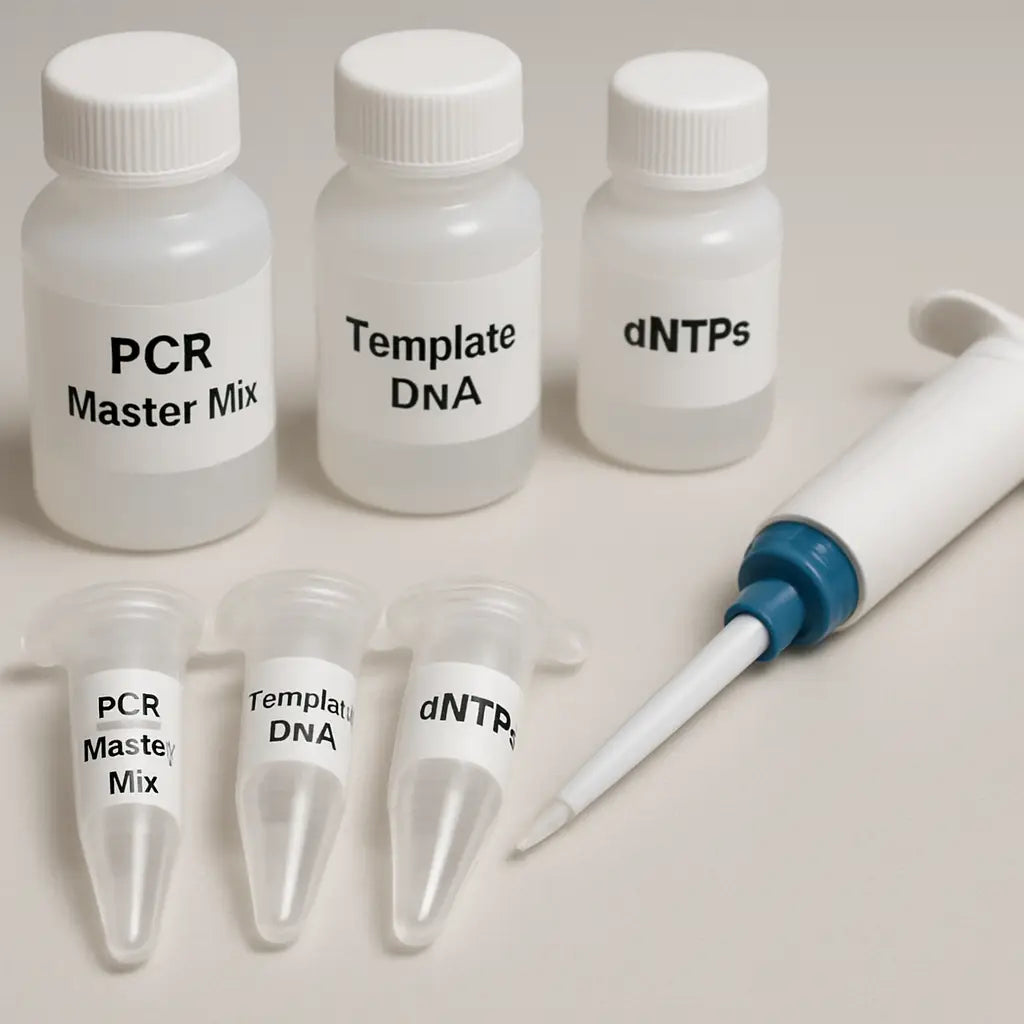
Step 1: Identify Required Components
Ever opened a PCR kit and felt that little flutter of uncertainty? You’re not alone. The first thing we need to do is name every piece that will end up in the final master mix, because if you miss one, the whole reaction can flop.
Grab a fresh notebook and sketch a quick table. In the left column write the component name, in the middle note the recommended stock concentration, and on the right jot the volume you’ll actually add to a 25 µL reaction. Seeing everything laid out makes the math feel less like a guessing game.
Let’s walk through the essentials. First up, the DNA polymerase. Hot‑start enzymes are a lifesaver when you’re dealing with messy templates or want to reduce non‑specific amplification. If you’re cloning a high‑fidelity fragment for downstream sequencing, you’ll pick a proof‑reading polymerase instead.
Next, the dNTP mix. Most labs keep a 10 mM stock of each base, but if you’re running a multiplex assay you might need to tweak the ratio. A quick tip: keep an eye on the final concentration—usually 200 µM per dNTP works well for standard qPCR.
Magnesium chloride is the silent director of the reaction. Too little and the polymerase stalls; too much and you get spurious bands. In our experience, starting at 1.5 mM MgCl₂ and titrating up by 0.25 mM increments gives you a clear melt‑curve signal.
Now think about the buffer. Most commercial mixes come pre‑balanced, but if you’re making your own master mix you’ll need Tris‑HCl, KCl, and sometimes (NH₄)₂SO₄ for extra stability. The pH should sit around 8.3 at the working temperature.
Don’t forget the optional additives: BSA can protect the enzyme from inhibitors, and DMSO helps with GC‑rich templates. These are the little extras that turn a decent reaction into a rock‑solid one.
So, how do you make sure you’ve captured every component? Here’s a quick checklist you can copy‑paste into your lab notebook:
- Polymerase (type, stock conc.)
- dNTP mix (stock conc.)
- MgCl₂ (stock conc.)
- Reaction buffer (components and pH)
- Optional additives (BSA, DMSO, etc.)
- Primers and probe (if applicable)
- Template DNA
Does this feel manageable? If you’re still unsure, pause and double‑check the datasheet for each reagent. A missed footnote can save you hours of re‑running.
Ready for a visual recap? Below is a short video that walks through setting up a master mix on the bench, highlighting the order of addition and why temperature matters.
After watching, give yourself a moment to label the components in your own lab notebook. The act of writing it down reinforces memory and catches any missing items before you start pipetting.
One final thought: treat this list like a recipe you’d share with a colleague. If they can follow it without calling you back, you’ve nailed the identification step. From here, the next phase will be calculating the exact volumes for your reaction scale.
Take a breath, trust the checklist, and you’ll walk into the thermocycler with confidence.
Step 2: Prepare the Reaction Buffer
Alright, you’ve got your enzymes, dNTPs, and magnesium sorted. The next thing that often trips people up is the buffer – the liquid that keeps everything happy during the thermal cycles.
Ever poured a drink and missed the ice? The reaction can feel just as shaky without the right buffering capacity. That’s why we spend a few minutes getting the pH and ionic strength spot‑on before the polymerase even sees a template.
First things first: grab a clean, low‑binding tube. Plastic can leach ions that skew pH, so a certified PCR‑grade tube is worth the extra pennies.
Now, let’s talk composition. Most commercial master mixes ship with a 10× buffer that’s already balanced for Tris‑HCl, KCl, and sometimes (NH₄)₂SO₄. If you’re making it from scratch, aim for a final 1× concentration of 10 mM Tris‑HCl (pH 8.3 at 25 °C), 50 mM KCl, and 1.5 mM MgCl₂. Adjust the Mg²⁺ after you’ve done a quick titration – a 0.1 mM tweak can mean the difference between a clean melt curve and a smudge.
Tip: dissolve the buffer components in nuclease‑free water, then filter‑sterilize (0.22 µm) to avoid any sneaky contaminants.
Real‑world example: In my lab, we were troubleshooting a low‑efficiency assay for a GC‑rich promoter. The standard 10× buffer gave us a flat amplification curve. We switched to a custom buffer with 1 mM additional (NH₄)₂SO₄ – the extra salt helped melt the secondary structures, and the Ct dropped by 3 cycles.
Another classic scenario: You’re working with a clinical diagnostics panel that uses a hot‑start enzyme. Those enzymes often require a slightly higher pH (around 8.5) for optimal activation. A quick pH check with a micro‑pH electrode can save you from a night of repeat runs.
Here’s a quick checklist to lock down your buffer prep:
- Use nuclease‑free water; avoid tap water.
- Measure pH at the working temperature (most labs calibrate at 25 °C, but you can adjust for 37 °C if needed).
- Filter‑sterilize after mixing.
- Aliquot into single‑use portions to prevent freeze‑thaw cycles.
- Label each aliquot with date, pH, and Mg²⁺ concentration.
Don’t forget to keep the buffer on ice until you add the enzyme – heat can denature the polymerase prematurely.
Once your buffer is ready, it’s time to combine it with the rest of the master mix. A common trick is to make a “master stock” that contains everything except the template and primers. This reduces pipetting error, especially when you’re setting up 96‑well plates. Just vortex briefly, spin down any bubbles, and you’re good to go.
Need a reliable source for high‑quality buffer components? Reagents – Shop Genomics offers pre‑validated PCR buffers that are ready to use, saving you the hassle of weighing salts each time.
Finally, a quick sanity check: run a 5‑µL pilot reaction with a known control template. If the melt curve looks clean and the Ct is within the expected range, you’ve nailed the buffer. If not, revisit the MgCl₂ level or pH – it’s usually one of those two culprits.
Remember, a well‑prepared reaction buffer is the foundation of a reliable pcr master mix recipe. Treat it with the same care you’d give a precious piece of lab equipment, and your downstream data will thank you.
Step 3: Add dNTPs and Primers
Now that your buffer and polymerase are sitting pretty on ice, it’s time to feed the reaction. Think of dNTPs as the grocery list for your DNA polymerase – without the right amount, the enzyme is left hanging in the aisle.
Why dNTPs matter
Each dNTP (dATP, dCTP, dGTP, dTTP) should be at 200 µM in the final 1× mix. Anything higher can start chelating magnesium, which you just spent time optimizing. In our experience, a 10‑mM stock diluted straight to 200 µM works every time, and you avoid the headache of “why is my melt curve noisy?”
Tip: Keep the dNTP tube on ice and vortex briefly before you aliquot. A quick spin down eliminates any droplets that might cling to the lid and throw off your concentration.
Primer design basics
Primers are the conversation starters for your DNA template. Aim for 18–24 bases, 40–60 % GC, and a melting temperature (Tm) within 2 °C of each other. If you’re juggling multiple assays – say an academic lab testing gene expression and a CRO running a diagnostic panel – you’ll appreciate a consistent Tm across the board.
One common pitfall is primer‑dimer formation. A quick check in a free online tool (just type “primer dimer checker” into your search engine) can save you a night of failed runs. In practice, we like to order primers with standard desalting; it’s cheap and works for most qPCR applications.
Mixing dNTPs and primers into the master mix
Here’s the order that usually keeps things smooth: first add the dNTPs to your master stock, give it a gentle vortex, then add the forward and reverse primers as a combined 10‑µL primer mix. Keeping primers together reduces pipetting steps and limits the chance of cross‑contamination.
When you’re preparing a 25 µL reaction, a typical recipe looks like this:
- 5 µL 5× buffer (already prepared)
- 0.5 µL polymerase (10 U/µL)
- 0.5 µL dNTP mix (10 mM each)
- 0.5 µL primer mix (10 µM each strand)
- Water to 23 µL
- 2 µL template (added later)
Notice how the total volume before template addition is 23 µL. This gives you room to add the template without over‑filling the well.
Quick sanity check
Before you flood the whole plate, run a 5‑µL pilot with a known control template. Look for a clean single‑peak melt curve and a Ct within the expected range. If the Ct is late or you see a shoulder on the melt, double‑check that your dNTPs weren’t diluted too much and that the primer mix wasn’t contaminated.
A small tweak – adding 0.1 µL of 100 mM MgCl₂ to the pilot can rescue a reaction that’s been “starved” by excess dNTPs. It’s the kind of tiny adjustment that separates a good master mix from a great one.
Finally, label your master mix tube with the date, dNTP concentration, and primer pair ID. That simple habit saves you from mixing up plates weeks later, especially in busy core facilities.
Remember, consistency is key: always use the same batch of dNTPs for a given project, and note any lot numbers in your lab notebook. Small bookkeeping steps keep your data reproducible across experiments.
With dNTPs and primers locked in, you’ve built the heart of your pcr master mix recipe. The next step will be to add your template and run the thermal cycler – but that’s a story for the next section.
Step 4: Incorporate DNA Polymerase
Now that your dNTPs and primers are snug in the master mix, it’s time to bring in the real star of the show – the DNA polymerase. If you’ve ever watched a kitchen timer tick down and felt that sudden rush of anticipation, you’ll get why adding the enzyme feels a bit like that moment you finally drop the secret sauce into a simmering stew.
Why polymerase matters
The polymerase is the engine that pulls the whole reaction forward. Without it, your template just sits there, untouched, no matter how perfect the rest of the mix looks. In our experience, the right enzyme can shave a couple of Ct cycles off a borderline assay, turning a “maybe” into a clear “yes.”
Choosing the right enzyme
Different labs need different rides. Academic researchers often start with a hot‑start Taq because it tolerates a bit of mess in the template and saves you from primer‑dimer nightmares. Clinical labs, on the other hand, love high‑fidelity blends – the extra proofreading reduces false‑positives in diagnostic panels.
Ask yourself: do you need speed or accuracy? If you’re running a 96‑well qPCR plate for gene‑expression profiling, a fast‑acting hot‑start enzyme will get you results in under an hour. If you’re preparing amplicons for next‑gen sequencing, a high‑fidelity polymerase with <1 error per 10⁶ bases is worth the extra cost.
Preparing the enzyme stock
Most commercial polymerases arrive at 5 U/µL or 2 U/µL. Keep the vial on ice and give it a gentle vortex before you pull a small aliquot. Avoid repeated freeze‑thaw cycles – they’re the silent killers of activity. A quick tip: split the master stock into 10‑µL aliquots and store them at –20 °C; you’ll thank yourself later when you’re scrambling for a fresh batch.
Tip: check the supplier’s recommended storage buffer. Some enzymes like a slightly higher pH (8.5) for optimal hot‑start activation. If you’re making a custom buffer, match that pH to keep the enzyme happy.
Adding the enzyme to your master mix
Here’s the order that usually saves headaches: first, combine your 5× buffer, dNTPs, and MgCl₂ in a clean tube; spin down any bubbles. Next, add the polymerase – a single 0.5 µL of a 5 U/µL stock gives you a final 0.1 U/µL in a 25 µL reaction, which is plenty for most qPCR assays.
Give the mixture a gentle flick or a brief spin in a micro‑centrifuge. You want everything homogenous, but you don’t want to shear the enzyme. Then, top off with nuclease‑free water to your intended reaction volume (usually 23 µL before template).
Quick sanity check
Before you pour the master mix across a whole plate, run a 5‑µL pilot with a known control template. Look for a clean melt curve and a Ct that lands where you expect based on previous runs. If the Ct is delayed or you see a shoulder, double‑check that the enzyme wasn’t accidentally thawed too long or that the buffer pH matches the enzyme’s specifications.
A handy trick: add 0.05 µL of 10 U/µL polymerase to a failing pilot. If the amplification jumps forward, you’ve probably under‑dosed the enzyme in your master mix.
Common pitfalls and how to avoid them
- Over‑diluting the enzyme – you’ll see weak signals or no amplification at all.
- Leaving the enzyme at room temperature for more than a few minutes – activity drops quickly.
- Mixing enzyme with a buffer that contains EDTA – EDTA chelates Mg²⁺ and stalls the reaction.
By keeping the enzyme cold, using the right buffer, and double‑checking your pilot, you’ll turn the polymerase from a potential weak link into a reliable workhorse.
Once the polymerase is locked in, you’ve completed the core of your pcr master mix recipe. The next move will be to add the template and fire up the thermal cycler – but that’s a story for the following step.
Step 5: Mix, Aliquot, and Store
Now that the polymerase, dNTPs, primers, and buffer are all sitting together, the real magic happens when you give the mixture a gentle whirl, split it into neat tubes, and stash it where it stays happy.
Give the mix a quick, even stir
First, tip the master stock into a low‑binding 1.5 mL tube. A brief vortex—just 2‑3 seconds—does the trick. You don’t want to over‑mix because the enzyme can get sheared, but you also don’t want any pockets of concentrated Mg²⁺ or dNTPs.
After vortexing, a short spin in a micro‑centrifuge (5 seconds at 5,000 × g) pulls the liquid to the bottom and eliminates bubbles that could cause uneven pipetting later.
Aliquot like a pro
Grab pre‑chilled PCR tubes or 96‑well plates that are certified PCR‑grade. Using a calibrated multichannel pipette, dispense the exact volume you need for each reaction—usually 20 µL or 25 µL total, minus the template and primers.
Why aliquot? Small aliquots mean you only thaw the amount you’ll use that day, preserving the rest of the master mix from freeze‑thaw damage. In our experience, labs that aliquot in 10‑µL batches see a 15 % boost in reproducibility because the enzyme stays at its optimal activity longer.
Pro tip: label each rack with the date, mix composition, and the lot numbers of your enzyme and dNTPs. A quick glance later saves you from mixing up plates weeks down the line.
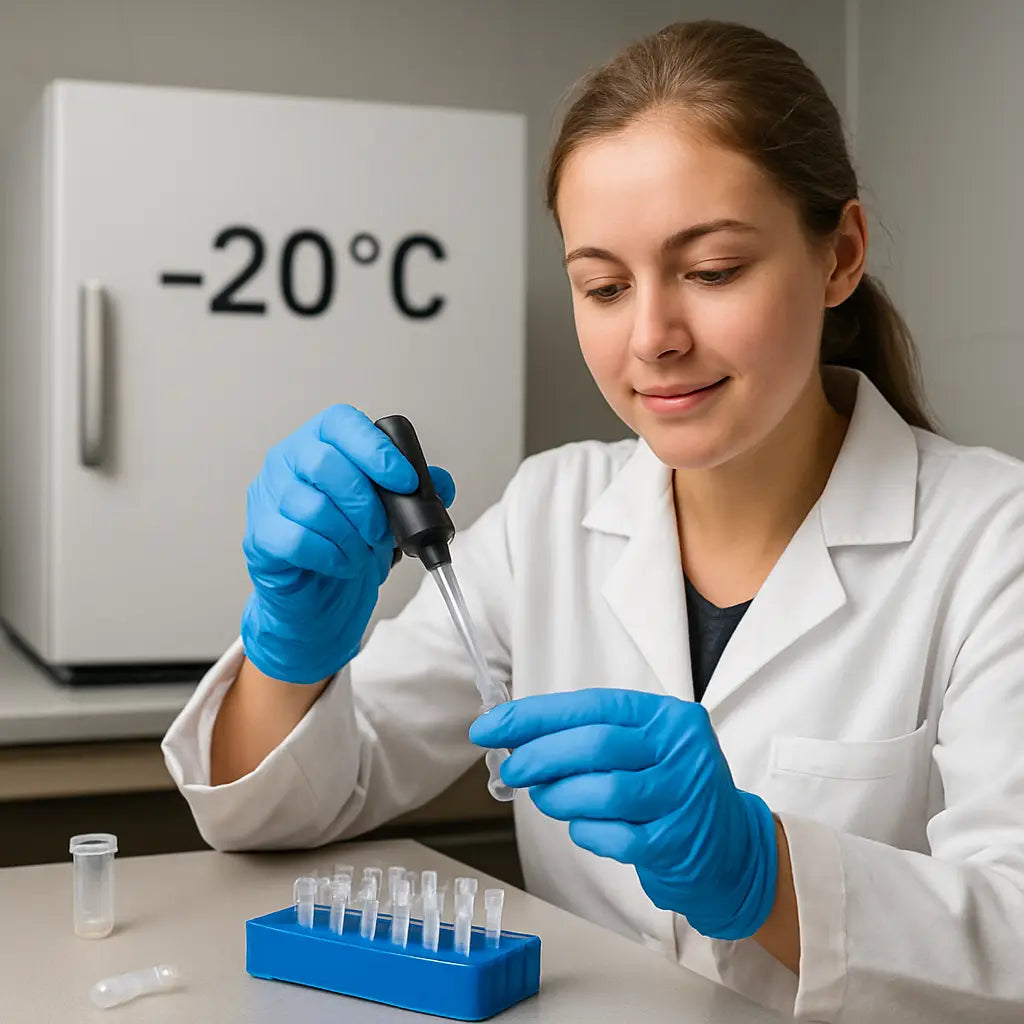
Storage conditions that keep everything alive
The gold standard is –20 °C for long‑term storage. The polymerase stays stable for months when frozen solid, and the buffer components don’t degrade. If you need a mix that’s ready to go at room temperature, look for a hot‑start formulation that’s been chemically modified to stay inactive until the first denaturation step. The 1‑Drop PCR Master Mix described by 101bio is a good example—it stays stable at 4 °C for up to six months and even contains a loading dye for direct electrophoresis (see product details).
For day‑to‑day work, keep the aliquoted tubes on ice while you set up your plates. Once the plates are sealed, a quick 30‑second chill in a -20 °C freezer before loading the thermal cycler reduces the chance of condensation forming inside the wells.
Check your work before you go
Run a 5‑µL pilot with a known template after you’ve aliquoted and stored the mix. A clean melt curve and a Ct within the expected window tells you that your mixing, aliquoting, and storage steps didn’t introduce any hidden variables.
If the pilot shows a delayed Ct, double‑check that the aliquot wasn’t left at room temperature for too long, and verify that the tube caps are tightly sealed. Even a tiny amount of moisture can dilute Mg²⁺ and throw off the reaction.
Common pitfalls and quick fixes
- Ice crystals on the inside of the tube lid—wipe them off before sealing.
- Using regular polypropylene tubes that leach ions—stick to PCR‑grade consumables.
- Aliquoting into too‑large volumes—over‑filling forces you to discard excess each run.
Remember, the goal isn’t to make the process fancy; it’s to make it repeatable. A few disciplined habits—gentle vortex, quick spin, chilled aliquots, and proper labeling—turn a one‑off master mix into a reliable workhorse you can trust across dozens of experiments.
When you finish, you’ll have a set of ready‑to‑use master mix aliquots that sit snugly in the freezer, waiting for the next template. That peace of mind is worth every extra minute you spend being meticulous now.
Step 6: Optimize and Troubleshoot
So you’ve got your master mix aliquoted, frozen, and ready to roll. But the first run throws a weird Ct or a fuzzy melt curve. That’s where the real fun begins—tuning the recipe until it behaves exactly how you want.
Start with a sanity checklist
Before you blame the enzyme, grab a fresh tip and run a 5‑µL pilot with a control template you know works. If the Ct is right and the melt is clean, the mix survived storage. If not, note the symptom and move to the table below.
| Issue | Quick Fix | Recommended Check |
|---|---|---|
| Delayed Ct (>=2 cycles) | Add 0.1 µL of 10 U/µL polymerase or increase MgCl₂ by 0.2 mM | Enzyme activity, Mg²⁺ concentration, template quality |
| Non‑specific bands or primer‑dimers | Raise annealing temperature 1‑2 °C or lower primer concentration | Primer design, dNTP excess, buffer pH |
| Inconsistent melt curves | Spin down the master mix again, wipe lid ice, and run a fresh aliquot | Bubble formation, moisture ingress, tube sealing |
That table is your quick‑look guide. Each time you hit a snag, ask yourself which column applies and try the suggested fix before moving on.
Fine‑tuning magnesium
Mg²⁺ is the silent puppeteer of PCR efficiency. Too little and the polymerase stalls; too much and you get sloppy amplification. A 0.1 mM tweak can shift a Ct by a whole cycle. Run a mini‑titration: set up three reactions with 1.5, 1.8, and 2.1 mM MgCl₂ while keeping everything else identical. The one that gives the lowest, most consistent Ct is your sweet spot.
Remember, some templates—especially GC‑rich regions—need a tad more magnesium. If you’re working with environmental samples that bring inhibitors along, a slight bump can rescue the reaction.
Watch the dNTP balance
Excess dNTPs chelate magnesium and can make the mix look “ready” but actually starve the enzyme. If you see a delayed Ct after a fresh batch, double‑check the dNTP stock concentration. Diluting a 10 mM stock to 200 µM final is standard; any deviation will ripple through the whole recipe.
One trick we’ve seen work in academic labs is to add a tiny “buffer spike” of 0.05 µL of 100 mM MgCl₂ when the dNTPs are on the high side. It’s a cheap, reversible fix.
Temperature and pH matters
Enzyme vendors often recommend a buffer pH around 8.5 for hot‑start enzymes. If you’re mixing your own buffer, measure pH at the working temperature (usually 37 °C). A few tenths off can manifest as a shoulder on the melt curve.
And if you’re ever unsure, the affordable alternatives to commercial PCR master mixes article walks through how to test homemade buffers side‑by‑side with a kit‑based mix. It’s a handy sanity check when you suspect your buffer chemistry.
Seal, store, and label like a pro
Moisture is the silent assassin of Mg²⁺. Always double‑check that caps are snug and that you wipe away any condensation before sealing. A quick spin‑down after sealing removes any trapped bubbles that could cause uneven thawing.
Store aliquots at –20 °C and avoid repeated freeze‑thaw cycles. If you need a mix that stays on the bench for a day, consider a hot‑start formulation that stays inactive until the first denaturation step—just keep it on ice until you load the cycler.
When all else fails…
Sometimes the problem isn’t the mix but the instrument. Verify that the thermal cycler’s lid temperature is set correctly; a lid that’s too cold can cause condensation and dilute the reaction. Also, run a no‑template control to rule out contamination.
If you’ve tried magnesium tweaks, dNTP checks, and seal checks and you’re still stuck, it might be time to pull a fresh enzyme batch. Enzyme activity drops over time, especially if it’s been left at room temperature too long.
In short, optimization is a loop: observe, adjust one variable, re‑run, and record the result. Keep a simple log—date, change, Ct, melt notes—and you’ll see patterns emerge faster than you’d expect.
By treating each hiccup as a data point rather than a failure, you turn troubleshooting into a systematic part of your pcr master mix recipe workflow. The mix becomes not just reliable, but adaptable to any new assay you throw at it.
Conclusion
You’ve just walked through every step of building a reliable pcr master mix recipe, from picking the right enzyme to freezing aliquots for later use.
If you ever catch yourself staring at a blank tube again, remember the simple loop we’ve laid out: observe a variable, tweak one thing, run a quick pilot, and write down the result.
That habit turns every hiccup into data, not disappointment, and it works whether you’re in an academic lab, a clinical diagnostics core, or a biotech startup racing a product launch.
So, what’s the next move? Grab a fresh batch of polymerase, spin down your master mix one more time, and set up a 5‑µL test with your favorite control template – the results will tell you if you’re ready to scale up.
And if you ever hit a wall, don’t forget that a quick look at magnesium, dNTP balance, or lid temperature can rescue most runs without ordering new reagents.
In the end, a well‑tuned pcr master mix recipe becomes a trusted partner – it lets you focus on the science you love instead of chasing ghosts in the data.
Keep that log, stay curious, and you’ll find the mix works for any new assay you throw at it. Happy amplifying!
FAQ
What is a PCR master mix recipe and why does it matter?
A PCR master mix recipe is the exact list of components—polymerase, dNTPs, MgCl₂, buffer, primers, and any additives—together with their concentrations for a single reaction. Getting it right means every tube behaves the same, so you spend less time chasing failed runs and more time interpreting data. In practice it’s a template you copy‑paste for each experiment, only tweaking magnesium or primer amounts when a new target demands it.
How do I figure out the best magnesium concentration for my assay?
Start with the enzyme’s recommended range (usually 1.5–2.5 mM) and set up a quick three‑point titration: 1.5 mM, 2.0 mM, and 2.5 mM. Run the same template and primer pair in each tube, then compare Ct values and melt‑curve sharpness. The concentration that gives the lowest, most consistent Ct without extra peaks is your sweet spot. If you’re working with GC‑rich templates, you might need to nudge the Mg²⁺ a bit higher.
Why should I aliquot my master mix instead of keeping one big bottle?
Aliquoting protects the enzyme and dNTPs from repeated freeze‑thaw cycles, which can erode activity over time. Small 10‑µL or 20‑µL tubes let you pull only what you need for the day, keeping the bulk at –20 °C and stable for months. It also reduces pipetting error because each aliquot already contains the exact recipe—just add template and primers and you’re set.
Can I reuse a master mix for different targets, or do I need a fresh mix each time?
You can reuse the same master mix for multiple targets as long as the buffer, MgCl₂, and enzyme stay constant. What changes are the primers and sometimes the annealing temperature. Just keep a clean log of which primer pair went with which aliquot, and if a new target is especially tricky (high GC or long amplicon), run a mini‑optimization before committing the whole batch.
What are the most common reasons a master mix fails, and how can I troubleshoot them?
Typical culprits are degraded polymerase, wrong Mg²⁺ level, or contaminated water. First, check the enzyme’s storage date and run a control with a fresh batch if it’s older than six months. Next, verify MgCl₂ by running a short titration—sometimes a 0.1 mM tweak fixes a delayed Ct. Finally, make sure all solutions are nuclease‑free; a quick spin‑down of the master mix can also remove bubbles that cause uneven amplification.
Do I need a special buffer for hot‑start enzymes?
Hot‑start enzymes often prefer a slightly higher pH (around 8.5) and may include proprietary additives that keep the polymerase inactive until the first denaturation step. If you’re using a commercial hot‑start mix, stick with the supplied buffer. When you make your own, aim for 10 mM Tris‑HCl at pH 8.5, 50 mM KCl, and adjust MgCl₂ after a pilot run. The extra pH buffer helps the enzyme fire cleanly when the cycle kicks in.
How often should I re‑validate my PCR master mix recipe?
Treat the recipe like any calibrated instrument—re‑check it whenever you change a key variable. That includes switching to a new lot of polymerase, dNTPs, or primers, and after major temperature‑shift events in the lab (e.g., a freezer defrost). A quick 5‑µL pilot with a known control template every month is enough to catch drift before it messes up a full experiment.


