
Ever opened a PCR plate only to see a mysterious smear and wonder if the whole experiment is ruined? You’re not alone – that gut‑wrenching moment of doubt happens to anyone who’s ever tried to amplify DNA in a busy lab.
What we’ve seen over the years at Shop Genomics is that most contamination issues boil down to a few simple oversights: airborne aerosols, cross‑talk between samples, and leftover nucleic acids on work surfaces. It doesn’t take a massive budget to fix them; it takes the right mindset and a few practical habits.
First, think of your workspace like a kitchen. You wouldn’t chop onions on a cutting board that’s still covered in raw chicken, right? The same logic applies to PCR. Designate a clean zone for reagent preparation, a separate area for template handling, and a dedicated post‑PCR space for analysis. Keep the flow one‑way – from clean to dirty – and you’ll dramatically cut down on stray DNA.
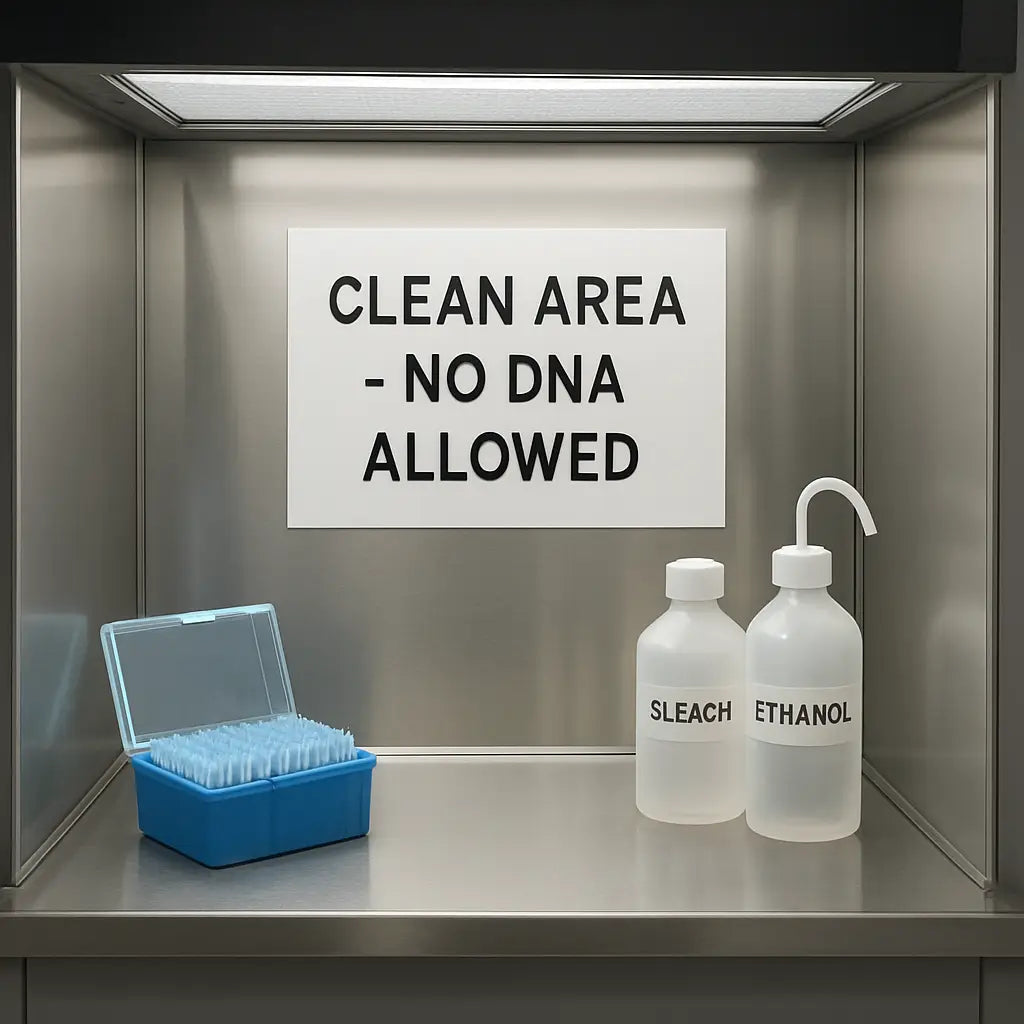
Second, seal your samples as soon as you can. Using low‑retention, filtered pipette tips helps stop aerosol droplets from traveling up the barrel. And when you’re ready to set up reactions, a closed‑system workstation makes a world of difference. The SureAir PCR Workstation - Shop Genomics provides a sterile, HEPA‑filtered environment that keeps the air around your tubes clean, which is a game‑changer for any academic, clinical, or biotech lab.
Third, adopt a strict cleaning routine. Wipe benches with 10% bleach, follow up with 70% ethanol, and let them air‑dry before you start. Don’t forget the centrifuge rotors and tube racks – they’re silent carriers of DNA. A quick “spin‑down, wipe, and air‑dry” checklist after every run keeps residues from building up.
Finally, incorporate controls into every experiment. A no‑template control (NTC) tells you instantly whether contamination slipped in during setup. If the NTC lights up, you know it’s a procedural issue, not a problem with your primers or enzymes. Track these results in a simple spreadsheet so you can spot patterns over time.
So, how to prevent PCR contamination? Treat your lab like a clean kitchen, seal samples fast, work in a dedicated clean enclosure, clean surfaces rigorously, and always run an NTC. Follow these steps, and you’ll turn those gut‑wrenching moments into confident, reproducible results.
TL;DR
If you’ve ever stared at a smudged PCR plate and wondered why, the quick fix is to treat your lab like a kitchen, seal samples fast, work in a HEPA‑filtered enclosure, and wipe every surface with bleach then ethanol before each run.
Add a no‑template control every time, follow a spin‑down‑wipe‑dry checklist, and you’ll turn those gut‑wrenching moments into confident, reproducible results, meaning you finally know how to prevent PCR contamination.
Step 1: Set Up a Dedicated Clean Workspace
When you walk into the lab, the first thing you notice is the hum of equipment and the smell of reagents. If you’ve ever watched a PCR plate turn into a mess of smears, you know the frustration starts the moment you set down your tube.
That’s why the very first step in learning how to prevent PCR contamination is to carve out a dedicated clean workspace. Think of it like a kitchen countertop that’s been wiped down before you start chopping vegetables – no raw chicken leftovers, no hidden germs.
Pick a bench that you can close off from the rest of the room. A simple plastic drape, a portable HEPA‑filtered hood, or even a clear acrylic enclosure works as long as it stays sealed while you pipette. The key is that nothing from the “dirty” side – like post‑PCR amplicons or open tubes – ever drifts into the clean zone.
Keep the flow one‑way: reagents → master mix → template → sealed plates. Never bring a used tip or a tube rack that’s been in the PCR cycler back into this zone. If you need to move something, pause, decontaminate the surface with 10 % bleach, wipe with 70 % ethanol, and let it air dry before it touches any new sample.
It helps to label the bench clearly. A bright sign that says “Clean Area – No DNA Allowed” reminds everyone, even the intern on their first day, to respect the boundary. A quick visual cue can stop a stray aerosol before it ever forms.
What about the tools you reach for? Low‑retention, filtered pipette tips are a must. They trap aerosols inside the tip barrel, so you’re not shooting DNA into the air every time you aspirate. If you browse our pipette collection, you’ll see options that balance precision with contamination control.
And don’t forget the smaller accessories – tube racks, vortex mixers, and even the bench mat. Wipe each of them down at the start of every run. A quick “spin‑down, wipe, dry” checklist keeps hidden residues from building up over weeks of use.
Some labs find it useful to treat the clean zone like a lab‑grade “cleanroom”. That’s where the IT compliance mindset can be surprisingly helpful. Reading about IT compliance services for SMBs gives you a framework for documenting who entered, what was brought in, and when the space was last decontaminated.
Negotiating the right equipment budget can feel like a side quest, but it matters. A solid guide on procurement negotiation strategies shows how to get quality HEPA filters or low‑retention tips without blowing the grant budget.
Even the paperwork can be streamlined. A simple spreadsheet that logs each cleaning step, who performed it, and the time stamp keeps everyone accountable and makes audits painless.
Finally, a clean workspace isn’t complete without a quick visual reminder of the bigger picture. Imagine you’re printing a protocol sheet – a crisp, clear document helps you stay on track. Services like JiffyPrint can churn out those sheets fast, so you never have to scramble for a pen mid‑run.
Now that your bench is sealed, your tools are filtered, and your cleaning checklist is printed, you’re ready to move on to the next step: sealing your samples as soon as possible.
Step 2: Use Filtered Pipette Tips and Separate Reagents
Ever caught a whiff of that faint, metallic tinge after a PCR run and thought, 'Did something just hitch a ride into my sample?' That's the sneaky feeling of aerosol carry‑over, and it usually starts at the tip of your pipette.
The simplest fix? Switch to filtered, low‑retention tips and keep your master‑mix reagents completely separate from any template‑laden tubes.
Filtered Pipette Tips: Your First Line of Defense
A barrier tip has a tiny membrane right at the tip opening. The membrane catches droplets before they can travel up the barrel, so the next sample you aspirate stays pristine. Filter barrier tips are pre‑sterilized, DNase‑free, and especially useful for qPCR where a single stray copy can turn a clean curve into a false positive.
But not every barrier tip is created equal. Look for a snug fit—something Bitesize Bio calls ‘FlexFit’—so there’s no wobble that could let air escape and ruin your volume accuracy.
Low‑retention coating is the other half of the story. It adds a hydrophobic layer so the liquid doesn’t cling to the inner wall, which means you won’t see those little droplets that later splash onto the bench and become invisible contaminants.
Quick tip: keep a dedicated rack of filtered tips on the clean‑zone bench and never mix them with the bulk, non‑filtered stock you keep for general pipetting.
Separate Reagents, Separate Mindset
Think of your master mix like a pristine sauce you’d never want to contaminate with a stray crumb. The moment you open a tube that already holds amplified product, you’ve created a highway for DNA to travel back into every new reaction.
The clean‑PCR workflow we champion at Shop Genomics splits reagents into two clearly labelled containers: one for all enzyme‑containing master mixes, the other for water, primers and template DNA. Never store a template tube in the same drawer as your polymerase.
Why does it matter? Proper pipetting technique and keeping pre‑PCR and post‑PCR consumables physically separate prevents amplicons from being re‑introduced into the master mix, which is the biggest source of false‑positive results.
A practical way to enforce this is to colour‑code your tip racks and reagent tubes. Green for everything that never sees DNA, red for anything that has handled a sample. When you reach for a tip, the colour reminds you which zone you’re in.
Don’t forget to change gloves every time you cross the invisible line. A fresh pair of nitrile gloves acts like a barrier between your hands and any stray DNA that might have settled on the bench.
- Use filtered, low‑retention tips for every PCR pipetting step.
- Keep master‑mix reagents in a dedicated green‑coded rack, never mix with template tubes.
- Swap gloves and wipe the bench with bleach/ethanol before moving from post‑PCR to pre‑PCR.
- Label all tip racks and tubes with colour tags – green = clean, red = dirty.
Following this routine cuts down aerosol carry‑over so dramatically that even the most sensitive qPCR assays start behaving like they used to in a brand‑new lab.
If you’re still wondering whether it’s worth the extra cost, remember that a single contaminated run can waste reagents worth hundreds of euros and, more importantly, your precious time. Investing in a good supply of filtered tips is cheaper than repeating the experiment three or four times.
Bottom line: filtered tips stop the tip from becoming a sneaky carrier, and separate reagent zones keep that carrier from ever meeting your sample. Together they answer the question ‘how to prevent PCR contamination’ with a simple, reproducible habit you can start today.
Step 3: Apply UV and Chemical Decontamination
Alright, you've got your clean zones and filtered tips in place. The next thing that trips people up is the invisible layer of DNA that can cling to surfaces, pipettes, and even the air around your bench. That's where UV and chemical decontamination step in – think of them as the final rinse before you start a new experiment.
Why UV matters
UV-C light breaks down nucleic acids by creating tiny breaks in the DNA backbone. A half‑hour exposure inside a laminar flow cabinet can knock out any stray amplicons that survived your bleach wipe. The rapidmicrobiology guide notes that a 30‑minute UV cycle followed by a quick ethanol flush is a solid combo for keeping no‑template controls clean.
Does it really work for you? In our labs we’ve seen NTCs go from bright green to completely flat after adding that UV step. It’s a cheap, hands‑free safeguard that doesn’t introduce any new chemicals.
Choosing the right chemicals
Bleach (10‑15 % sodium hypochlorite) is the workhorse for DNA destruction. Let it sit on the bench for 10‑15 minutes, then rinse with de‑ionised water before you finish with 70 % ethanol. The ethanol evaporates fast and leaves no residue that could inhibit polymerases.
If bleach isn’t friendly to your metal equipment, the Thermo Fisher cleaning protocol offers a validated alternative that uses a DNA‑destroying surface disinfectant followed by a water rinse. Either way, the key is the waiting time – you need those minutes for the chemistry to do its job.
Step‑by‑step UV & chemical routine
- Close the hood, turn on the UV lamp, and set a timer for 30 minutes.
- While the lamp is humming, prepare a fresh 10‑15% bleach solution in a spray bottle.
- After the UV cycle, spray all work surfaces, pipette handles, and tube racks with bleach. Let it sit for at least 10 minutes.
- Rinse with de‑ionised water, then wipe everything with 70 % ethanol. Let it air‑dry.
- Put on a new pair of nitrile gloves before you step back into the clean zone.
Quick tip: keep a small UV‑compatible timer on the bench so you never forget the 30‑minute window. And label your bleach bottle with the preparation date – fresh bleach is way more effective.
What about the equipment you use every day, like centrifuges or thermocyclers? Dedicate a set of “clean‑room” pipettes and rotor adapters that never leave the pre‑PCR area. Wipe them down with the same bleach‑then‑ethanol sequence after each run. This prevents a tiny droplet from traveling from a post‑PCR tube to a fresh reaction.
Now, you might wonder if all this extra time is worth it. Imagine running a qPCR assay that suddenly lights up in the NTC because a single amplicon slipped in during the night. You’d waste reagents, time, and possibly miss a deadline. A few extra minutes of UV and chemical cleaning can save you hours of re‑running and keep your data trustworthy.
For labs that need an extra safety net, consider adding uracil‑DNA‑glycosylase (UDG) to your master mix – it’ll chew up any carry‑over amplicons that contain dUTP. That’s a chemical safeguard on top of your surface cleaning, and it works especially well for T‑rich targets.
Finally, make this routine a part of your daily “clean‑room” checklist. Write it down, post it on the bench, and treat it like a pre‑flight safety check. When everyone in the team follows the same steps, you’ll see fewer surprise bands and more confidence in every result.
Bottom line: UV light zaps hidden DNA, bleach breaks it down, ethanol finishes the job, and a consistent checklist turns these actions into habit. That’s how you master how to prevent PCR contamination once you’ve already set up zones and filtered tips.
Step 4: Enforce Strict Workflow Segregation
Ever felt that uneasy twinge when you realize a plate might have been handled in the wrong area? That moment is the perfect cue to lock down your workflow like a lab‑safety vault.
When you keep the "clean" and "dirty" worlds separate, you cut the biggest source of PCR contamination right out of the equation. It’s not fancy – it’s just good sense.
Separate Pre‑PCR and Post‑PCR Zones
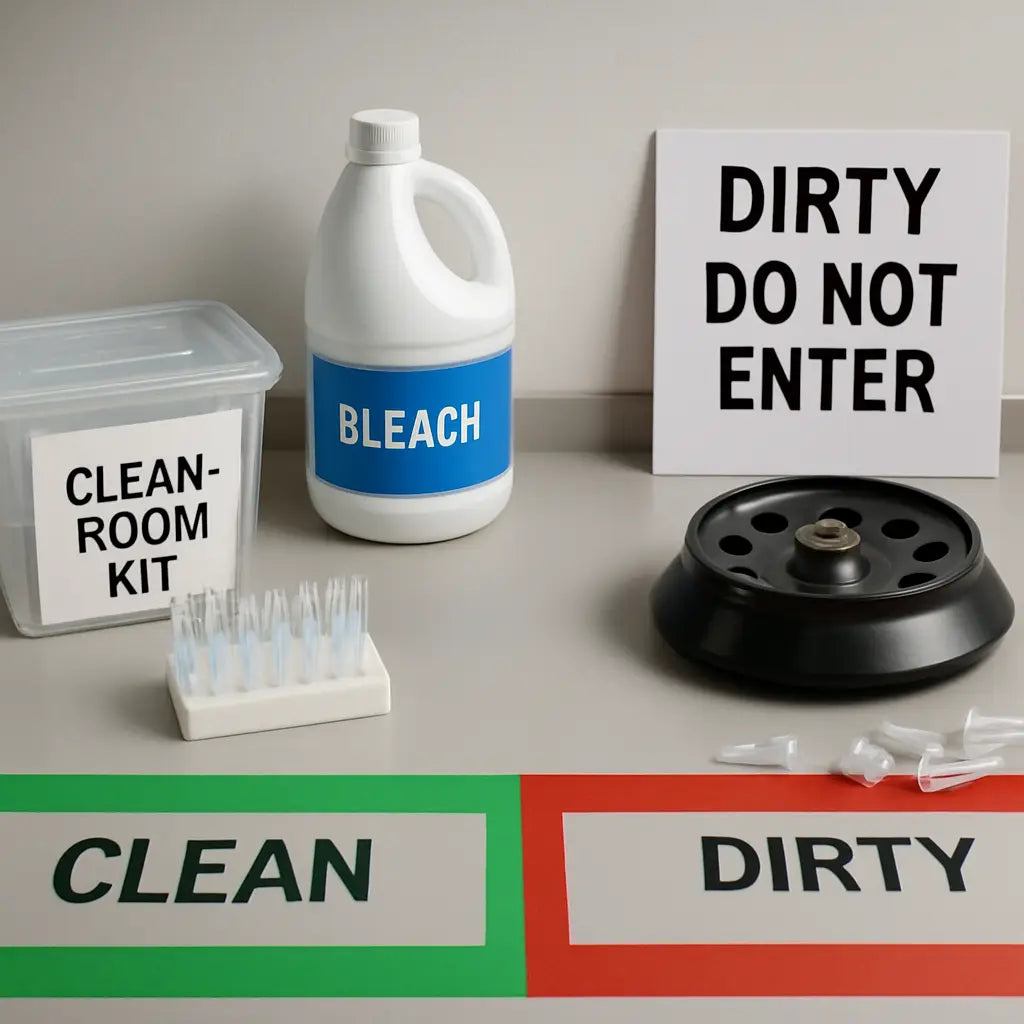
First, draw a clear line on the bench. Green tape for everything that never sees DNA, red tape for anything that has touched an amplicon. It sounds simple, but in our experience it saves hours of re‑runs for academic labs and biotech start‑ups alike.
Put all master‑mixes, primers, and water on the green side. Anything that could carry amplified product – gel images, tubes, pipette tips after a run – stays on the red side.
Even the floor matters. A dedicated rug or mat under the clean bench helps signal the zone shift every time you step forward.
One‑Way Traffic Flow
Think of the workflow as a one‑way street. You start at the reagent prep station, move to template handling, then end at post‑PCR analysis. Never reverse direction.
If you have to go back, wipe your gloves, change them, and do a quick surface wipe with 10 % bleach followed by ethanol. That tiny pause stops stray droplets from hitching a ride.
Does it feel a bit strict? Trust me, the peace of mind is worth the extra few seconds.
Dedicated Equipment for Each Zone
Assign separate pipettes, vortex mixers, and tube racks to each zone. Label them with colour‑coded stickers – green for clean, red for dirty. When you reach for a pipette, the colour tells you instantly which side you’re on.
We’ve seen CROs that keep a “clean‑room kit” on the green bench: a fresh set of filtered tips, a small bleach bottle, and a pair of nitrile gloves. The kit stays untouched until the next day, then you swap it for the “dirty” kit after the run.
It might sound like overkill, but the cost of a contaminated qPCR run can run into hundreds of euros in reagents alone.
Negative Controls as Your Early Warning System
Every batch should include a no‑template control (NTC). If that NTC lights up, you know something slipped through your segregation steps.
MiniPCR reminds us that the NTC is the baseline reference you need to spot contamination fast.Learn more about why negative controls matter.
When the NTC stays dark, you can breathe easy and move on to data analysis.
Checklists Keep Everyone Honest
Write a short checklist and post it where everyone can see it – right next to the bench. Something like:
- Spin‑down open tubes, then wipe bench with fresh bleach.
- Follow with ethanol, let air‑dry.
- Swap gloves before crossing the colour line.
- Log NTC result in your spreadsheet.
People love checking boxes. The habit becomes second nature.
And if a colleague forgets a step, the checklist catches it before the next plate is set up.
So, what does a perfectly segregated workflow look like in practice?
Imagine you finish a 96‑well qPCR run. You close the enclosure, switch to the red side, and start cleaning the rotor and tube rack with bleach. Once it’s dry, you put on fresh gloves, walk over to the green side, and begin prepping the next master mix. No cross‑talk, no surprise bands.
Remember, the goal isn’t to build a fortress; it’s to make the right habit so you never have to wonder whether a stray amplicon slipped in.
Take a moment each morning to walk the line, check the colour tape, and verify your checklist. In a few weeks you’ll notice fewer unexpected bands, smoother melt curves, and more confidence in every result.
That’s how you enforce strict workflow segregation and keep PCR contamination at bay.
Step 5: Run Negative Controls and Document Everything
When the last tip is tossed and the bench looks spotless, the real proof that you didn’t sneak a stray amplicon in is the no‑template control (NTC). If that lane stays dark, you’ve earned a quiet moment of confidence; if it lights up, you’ve just caught a contamination before it ruins hours of data.
So, what should you actually run? Think of an NTC as a “canary in the coal mine.” Set up a reaction that contains every reagent except the DNA template. Run it alongside every plate, even the ones you’re sure are clean. It costs pennies in reagents, but it saves you the price of a failed experiment.
And don’t stop at just one NTC. In larger batches, duplicate the control on the opposite side of the plate. That way you can spot edge‑effects or uneven sealing that might hide a leak.
Now, let’s talk documentation. A clean lab is a documented lab. Grab a simple spreadsheet – you can even use a free Google Sheet – and log three things for each run: the date, the NTC result (positive or negative), and any notes about what you changed that day (new tip batch, fresh bleach solution, UV exposure length).
Why does a tiny note matter? Imagine you’re troubleshooting a stubborn false‑positive that appears only after you switched to a new lot of filtered tips. If you’ve recorded “new tip lot #12345” next to a positive NTC, the culprit is instantly in view.
Here’s a quick checklist you can paste on the side of your bench:
- Prepare NTC with same master mix, same volume, same plate layout.
- Label NTC well clearly – “NTC‑1” or “NEG‑CTRL”.
- Run NTC before the first sample well to avoid carry‑over from the thermocycler.
- Record result immediately after the run, before you move plates.
- Flag any unexpected signal in the log and notify the team.
Does it feel like extra work? Think of it as a safety net you throw under every experiment. The moment you see a bright curve in the NTC, you stop, re‑wipe, and re‑run – a few minutes now versus a whole day later scrambling for answers.
For a more formal reference, the EPA’s qPCR quality‑assurance guide recommends running negative controls with every batch and keeping a traceable log of results (EPA guidance on PCR contamination control). Following that standard keeps your data audit‑ready, whether you’re in an academic lab or a CRO.
Below is a concise table that sums up the essential elements you should track for each control.
| Control Type | Purpose | How to Record |
|---|---|---|
| No‑Template Control (NTC) | Detect reagent‑borne or environmental DNA | Log “Negative” or “Positive” plus any plate notes |
| Positive Control | Verify enzyme activity and primer efficiency | Record Ct value and compare to expected range |
| Extraction Blank | Check for contamination introduced during nucleic‑acid extraction | Note extraction batch number and result |
And remember, consistency beats perfection. Use the same layout, the same naming convention, and the same logging method every time. Your team will start to spot trends without even thinking about it – like a spike in NTC positives whenever the bleach bottle is more than two weeks old.
Finally, make the log visible. Print a copy and tack it to the bench, or pin a QR code that opens the shared sheet. When everyone can glance at the latest entry, the habit sticks and the lab culture shifts from “hope it’s clean” to “we’ve proven it’s clean.”
That’s the essence of Step 5: run negative controls, write down what you see, and treat that record as the final gate before you trust any data.
Step 6: Train Staff and Monitor Continuously
Even the cleanest bench falls apart the moment someone forgets a step – and that’s why training is the real backbone of how to prevent pcr contamination.
First, treat the training session like a coffee‑break chat. You’re not lecturing a board; you’re showing a colleague how you keep that dreaded smear from ever showing up again.
Build a short, repeatable onboarding script
Write a 5‑minute script that covers the zone layout, filtered tip usage, UV exposure, and the NTC log. Keep it under a page so new technicians can glance at it before their first run.
Example script line: “When you walk from the green zone to the red zone, pause, swap gloves, and wipe the bench with fresh bleach – it’s the one‑minute habit that saves hours of re‑runs.”
Hands‑on drills, not PowerPoints
Set up a mock plate with a deliberately contaminated tip. Let the trainee spot the problem, replace the tip, and run a no‑template control. The moment they see a positive signal, they’ll remember the drill forever.
We’ve seen CRO teams cut NTC‑positive rates from 12% to 2% after a single hands‑on day.
Use real‑world data to motivate
Pull the last month’s NTC log and show the spike that happened when the bleach bottle sat on the bench for two weeks. Numbers speak louder than “just be careful.”
According to a Thermo Fisher application note, a single amplicon contaminant can amplify across an entire 96‑well plate, turning a clean experiment into a false‑positive nightmare. Read the details in the Thermo Fisher guide.
Create a daily “quick‑check” checklist
- Glove swap before crossing zones
- Bench wipe with 10 % bleach, then 70 % ethanol
- UV lamp on for 30 minutes overnight
- Run duplicate NTCs on every plate
- Log Ct values immediately after the run
Post the checklist on the bench with a magnet‑friendly QR code that opens the shared Google Sheet. When it’s visible, the habit sticks.
Schedule regular refresher rounds
Every quarter, run a 15‑minute “contamination refresher.” Ask each person to demonstrate one step – maybe the UV timer setup or the bleach‑wait time. If someone stumbles, you catch the gap before it becomes a lab‑wide issue.
For academic labs, we’ve heard of graduate students turning the refresher into a mini‑quiz. The competition fuels engagement and the scores end up on the wall as a badge of cleanliness.
Leverage external training resources
When you need a deeper dive, the free PCR techniques course on Elevify walks you through assay design, documentation, and quality‑management practices – all useful when you’re building a lab‑wide SOP.
Assign the module as homework and discuss the key take‑aways during the next team meeting. It’s a low‑cost way to keep everyone on the same page.
Monitor and give feedback in real time
Set up a simple dashboard in your lab notebook or spreadsheet that flags any NTC Ct < 35. When a flag pops up, send a Slack ping (or an email for older labs) to the person who ran the plate.
Then, schedule a quick 5‑minute debrief: “What changed that day? New tip lot? Different bleach batch?” Those tiny conversations create a culture of accountability.
Remember, monitoring isn’t about policing – it’s about catching the tiny slip before it spirals.
Reward the clean‑lab champions
Give a shout‑out in the monthly lab newsletter to anyone who logs a perfect NTC streak for a month. A small coffee voucher or a “Clean‑Lab Hero” badge goes a long way.
People love recognition, and it reinforces the behaviours you want.
So, what’s the final takeaway? Train your staff like you’d coach a sports team: clear drills, constant feedback, and a little celebration when the play goes right. When everyone knows the exact steps and sees the data backing them up, the lab becomes a low‑risk environment where PCR contamination is the exception, not the rule.
FAQ
What are the most common sources of PCR contamination?
Most of the time the culprit is something you’ve already seen – aerosol droplets that hitch a ride on the tip of a pipette, or leftover amplicon hanging on a bench edge. Even a stray piece of tube rack that’s touched a post‑PCR plate can seed the next run. In busy labs, gloves get swapped too late, and a quick glance at the NTC will reveal whether any of those tiny slips slipped through.
So, if you ever wonder why a clean‑looking plate lights up, think about the last time you crossed zones without a glove change or used an unfiltered tip. Those tiny moments add up fast.
How can I set up a clean workspace without spending a lot?
You don’t need a million‑dollar cleanroom. Start with colour‑coded tape: green for pre‑PCR, red for post‑PCR. A simple bench wipe station – a spray bottle of 10 % bleach, a bottle of 70 % ethanol, and a fresh pair of nitrile gloves – is all you need to keep surfaces DNA‑free.
Place a small “clean‑zone kit” on the green side. When you finish a batch, swap the kit, wipe the bench again, and you’ve built a habit that feels as natural as grabbing a coffee.
Do filtered pipette tips really make a difference?
Absolutely. The tiny membrane at the tip catches aerosol droplets before they travel up the barrel, so the next sample stays pristine. Low‑retention coating also means less liquid clings to the inner wall, cutting invisible splatter that can settle on the bench.
In our experience, labs that switched to filtered, low‑retention tips saw NTC positivity drop from a handful of plates a week to almost none. It’s a cheap upgrade that pays for itself in saved reagents and peace of mind.
What’s the best way to use no‑template controls?
Treat the NTC like a canary in a coal mine. Set it up with every plate, using the exact master mix and volume you use for your samples – just leave out the DNA. Run it in duplicate on opposite sides of the plate; if one lights up, you’ve caught a localized leak or edge effect.
Log the result immediately in a shared spreadsheet: date, Ct value (if any), and any notes about tip lot or bleach freshness. That tiny record becomes a goldmine when you’re troubleshooting a stubborn false‑positive later.
How often should I decontaminate surfaces and equipment?
Make it a ritual at the start and end of each day. A quick 10‑minute bleach soak on benches, pipette handles, and tube racks, followed by a swipe with 70 % ethanol, is enough to destroy stray DNA. For equipment you use daily – like centrifuge rotors – give them a brief bleach spray after each run.
If you’re running long‑term projects, add a weekly deep clean: UV exposure for 30 minutes (if you have a lamp) plus a fresh bleach cycle. Consistency beats intensity every time.
Can UV decontamination replace bleach?
UV is a great sidekick, but it isn’t a full substitute. UV‑C can break DNA strands on exposed surfaces, yet it won’t reach shadows or the inside of pipette tips. Bleach chemically destroys nucleic acids, covering the hidden spots UV can miss.
The sweet spot is a combo: wipe with bleach, let it sit, then give the enclosure a 30‑minute UV pulse. You get the best of both worlds without adding extra steps to your workflow.
What simple checklist can my lab adopt today?
Here’s a five‑step “quick‑check” you can print and stick on the bench:
- Glove swap before crossing from green to red zones.
- Wipe bench with fresh 10 % bleach, wait 10 minutes.
- Follow with 70 % ethanol wipe, let air‑dry.
- Run duplicate NTCs on every plate.
- Log NTC result and any notes straight after the run.
When everyone sees the list, the habit sticks, and you’ll notice fewer surprise bands before you even finish the first cycle.
Conclusion
So you've walked through zones, filtered tips, UV bursts, and NTC logs – you get why every tiny step matters.
If you’re still wondering how to prevent pcr contamination long‑term, the secret is turning these habits into a daily ritual.
Pick a spot on your bench, tape a quick‑check list, and treat the 10 % bleach wipe like you would a coffee break – quick, necessary, and never skipped.
Remember the colour tape trick? Green means ‘clean’, red means ‘dirty’. When you cross that line, swap gloves, give the bench a fresh spray, and you’ve just stopped a potential contaminant in its tracks.
A quick UV pulse at the end of the day is like locking the lab door – it doesn’t replace the lock (bleach) but adds extra peace of mind.
When you log every NTC result, you create a paper trail that catches trends before they become crises; a spike in positives often points to stale bleach or a missed glove change.
In our experience at Shop Genomics, labs that adopt this checklist see fewer surprise bands within a week – and that translates into saved reagents, time, and confidence.
So, what’s the next move? Grab a fresh bottle of bleach, put a timer on your UV lamp, and write down today’s NTC result – then repeat tomorrow.
When the routine feels natural, you’ll hardly notice the extra steps, but the data will thank you with clean, reliable results every run.
Keep it simple, stay consistent, and let the habit protect your experiments – that’s the real win in learning how to prevent pcr contamination.


