
Ever stared at a spectrophotometer readout and wondered how that raw absorbance number actually tells you how much DNA or protein you have in your tube?
You're not alone. Most of us in academic labs, biotech startups, or even teaching labs have hit that moment where the math feels like a black box. The good news? An absorbance to concentration calculator turns those mysterious numbers into concrete concentrations in seconds.
Think about it: you measure an absorbance of 0.85 at 260 nm with a NanoSpectrophotometer, plug the value into the calculator, and instantly know you have 50 ng/µL of nucleic acid. No manual back‑of‑the‑envelope calculations, no risk of a misplaced decimal point that could ruin a downstream reaction.
But why does this matter beyond convenience? In a PCR workflow, an incorrect concentration can lead to weak amplification or wasted reagents. In a clinical assay, it could affect diagnostic accuracy. That tiny step of converting absorbance to concentration is actually a safeguard for reproducibility.
We've seen researchers in university labs use the calculator to quickly adjust sample prep before loading a gel, and biotech teams rely on it to standardize enzyme concentrations across batches. The tool works the same whether you're handling micro‑volume samples on a UV‑Vis microplate reader or a full‑size spectrophotometer.
So, what should you look for in a reliable calculator? First, it should let you input the path length and extinction coefficient specific to your molecule. Second, it needs to handle different units—µg/mL, ng/µL, molarity—without you having to do extra conversions. And finally, a clean interface that saves your calculations for later reference can save hours over a busy week.
Ready to stop guessing and start measuring with confidence? Let’s dive into how you can set up the absorbance to concentration calculator for your next experiment and keep your data rock‑solid.
TL;DR
The absorbance to concentration calculator instantly turns raw spectrophotometer readings into precise ng/µL or molarity values, so you can skip manual math and avoid costly measurement errors.
By using this tool, researchers in labs, biotech firms, and teaching classrooms can save time, standardize protocols, and keep their experiments reproducible without guessing concentrations.
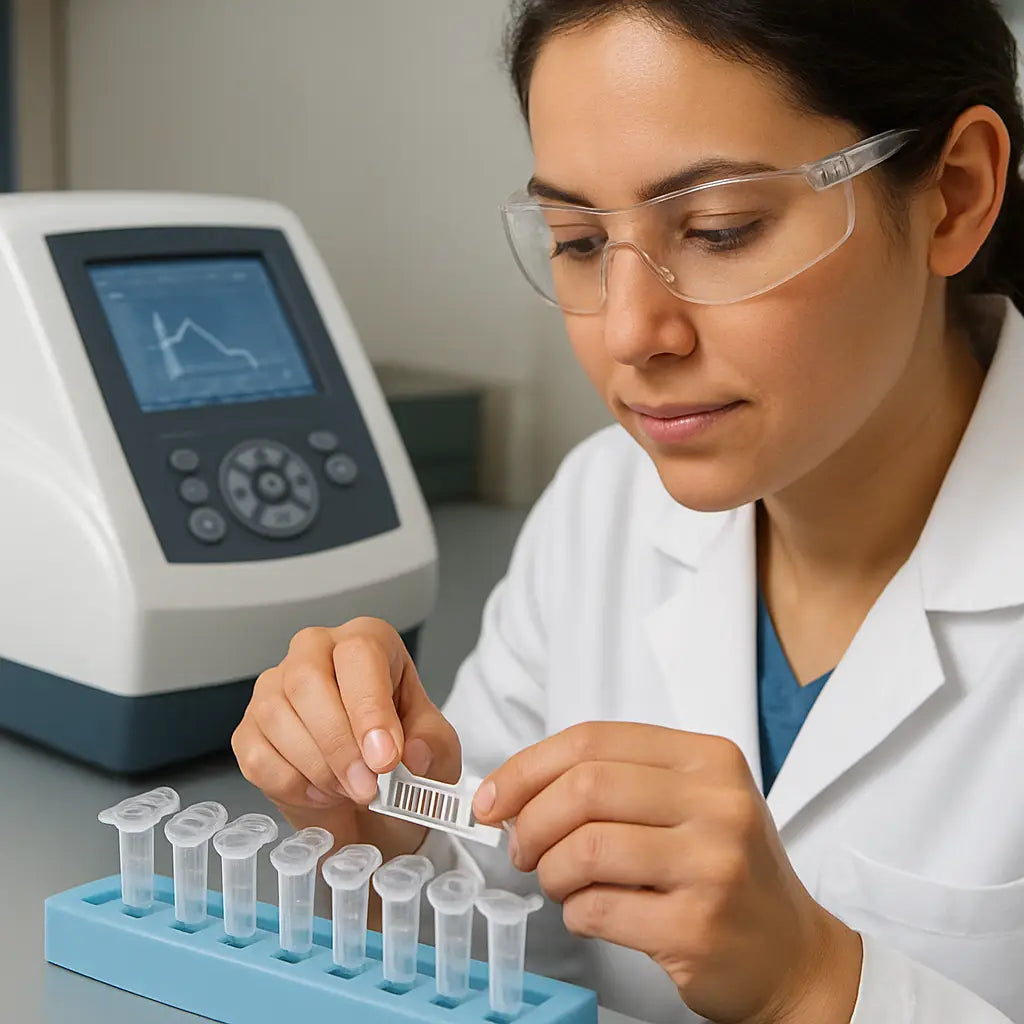
Step 1: Gather Your Spectrophotometer Data
First thing’s first: you need a clean, reliable readout before the calculator can do its magic. Grab a fresh cuvette, wipe it with a lint‑free tissue, and make sure there are no fingerprints—those little smudges can throw off absorbance by a few percent, and nobody wants that extra headache.
Next, run a blank. Fill the cuvette with whatever solvent you’re using (usually nuclease‑free water or TE buffer) and hit ‘zero’ on the spectrophotometer. This step establishes the baseline, so the instrument knows what a zero‑absorbance looks like for your specific path length and temperature.
Now, you’re ready for the real sample. Pipette the exact volume you plan to measure—most micro‑volume readers need 1‑2 µL, while a classic cuvette wants 100‑200 µL. Record the path length (usually 1 cm for standard cuvettes, but micro‑cuvettes can be 0.1 cm). If you’re not sure, check the instrument’s manual or the spec sheet; it’s worth a second glance.
Press the read button and note the absorbance at the wavelength that matches your molecule—260 nm for DNA, 280 nm for protein, or whatever your assay calls for. Write the number down, or better yet, type it straight into the Beer Lambert Law Calculator: A Practical Guide so you don’t lose it in the lab notebook shuffle.
Does the reading look off? A quick sanity check: DNA should usually fall between 0.1 and 1.0 for a good-quality prep. If it’s way above 2.0, you probably need to dilute. Remember, most spectrophotometers have a linear range—push it past that and the calculator will spit out nonsense.
While you’re at it, think about sample tracking. In a busy biotech lab, tubes can look identical, and a mislabeled sample can ruin an entire experiment. This is where a service like custom lab labels comes in handy. Print waterproof, barcode‑ready stickers that stick to microcentrifuge tubes, and you’ll spend less time hunting for the right sample later.
Got the absorbance? Great. Now it’s time to feed that number into the calculator. Most tools let you input the extinction coefficient (or molar absorptivity) for your molecule, the path length, and the raw absorbance. Hit ‘calculate’ and you’ll see ng/µL, µg/mL, or even molarity pop up instantly.
Pro tip: keep a digital log of each measurement—date, sample ID, absorbance, calculated concentration, and any dilution factor you used. This audit trail is gold when you need to troubleshoot a downstream PCR that suddenly under‑performs.
If your lab’s website hosts the calculator, make sure the page loads quickly and looks clean. A well‑designed interface can cut down on user error. If you ever need to upgrade that look, consider getting help from professional web design services that specialize in scientific tools. A tidy UI is almost as important as a tidy bench.
Finally, double‑check everything before you move on. Verify the units, confirm the temperature (some instruments drift with room temperature), and make sure you haven’t swapped a DNA sample with an RNA one. A quick second glance can save you from re‑running a whole batch later.
Once you’ve nailed down the raw data, you’re ready for the next step: feeding it into the absorbance to concentration calculator and letting the math do the heavy lifting.
Step 2: Understand the Beer‑Lambert Relationship
Now that you’ve got clean absorbance numbers, let’s pull back the curtain on what’s really happening inside the spectrophotometer.
The Beer‑Lambert relationship tells you that absorbance (A) grows linearly with concentration (c), path length (l), and the extinction coefficient (ε). In plain English: double the amount of material in the light’s way and the signal doubles too.
That sounds simple, but the magic lies in the constants. ε is a property of the molecule you’re measuring – for DNA at 260 nm it’s roughly 50 µg mL⁻¹ cm⁻¹, while proteins at 280 nm sit around 1.0 × 10⁴ M⁻¹ cm⁻¹. The path length is usually the cuvette width (1 cm) or the micro‑volume cell length (often 0.1 cm).
Here’s the core equation you’ll feed into the calculator:
A = ε · c · l
Rearrange it to solve for concentration:
c = A / (ε · l)
That’s the number the absorbance‑to‑concentration calculator will spit out – in the units you chose (µg mL⁻¹, ng µL⁻¹, mol L⁻¹, etc.).
Let’s walk through a quick example. You measured an absorbance of 0.85 at 260 nm using a 1 cm cuvette. The extinction coefficient for double‑stranded DNA is 50 µg mL⁻¹ cm⁻¹. Plug those numbers in:
c = 0.85 / (50 · 1) = 0.017 µg mL⁻¹, or 17 ng µL⁻¹ after you convert the units. If you were using a NanoDrop with a built‑in path length of 0.2 cm, you’d simply replace l with 0.2 and the calculator does the rest.
What if your sample is a protein? The same steps apply, just swap ε for the protein‑specific value. For a typical enzyme with ε = 1.2 × 10⁴ M⁻¹ cm⁻¹, an absorbance of 0.65 in a 1 cm cuvette yields:
c = 0.65 / (1.2 × 10⁴ · 1) ≈ 5.4 × 10⁻⁵ M, which you can then translate to mg mL⁻¹ using the molecular weight.
Do you ever wonder why labs sometimes report “A260/A280 ratio”? That’s a quick quality check: pure DNA shows a ratio around 1.8, while protein contamination pushes it toward 1.0. The ratio itself is just two Beer‑Lambert calculations side‑by‑side.
Real‑world tip: always double‑check that your spectrophotometer is zeroed with a blank that matches the buffer you’ll use for the sample. A stray impurity in the blank skews ε · l and throws off every concentration you calculate.
Need a deeper dive on the math? The Beer‑Lambert law calculator guide breaks down each variable and even lets you back‑calculate ε if you have a known concentration.
And if you’re measuring protein concentrations at 280 nm, the ThermoFisher technical note on protein absorbance at 280 nm offers handy tables of typical extinction coefficients for common enzymes.
Action checklist:
- Record A, ε, and l for each sample in a notebook or spreadsheet.
- Convert units so ε and l share the same basis (e.g., cm for path length).
- Use the calculator to compute c, then convert to the unit you need for downstream assays.
- Validate a subset of results with a known standard to catch any systematic error.
Once you’ve mastered this step, the rest of the workflow becomes a breeze – you’ll know exactly how much nucleic acid or protein you have, and you can move straight to downstream reactions without guesswork.
Step 3: Input Values into the Calculator
Now that you’ve got clean absorbance, ε, and path length on paper, it’s time to feed those numbers into the absorbance to concentration calculator.
1️⃣ Pull up the calculator interface
Open the web‑based tool on your laptop or tablet. Most calculators have three fields: Absorbance (A), Extinction coefficient (ε), and Path length (l). If you’re using a NanoDrop, the path length might already be displayed – just copy it.
Does the calculator ask for units? Yep. Make sure ε is in the same units as the path length – usually M⁻¹ cm⁻¹ for proteins or µg mL⁻¹ cm⁻¹ for nucleic acids. A quick glance at your notebook will save you a nasty conversion error later.
2️⃣ Paste or type your values
Start with the absorbance you recorded. No need for extra decimals; the tool will handle the rounding. Next, drop in the extinction coefficient you found in a vendor sheet or a literature table. Finally, type the cuvette or micro‑cell length – 1 cm, 0.1 cm, or whatever your instrument reports.
Tip: keep a tiny “cheat sheet” next to your computer with common ε values (DNA 260 nm ≈ 50 µg mL⁻¹ cm⁻¹, protein 280 nm ≈ 1.0 × 10⁴ M⁻¹ cm⁻¹). That way you don’t have to hunt through PDFs mid‑run.
3️⃣ Choose your output units
Most calculators let you toggle between µg mL⁻¹, ng µL⁻¹, or molarity. Pick the unit that matches the downstream assay you’re planning – qPCR loves ng/µL, enzyme kinetics prefers µM.
If you’re not sure, select “ng/µL” as a safe default; you can always convert later with a quick calculator.
4️⃣ Hit “Calculate” and read the result
The number that pops up is your concentration c = A / (ε · l). It may look like 23.5 ng/µL for a plasmid prep, or 0.0012 M for a purified enzyme. Write that down immediately – the calculator won’t remember it after you close the tab.
Does the result look odd? Compare it to the expected range you noted in Step 1. If it’s way off, double‑check that you didn’t mix up µg mL⁻¹ with mg L⁻¹, or that you didn’t forget a dilution factor.
5️⃣ Validate with a known standard
Even the best calculators can’t fix a bad blank. Grab a commercial DNA ladder or BSA standard, run it through the same workflow, and see if the calculator returns the advertised concentration. This quick sanity check catches systematic errors before you waste reagents.
For labs that prefer a visual approach, building a standard curve in GraphPad Prism works the same way – you enter known concentrations, fit a line, and let the software interpolate unknowns. The process is described in detail here.
6️⃣ Export or copy the results
Most tools let you copy the table to the clipboard or download a CSV. Paste the data straight into the spreadsheet you started in Step 1. Add a column for “Calculated concentration” so every sample stays in one row.
Now you’ve turned a raw absorbance number into a usable concentration, ready for PCR, library prep, or enzyme assays. The rest of the workflow – dilution, aliquoting, and downstream reactions – becomes a breeze because you know exactly what you have.
Quick checklist before you move on:
- Absorbance entered with correct decimal places.
- Extinction coefficient matches the molecule and wavelength.
- Path length unit matches ε.
- Output unit set to what you need.
- Result verified against a standard.
Once you tick all those boxes, you can trust the numbers you feed into the next step of your experiment. Happy calculating!
Step 4: Interpret the Output and Check Accuracy
So you’ve hit “calculate” and a number pops up – maybe 23.7 ng/µL for a plasmid prep, or 0.0012 M for an enzyme. First reaction? You probably glance at it and wonder if it looks right. That’s the moment we pause, double‑check, and make sure the calculator didn’t just give us a pretty‑looking typo.
Read the units, then the magnitude
It’s easy to miss that the tool defaulted to µg/mL while you expected ng/µL. A quick mental conversion (multiply by 1,000) can save you from pipetting a hundred‑fold too much. If the output feels way off – say 5 µg/µL for a DNA sample that should be in the tens of ng/µL range – you probably have a unit mismatch.
Cross‑check with a known standard
Grab a commercial DNA ladder or a BSA protein standard that comes with a certified concentration. Run it through the exact same workflow: blank, absorbance, feed the numbers into the calculator. Does the result land within ±5 % of the label? If yes, you’ve got a green light. If not, note which variable is drifting – maybe the extinction coefficient you entered was for double‑stranded DNA but you’re measuring single‑stranded RNA.
Spot‑check the raw absorbance
Look back at the original A value. Is it within the linear range of your spectrophotometer (usually A < 1.0 for most UV‑Vis devices)? An out‑of‑range reading inflates the calculated concentration no matter how perfect the math later is. If you see A = 2.3, dilute the sample, re‑measure, and run the calculator again.
Validate the path length
Remember that a 0.1 cm micro‑cell will give you a ten‑fold lower absorbance than a 1 cm cuvette for the same concentration. Double‑check the path length entry – a single misplaced decimal can flip your result from nanograms to micrograms.
Round‑trip sanity test
Take the concentration the calculator gave you, plug it back into the Beer‑Lambert equation (c × ε × l) and see if you get the original absorbance. If the numbers line up, the math checks out. If they diverge, you’ve likely entered the wrong ε or mis‑read the instrument’s display.
Here’s a quick checklist you can paste into your lab notebook:
- Units match the downstream assay (ng/µL for qPCR, µM for enzyme kinetics).
- Standard curve or known sample returns expected concentration.
- Absorbance within linear range (0.1–0.8 is ideal).
- Path length entry correct to two decimal places.
- Round‑trip calculation reproduces original A value.
When all those boxes are ticked, you can move forward with confidence. If any box stays unchecked, pause, troubleshoot, and rerun the calculation – it’s far cheaper than wasting reagents on a failed PCR or a botched library prep.
In practice, we’ve seen academic labs catch a 20 % error just by re‑measuring a blank after a buffer change. A biotech startup avoided an entire batch loss by comparing the calculator output to a fresh BSA standard before scaling up production. Those tiny sanity checks add up to big savings.
Quick Comparison Table
| Check | What to Look For | Action if Off |
|---|---|---|
| Units | Output matches assay needs (ng/µL, µM, etc.) | Convert or re‑enter correct unit. |
| Standard Validation | Known standard returns expected value (±5 %). | Re‑check ε, path length, or instrument calibration. |
| Absorbance Range | A < 1.0 (ideally 0.1–0.8). | Dilute sample, re‑measure, recalculate. |
Step 5: Troubleshoot Common Issues
Let me be completely honest: nothing derails an experiment faster than a calculator giving a number that feels wrong.
When your absorbance to concentration calculator returns an unexpected value, don’t panic — we’ll walk through focused checks so you fix the problem without wasting samples.
Quick triage checklist
Start small. Ask: did I enter the right A, path length, ε, and dilution factor?
If the answer is no, correct the entry and recalc. If yes, move on.
Check the blank — re‑measure it in the same cuvette/well and buffer.
Confirm path length (1.00 cm vs 0.1 cm vs instrument auto‑reported value).
Verify the extinction coefficient and units match your output units.
Double check dilution factors and unit conversions (µg/mL vs ng/µL vs M).
Stepwise troubleshooting (what to do and why)
1) Re‑measure the blank and a known standard.
If the blank moved by >0.01 A, your baseline drift or buffer contaminant is the problem.
2) Inspect the optical path.
Is the cuvette scratched, cracked, or wet on the outside? Light scattering raises A; clean or replace the cell and re‑measure.
3) Check linear range and dilution.
Most UV‑Vis instruments give reliable A below ~1.0 (0.1–0.8 ideal). If A is >1.0, dilute the sample, re‑measure, and multiply back by the dilution factor.
4) Verify ε and molecule state.
Extinction coefficients differ for single‑ vs double‑stranded nucleic acids and by wavelength. Enter the correct ε at the measurement wavelength before you trust the number.
5) Back‑calculate to validate (round‑trip test).
Take the calculated concentration, plug it into A = ε·c·l and confirm you reproduce the original absorbance. If not, you probably swapped units or mis‑typed ε.
Real‑world examples that help
Example: your plasmid prep reads 2.3 A and the calculator says 230 ng/µL. You expect ~25 ng/µL.
Do the dilution check — measure a 1:10 dilution. If the diluted A is 0.23, your original A was out of linear range and the calculator’s unadjusted number was misleading.
Example: two labs ran the same standard but got 20% different concentrations. The difference traced to two different blanks: one used water, the other used buffer with a small amount of EDTA. Always blank in the same buffer your samples sit in.
Advanced checks and when to escalate
Confirm instrument calibration with a certified reference if values remain inconsistent across samples.
Does the plate reader report path‑length correction? If so, use that value in the calculator or the result will be systematically wrong.
Still stuck? Run a standard curve (known concentrations) and let orthogonal statistics flag a bias. If the standard curve returns expected values and your unknowns don’t, suspect sample problems (degradation, contaminants, turbidity).
Quick troubleshooting card to copy into your notebook
Blank measured in same buffer
Path length confirmed and entered
Absorbance within linear range or diluted
Correct ε and units
Round‑trip Math check and standard validation
Need a refresher on the Beer‑Lambert math behind these steps? A concise primer on the Beer‑Lambert relationship can help you debug the algebra and spot unit mismatches: Beer‑Lambert law primer (Bellevue College PDF).
Follow this flow, and the absorbance to concentration calculator becomes a reliable ally instead of a puzzle. If you want, try these steps on one sample first — it's the fastest way to build confidence without losing a whole batch.
Step 6: Automate Repeated Calculations
You've spent the last few steps getting clean absorbance numbers, double‑checking blanks, and feeding the data into the calculator. Now imagine you have a 96‑well plate, twenty samples, and you need to run the same math over and over. Typing each value by hand is a recipe for fatigue and mistakes. That's why we automate.
First, decide where you want the automation to live. Most labs already use a spreadsheet—Excel, Google Sheets, or LibreOffice. These programs can pull the raw A, ε, and path length from your notebook and spit out concentrations with a single formula. The trick is to lock the extinction coefficient and path length in absolute cells so you only paste new absorbance values.
Set up a master table
In column A list Sample ID, column B the raw absorbance, column C the dilution factor, column D the path length (usually 1 cm), and column E the extinction coefficient for your molecule. Keep D and E the same for every row if you’re using the same cuvette and molecule. A quick note: label the header row clearly—e.g., “ε (µg mL⁻¹ cm⁻¹)”—so anyone can glance and know what’s locked.
Write the calculation formula
In column F enter the following Excel formula (adjust row numbers if your header isn’t row 1): =B2/(E$1*D$1)/C2. Drag the corner down and Excel will recalc for each sample. The dollar signs lock the reference rows so you never have to re‑type ε or l.
Does that feel like magic? It’s really just basic algebra baked into a cell. The moment you paste a new absorbance value, the concentration appears instantly—no extra clicks.
Google Sheets tricks
If your team prefers a cloud‑based solution, Google Sheets can do the same thing with an ARRAYFORMULA. For example, put the formula in F2: =ARRAYFORMULA(B2:B/(E$1*D$1)/C2:C). Now any new row you add automatically inherits the calculation. You can even share the sheet with a lab mate, and they’ll see the results update in real time.
Imagine a CRO running dozens of qPCR prep batches a day. Instead of opening Excel on every workstation, they keep one shared Google Sheet. The techs just copy the absorbance column from the spectrophotometer export and watch concentrations fill in. It cuts error‑prone manual entry by half.
Batch‑processing with a script
When you’re dealing with hundreds of samples—say a biotech startup scaling a plasmid‑prep pipeline—a spreadsheet can become sluggish. That’s where a short Python script shines. Using pandas, you read a CSV of raw absorbance values, apply the Beer‑Lambert equation, and write a new CSV with concentrations. A few lines of code look like this:
import pandas as pd

# Load raw data
df = pd.read_csv('raw_abs.csv')
ε = 50   # µg mL⁻¹ cm⁻¹ for DNA
l = 1.0   # cm

# Calculate concentration
df['conc_ng_per_uL'] = df['abs']/ (ε * l) * 1000 / df['dilution']

df.to_csv('conc_results.csv', index=False)
Run it once, and you have a ready‑to‑use file for downstream analysis. The script can be scheduled with a simple cron job, so every time the spectrophotometer drops a new export into a folder, the calculations happen automatically.
Integrate with lab‑management software
Many labs already track samples in LIMS or electronic lab notebooks. Most of those platforms let you import a CSV and map columns to fields. By feeding the auto‑generated concentration file straight into your LIMS, you eliminate the final copy‑paste step. In our experience, research groups that close that loop see a noticeable drop in mismatched sample IDs and a smoother hand‑off to downstream assays.
Checklist before you hit “run”
- Confirm ε and path length are entered once and locked (absolute references).
- Verify dilution factors are recorded in a separate column, not baked into the raw absorbance.
- Run a quick sanity check: pick one sample, calculate manually, and compare to the sheet output.
- If using a script, test with a small CSV first to catch syntax errors.
- Save the final file in the format required by your downstream protocol (ng/µL for qPCR, µM for enzyme work).
Once you’ve set up any of these automation routes, you’ll find yourself reaching for the calculator less and trusting the numbers more. The repetitive math that once ate up precious bench time now runs in the background, letting you focus on the real science—designing experiments, interpreting results, and writing that next grant.
Conclusion
We've come a long way from that first blank reading on the spectrophotometer, haven't we?
If you walk away with a reliable absorbance to concentration calculator in your workflow, you’re basically giving yourself a safety net for every downstream assay.
In practice, a quick sanity check—pick one sample, recalc by hand, and compare—can catch the 10 % drift that would otherwise wreck a PCR or a clinical test.
So, what’s the next move? Grab your raw absorbance sheet, plug the numbers into the calculator, export the CSV, and feed it straight into your LIMS or notebook. No more manual math headaches.
Remember, the tool is only as good as the data you give it—keep your blanks clean, stay inside the linear range, and double‑check your extinction coefficient.
Whether you’re in an academic lab, a biotech startup, or a clinical diagnostics unit, the same principle applies: let the calculator do the heavy lifting so you can focus on science, not spreadsheets.
That’s the bottom line—consistent, accurate concentrations empower reproducible experiments, faster turn‑around, and fewer wasted reagents. Give it a try on your next run, and you’ll see the time you’ve saved add up.
Got a question or need a quick tip? Drop us a line—our community loves sharing real‑world tricks for getting the most out of every calculation.
FAQ
What is an absorbance to concentration calculator and why should I use it?
In plain terms, it’s a tiny web‑tool that takes the absorbance value you read from a spectrophotometer, plugs in the path length and extinction coefficient, and spits out the concentration of your sample. You get a number in ng/µL or µM without doing any mental math. That saves minutes per sample, cuts the chance of a typo, and lets you focus on the science instead of spreadsheet gymnastics.
How do I choose the right extinction coefficient for my molecule?
The extinction coefficient (ε) is a constant that tells you how strongly a particular molecule absorbs light at a given wavelength. For double‑stranded DNA at 260 nm it’s about 50 µg mL⁻¹ cm⁻¹, while proteins at 280 nm sit near 1.0 × 10⁴ M⁻¹ cm⁻¹. Check the vendor’s data sheet or a standard reference table. If you’re unsure, use the “average” value for the molecule type and verify with a known standard – it’s a quick sanity check before you trust the calculator’s output.
Can I trust the calculator if my absorbance is outside the linear range?
Not without a dilution. Most UV‑Vis devices are reliable up to an absorbance of about 1.0; beyond that the response becomes non‑linear and the calculator will overestimate concentration. The safe move is to dilute the sample until the reading falls between 0.1 and 0.8, note the dilution factor, and feed that factor into the calculator. The result you get after adjusting for dilution will be spot‑on.
What should I do if the calculator’s result looks way too high or too low?
First, double‑check that you entered the correct path length – a 0.1 cm cuvette will produce a ten‑fold lower absorbance than a 1 cm cuvette, and a simple typo can flip your answer. Next, verify the blank was measured in the same buffer; a stray contaminant adds a baseline shift. Finally, run a known standard (like a commercial DNA ladder) through the same workflow. If the standard reads within 5 % of its label, your calculator is likely fine; otherwise revisit the inputs.
Do I need to manually copy the numbers into the calculator, or can I automate the process?
You can absolutely automate it. Export your spectrophotometer’s raw data as a CSV, then use a spreadsheet formula (e.g., =A2/(ε*L)/D2 where D2 is the dilution factor) or a short Python script with pandas to apply the Beer‑Lambert equation to every row. Once the script runs, you get a new column of concentrations ready for downstream analysis – no tedious copy‑and‑paste.
How often should I recalibrate my spectrophotometer for accurate calculator results?
At a minimum, run a calibration check once a month with a certified reference material. If you notice a drift of more than 0.01 absorbance units between blanks, or after any major maintenance, run the calibration routine immediately. A well‑calibrated instrument gives you confidence that the raw absorbance you feed into the calculator truly reflects your sample’s concentration.
Is the absorbance to concentration calculator suitable for both research and clinical labs?
Yes, it works across the board. In an academic lab you might use it to quickly set up qPCR reactions, while a clinical diagnostics team can rely on it for consistent sample prep before a nucleic‑acid test. The key is to follow the same rigorous steps: clean blanks, correct path length, appropriate ε, and validation with a known standard. That universal discipline makes the calculator a trustworthy ally no matter the setting.


