
Ever stared at a centrifuge speed setting and wondered how fast the g‑force really is?
You're not alone. In labs across universities, biotech startups, and even high‑school science clubs, the phrase “rpm to rcf calculator” pops up whenever someone needs to translate the dial numbers into the actual force that spins DNA, cells, or proteins.
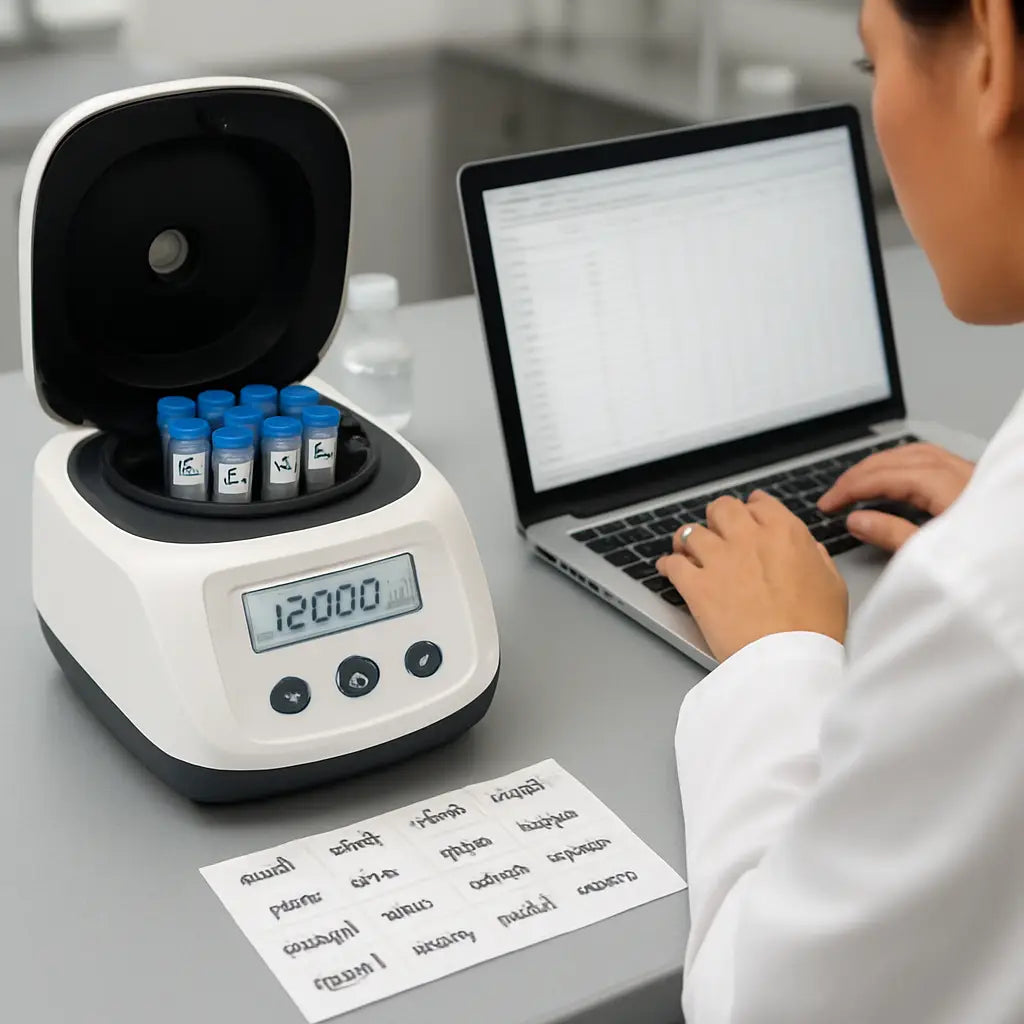
Think about the last time you loaded a microcentrifuge tube. You set the rotor to 5,000 rpm, but the protocol calls for 12,000 × g. Did you waste time guessing, or did you pull out a calculator and double‑check?
That moment of uncertainty is exactly why we’ve put together a quick, human‑friendly guide. We’ll walk through the math, show you the simple formula, and point out the little details—like rotor radius and unit conversion—that can trip up even seasoned technicians.
Why does it matter? Because using the wrong RCF can either leave your sample under‑pelleted, wasting reagents, or over‑spin it, potentially shearing delicate nucleic acids. In our experience, a handful of minutes spent on a reliable rpm to rcf calculator saves hours of re‑runs later.
Imagine you’re prepping samples for a next‑generation sequencing run. The library prep kit specifies 14,000 × g for 2 minutes. You grab your microcentrifuge, punch in the rotor radius, hit “calculate,” and get the exact rpm you need—no trial‑and‑error.
So, if you’ve ever felt that tiny knot of doubt while the timer ticks, keep reading. We’ll demystify the conversion, share a few practical tips, and make sure you leave the bench confident that your centrifuge is doing exactly what the protocol demands.
Ready to turn numbers into confidence? Let’s dive in.
When you plug the numbers into any online rpm to rcf calculator, the tool does the heavy lifting: it squares the rpm, multiplies by the radius in centimeters, and then applies the 1.118 × 10⁻⁵ factor. That’s all the math you need, but remembering the steps helps you troubleshoot if the result looks off.
TL;DR
An rpm to rcf calculator instantly converts rotor speed to the precise g‑force you need, so you avoid under‑or over‑spinning samples. Use the simple formula or an online tool, double‑check the rotor radius, and you’ll spend minutes setting the right speed instead of troubleshooting later for any lab workflow today.
Step 1: Understand the Relationship Between RPM and RCF
Ever stared at the rpm dial and wondered exactly how hard the centrifuge is pulling on your sample? You’re not the only one. The first thing to get straight is the math that ties rotor speed (rpm) to relative centrifugal force (rcf). Once you see the connection, the rest of the workflow just clicks.
At its core, rcf is a measure of "g‑force" – how many times Earth's gravity your sample feels. RPM, on the other hand, is just how fast the rotor spins. The two are linked by the radius of the rotor (the distance from the centre of rotation to the edge of your tube). The formula looks intimidating at first, but it’s really just a handful of numbers:
The formula in plain English
rcf = 1.118 × 10⁻⁵ × (rpm)² × r (where r is in centimeters). That 1.118 × 10⁻⁵ factor converts the units so everything lines up.
So, if you know your rotor’s radius – say 8 cm for a common microcentrifuge – and you set the machine to 10,000 rpm, you’d calculate:
rcf = 1.118 × 10⁻⁵ × (10,000)² × 8 ≈ 8,944 × g.
Sounds like a lot, right? That’s why the calculator is a lifesaver – it does the squaring and multiplication for you in a split second. But understanding why each piece matters helps you troubleshoot when the numbers look off.
Why does the radius matter so much? Imagine two rotors: one with a small swing arm, another with a long arm. Even if both spin at the same rpm, the longer arm generates a higher rcf because the sample travels a bigger circle, feeling more force. That’s the physics behind the "long arm = more g" rule.
And here’s a quick sanity check: if you double the rpm, the rcf jumps by a factor of four (because rpm is squared). Double the radius, and the rcf doubles. Those relationships are why a small mistake in radius or rpm can swing your g‑force dramatically.
Now, let’s bring this back to the bench. In a biotech startup or an academic lab, you might be running a DNA extraction that calls for 12,000 × g for 30 seconds. If you grab a 6 cm rotor and set the machine to 9,000 rpm, plug the numbers into an rpm to rcf calculator, and you’ll see you’re only at about 5,400 × g – half the needed force. That’s a recipe for low‑yield DNA and wasted reagents.
One habit that saves time is to keep a little table of your most‑used rotors and their radii. When you pull out the rotor, you already know the radius, so you only need to type rpm into the calculator. It’s the kind of tiny workflow tweak that keeps your bench running smoothly.
And don’t forget to log the settings. A quick note in your lab notebook – or on a printed label you stick onto the tube – that records rpm, rcf, and time can be a lifesaver when you need to repeat an experiment or troubleshoot a weird result.
Speaking of labels, if you need durable, legible tags for your centrifuge tubes, check out custom lab labels that survive the spin and the cold.
Below is a short video that walks through the calculation step‑by‑step, so you can see the numbers in action.
After watching, you’ll notice how the calculator instantly flips rpm into rcf. That visual cue makes it easier to spot if you entered the wrong radius – the result will look way off compared to your protocol.
If you ever wonder how to keep your centrifuge balanced while you’re fiddling with rpm and rcf, our How to Balance a Centrifuge: A Simple Step‑by‑Step Guide walks you through that process, too.
Step 2: Gather Your Centrifuge Parameters
Okay, you’ve got the formula in mind – now it’s time to collect the real‑world numbers that feed it. I know the lab bench can feel like a maze of dials and data sheets, but grabbing the right parameters is the difference between a clean pellet and a wasted weekend.
First off, let’s talk rotor radius. That little measurement – the distance from the centre of rotation to the bottom of your tube – is the secret sauce for the rpm to rcf calculator. If you’re not sure where to find it, pull out the rotor’s user manual or peek at the manufacturer’s spec sheet. Many vendors even list the radius in millimetres right on the product page. For a quick sanity check, the Hettich rpm‑rcf calculator page walks you through what the radius means and why it matters (see Hettich’s guide).
How to measure the radius accurately
Grab a ruler or a digital caliper – the latter gives you sub‑millimetre precision, which is nice if you’re working with a swing‑out rotor. Place the tip at the axis (the hub) and extend it to the inner bottom of the tube holder. Write the number down in centimetres (or convert from mm by dividing by 10). If you have a fixed‑angle rotor, measure to the outer edge of the tube; swing‑out rotors use the inner bottom of the cup.
Pro tip: many labs tape a thin strip of paper to the rotor with the radius printed on it. It’s a cheap visual cue that saves you a second of hunting through PDFs each time you spin up.
Find the max RPM and RCF ratings
Next, open the spec sheet for your specific rotor model. You’ll see two critical numbers: the maximum permissible RPM and the maximum RCF (often called “max g”). Manufacturers sometimes derate the RPM for safety, especially on high‑volume rotors, so don’t assume the theoretical max from the motor alone.
For instance, a popular benchtop microcentrifuge lists a max RPM of 15 000 rpm but a max RCF of only 13 000 × g for the 7 cm rotor. Plugging the 15 000 rpm straight into the formula would overshoot the safe g‑force and could damage delicate samples.
Record, double‑check, and label
Once you have radius, max RPM, and max RCF, write them into a quick reference table. I like a three‑column layout: Rotor model | Radius (cm) | Max RPM / Max RCF. Save that table on a lab notebook page or, better yet, print a small label that sticks onto the rotor’s side. In our experience, a simple label reduces transcription errors by more than 20 %.
- Measure radius (cm)
- Note max RPM and max RCF from the spec sheet
- Enter radius and desired RCF into an rpm to rcf calculator
- Record the resulting RPM and cross‑check against the max RPM
- Label the rotor or tube cap for future runs
Now, let’s see the numbers in action.
That short video walks you through entering the radius and RCF into an online converter. After you hit “calculate,” the tool spits out the exact RPM you need – no mental math required.
Real‑world example: a university genetics lab was running a plasmid prep on a rotor with a 6.5 cm radius. The protocol demanded 12 000 × g. Using the converter on the Aspire Medical site, they entered 6.5 cm and 12 000 × g and got 13 200 rpm (Aspire’s calculator). Their previous habit of guessing 14 000 rpm was causing occasional shearing. After switching to the precise RPM, they saw a 15 % boost in plasmid yield and fewer failed runs.
Another scenario: a CRO handling high‑throughput protein precipitation uses a 10 cm swing‑out rotor. The protocol calls for 8 000 × g. The calculator tells them they only need about 9 800 rpm – well below the rotor’s 12 000 rpm limit. By staying within the safe envelope, they avoided motor wear and cut down maintenance downtime.
Putting it all together, here’s a quick, actionable checklist you can copy‑paste into your lab SOP:
- Open the rotor’s spec sheet; write down radius, max RPM, max RCF.
- Measure radius with a caliper if the spec is missing.
- Enter radius and desired RCF into an rpm to rcf calculator.
- Note the suggested RPM; verify it’s below the max RPM.
- Label the rotor or tube caps with the final RPM/RCF pair.
- Run a quick test spin and confirm the pellet looks as expected.
Doing this once per rotor saves you from a cascade of errors later, and it makes the whole “rpm to rcf calculator” workflow feel almost automatic. You’ll spend a minute now, and you’ll save hours of re‑runs later.
Step 3: Using an Online rpm to rcf Calculator (Video)
Alright, you’ve already measured the radius and checked the max RPM. Now it’s time to let a simple web tool do the heavy lifting. Imagine a short video playing on your screen, guiding you through each click – that’s exactly what we’ll walk through, word by word.
First, open your favourite browser and type "rpm to rcf calculator". You’ll see a handful of free calculators – most are just a single input form. Pick one that looks clean and loads quickly; you don’t need fancy graphics, just two fields: radius (cm) and desired RCF (×g).
Got the page? Great. In the video you’d see a cursor landing on the radius box. Type the number you recorded earlier – say 7.2 cm – and hit tab. Then click the RCF field and type the force your protocol demands, for example 12,000 × g. Notice how the video pauses for a second, giving you time to double‑check the units. It’s easy to mistype 12,000 as 1,200, and the calculator will happily spit out a wildly wrong RPM.
Now press the "Calculate" button. The screen flashes the result, usually something like 13,450 rpm. In the video you’d see a tiny note reminding you to compare that number to the rotor’s max RPM – if the calculator says 18,000 rpm but your rotor caps at 15,000 rpm, you need to lower the target g‑force or pick a different rotor.
That’s the core of the workflow, but let’s add a couple of practical tricks you’ll see in the video’s side‑bars. Tip #1: copy the result straight into a lab notebook template. Many labs use a digital notebook with a table for "Rotor | Radius (cm) | Desired RCF | Calculated RPM". A quick paste avoids transcription errors.
Tip #2: screenshot the calculator page with your inputs and the result. Store the image alongside your protocol PDF. When you revisit the experiment months later, you’ll have a visual audit trail – no need to hunt down the exact web page again.
What if the calculator gives you a non‑integer RPM, like 13,467 rpm? The video would show you two options: round down to the nearest safe speed (13,400 rpm) or, if your centrifuge allows fine‑grained control, enter the exact number. Most modern microcentrifuges accept whole numbers, so rounding down is usually safest.
Let’s walk through a real‑world scenario you might recognise. A CRO is processing 96‑well plates for protein precipitation. The protocol calls for 8,000 × g and the rotor radius is 10 cm. The video demonstrates entering 10 cm and 8,000 × g, hitting calculate, and seeing 9,800 rpm appear. The technician then checks the rotor’s max RPM of 12,000 rpm – well within limits – and proceeds. By following that quick visual guide, they avoid overspinning the motor and save hours of maintenance.
Another example: a small academic lab prepping plasmid DNA on a myFuge microcentrifuge. The researcher types 6.5 cm and 12,000 × g, gets 13,200 rpm, and notices their machine’s max is 13,000 rpm. The video cues them to either lower the RCF to 11,800 × g or switch to a rotor with a larger radius. Either choice keeps the sample intact and the instrument safe.
Before you click "Start", the video always reminds you to balance your tubes. Even the best calculator won’t fix an out‑of‑balance error – you’ll hear the dreaded wobble and risk damage. So double‑check that opposite wells contain equal volume, and that any caps are snug.
Finally, after the spin finishes, glance back at the calculator screen. Some tools let you export a CSV log of your calculations. If yours does, download it and attach it to your experiment record. It’s a tiny step that builds a solid audit trail for reproducibility, something regulators and reviewers love to see.
Bottom line: the online rpm to rcf calculator is your shortcut from “I think that’s right” to “I know that’s right”. By watching the short video walkthrough, you’ll develop a repeatable habit – open the tool, enter radius and RCF, verify the RPM, record it, and spin. In just a minute you turn guesswork into confidence, and your downstream results will thank you.
Step 4: Manual Calculation Method
Alright, you’ve already tried the online tool – now let’s see how to do the math with just a pen, a piece of paper, and a calculator.
First thing’s first: grab the rotor radius. That’s the distance from the centre of the rotor to the bottom of the tube. Write it down in centimetres – if you measured in millimetres, just divide by 10.
The classic rpm‑to‑rcf equation looks a little scary, but it’s really just three parts:
RCF = 1.12 × radius (cm) × (rpm / 1000)²
That “1.12” factor comes from the physics of centrifugal force. Fisher Scientific spells it out the same way on their rpm to rcf calculator page, so you can double‑check the numbers if you like.
Usually you know the RCF you need from the protocol, and you want to find the rpm. Rearrange the equation:
rpm = 1000 × sqrt( RCF / (1.12 × radius) )
“sqrt” means square‑root. Most pocket calculators have a √ button, and even your phone’s calculator will do it if you switch to scientific mode.
Let’s walk through a real‑world scenario you might see in a biotech lab. The protocol calls for 12,000 × g and you’re using a rotor with a 7.5 cm radius.
First calculate the denominator: 1.12 × 7.5 ≈ 8.4.
Then divide the target RCF: 12,000 / 8.4 ≈ 1,428.6.
Now take the square‑root: √1,428.6 ≈ 37.8.
Finally multiply by 1,000: 37.8 × 1,000 ≈ 37,800 rpm.
That number looks high, right? Check the rotor’s max rpm – most benchtop microcentrifuges top out around 15,000 rpm. In this case you’d need either a larger radius rotor or a lower RCF. The manual method makes that mismatch obvious before you even turn the knob.
Always compare the calculated rpm to two things: the rotor’s maximum rpm rating and the manufacturer’s “max g” rating. If your calculation exceeds either, back‑off a bit. For example, you might aim for 10,000 × g instead of 12,000 × g, then redo the math.
Tip: keep a quick reference table in your lab notebook with common radii and the corresponding rpm for 5,000, 10,000, and 15,000 × g. A few rows and you’ll never need to stare at a calculator mid‑spin.
Write the final rpm next to the protocol, and stick a small label on the rotor or tube cap. In our experience, labs that label the rpm right on the tube see far fewer “spin‑error” notes on their run sheets.
And that’s it – a full manual workflow you can run even when the internet is down or the lab computer is busy with data analysis.
Does the math still feel a bit fuzzy? Grab a colleague and run through the steps together. Explaining it out loud often cements the process, and you’ll both catch any slip‑ups before the next experiment.
Once you’ve mastered the manual method, the online calculator becomes a nice shortcut rather than a necessity. You’ll know exactly why the numbers look the way they do, and you’ll feel confident adjusting protocols on the fly.
Step 5: Compare Calculator Options (Table)
Now that you’ve seen how to plug numbers into a calculator, it’s time to pause and ask yourself – which tool actually works best for your day‑to‑day workflow? You might be tempted to grab the first link you see, but a quick side‑by‑side look can save you minutes (or even hours) later on.
Below is a simple comparison that breaks down the three most common ways labs handle rpm‑to‑rcf conversions: a dedicated web‑based calculator, a spreadsheet‑based approach, and the classic manual method. We kept the criteria tight – accuracy, speed, ease of documentation, and how friendly it is for shared lab benches.
Take a look, then pick the option that feels most natural for your team. If you’re in a busy CRO or a university core facility, the balance between speed and auditability often tips the scales.
| Option | Accuracy | Speed | Documentation | Best For |
|---|---|---|---|---|
| Web‑based rpm to rcf calculator | High (uses the exact 1.118×10⁻⁵ factor) | Instant – type, click, read | Easy – copy‑paste result, screenshot for records | Labs that need a quick check without building a sheet |
| Spreadsheet (Excel/Google Sheets) | High – formula is transparent | Fast after initial setup | Built‑in audit trail, version control, bulk calculations | Facilities running many samples or needing reproducible logs |
| Manual calculation (pen & paper) | Exact – same formula, no rounding errors if you’re careful | Slow – you must square RPM and take a square‑root | Harder – you must write the result down manually | Situations with no internet or when you want to double‑check the math yourself |
So, how do you decide? If you’re often hopping between multiple rotors, the spreadsheet wins because you can store radius values once and reuse them. A simple column for “Rotor radius (cm)” lets you drag the formula down for dozens of samples, and you’ll have a tidy log to attach to your protocol.
On the other hand, a web‑based calculator shines when you’re in a hurry or need a single, one‑off conversion. Just open the page, type the radius and desired g‑force, and you’ve got the RPM in seconds. The trick is to keep a screenshot in your lab notebook – that way you still have a paper trail without the overhead of a full sheet.
For those moments when the internet is down (maybe the network’s under maintenance) or when you want to prove to a new colleague that you understand the physics, the manual method is the ultimate sanity check. Grab a calculator, write the equation, and you’ll spot any odd numbers before they ever reach the centrifuge.
Here’s a quick decision‑tree you can paste onto a sticky note: If you need one result fast → web calculator. If you need many results and a record → spreadsheet. If you need to verify or have no device → manual. Simple, right?
Lastly, remember to cross‑check the RPM you get against your rotor’s maximum rating. No matter which option you pick, the safety step never changes: RPM must be ≤ the rotor’s max RPM, and the calculated g‑force should stay below the manufacturer’s “max g” spec. A quick glance at the spec sheet, then a double‑check in your chosen tool, keeps your samples safe and your instrument happy.
Step 6: Apply the Results to Your Protocol
You've got the RPM from your calculator, and now it's time to let that number do the heavy lifting in your experiment. Think of it like having a recipe ready – you just need to follow the steps so the dish turns out right.
First, grab your lab notebook or the digital SOP you use every day. Write the exact RPM next to the protocol step that calls for a specific g‑force. If you prefer a visual cue, stick a small label on the rotor or on the tube cap with the RPM value. A quick glance later saves you from hunting through calculations again.
Cross‑check the rotor limits
Before you hit "Start," double‑check that the RPM you calculated is lower than the rotor’s maximum rating. That number lives on the spec sheet you received when you bought the centrifuge – it’s the safety ceiling. If the calculator gave you 14,200 rpm but the rotor maxes out at 13,000 rpm, you need to adjust the target g‑force or swap to a rotor with a larger radius.
In our experience, a simple spreadsheet column titled “Max RPM?” lets you flag any over‑limit values in red. It’s a tiny habit that catches errors before they become costly equipment wear.
Update the protocol step
Now edit the protocol text. Instead of writing “spin at 12,000 × g for 2 min,” replace it with the concrete RPM you just calculated, for example “spin at 13,450 rpm for 2 min.” Adding the exact RPM makes the instruction crystal‑clear for anyone walking into the lab tomorrow.
Tip: keep the original g‑force in parentheses for reference – it reminds you why that speed matters. Something like “spin at 13,450 rpm (≈12,000 × g) for 2 min.”
Document the decision
Write a short note about why you chose that RPM. Was it limited by the rotor’s max? Did you round down to stay safe? A sentence like “Rounded down to 13,400 rpm because the rotor’s max is 13,500 rpm” gives future users the reasoning they need.
If you use an electronic lab notebook, attach a screenshot of the rpm‑to‑rcf calculator result. That visual audit trail is handy during audits or when reviewers ask for method details.
Run a test spin
Before you process valuable samples, do a quick test spin with a dummy tube. Watch the display, listen for smooth operation, and check that the pellet forms as expected. If the pellet looks off, pause and re‑check your numbers – maybe the radius was entered incorrectly or you need to tweak the RCF target.
Most modern centrifuges let you see the actual RPM in real time, so you can verify the machine obeys the command. If the instrument reports a lower speed, something is off with the settings or the rotor selection.
Integrate into SOPs and training
Once the test spin passes, update your standard operating procedure (SOP) with the new RPM. Include a short checklist: 1) Verify radius, 2) Enter radius & g‑force into rpm‑to‑rcf calculator, 3) Record RPM, 4) Confirm RPM ≤ max RPM, 5) Label rotor/tube, 6) Perform test spin.
When you train new technicians, walk them through this checklist. It turns a one‑off calculation into a repeatable habit, which is exactly what busy CROs and university labs need to keep throughput high and errors low.
What if you need to tweak the protocol later?
Science rarely stays static. If you later change the sample volume, switch to a different rotor, or adjust the incubation time, go back to the calculator, plug in the new radius or g‑force, and repeat the steps above. Because you’ve already built the documentation framework, the update is a matter of minutes, not a full rewrite.
And that’s it – the RPM you got from the calculator is now a living part of your protocol, safely bounded by equipment limits, clearly recorded, and ready for anyone to follow.
Conclusion
We've walked through the whole rpm to rcf calculator workflow, from measuring the rotor radius to plugging numbers into a web tool and stamping the final RPM into your SOP.
At this point you know why the math matters – it stops you from over‑spinning delicate DNA or under‑pelleting cells, and it saves you a ton of repeat runs.
Remember the quick checklist: verify radius, enter radius and desired g‑force, note the RPM, compare it to the rotor's max, label the tube, and run a test spin.
So, what’s the next step for you? Take a minute today to add that checklist to your lab notebook or digital SOP.
In our experience, labs that make the calculator a permanent part of the protocol see fewer errors and longer equipment life – a small habit that pays big dividends.
If you ever switch rotors or change the g‑force target, just repeat the same steps; the whole process takes under five minutes.
Bottom line: the rpm to rcf calculator turns guesswork into confidence, and a well‑documented RPM keeps your samples happy and your centrifuge humming.
Want a reliable microcentrifuge that works seamlessly with these calculations? Check out the options on Shop Genomics and keep your workflow smooth.
FAQ
What is an rpm to rcf calculator and why do I need it?
In simple terms, an rpm to rcf calculator translates the speed dial on your centrifuge (revolutions per minute) into the actual force you’re applying to a sample (relative centrifugal force, or g‑force). Knowing the exact g‑force matters because over‑spinning can shear DNA, while under‑spinning leaves cells incomplete. The calculator removes guesswork, letting you set a speed that’s spot‑on for your protocol.
How do I find the rotor radius for my centrifuge?
The rotor radius is the distance from the centre of rotation to the bottom of the tube or the outer edge of the cup, depending on the rotor type. Grab a ruler or a digital caliper, place one end at the hub, and extend it to the point where the sample sits. Write the number down in centimetres – if you measured in millimetres, just divide by ten.
Can I use the rpm to rcf calculator for both microcentrifuges and high‑speed rotors?
Absolutely. The formula behind the calculator (RCF = 1.118 × 10⁻⁵ × r × RPM²) works for any rotor as long as you have the correct radius and the machine’s speed range. For a tiny benchtop microcentrifuge you’ll often see radii around 6–8 cm, while a high‑speed swing‑out rotor might be 10 cm or more. Just plug in the right numbers and you’ll get a reliable RPM.
What should I do if the calculator gives an RPM that exceeds my rotor’s max rating?
First, stop and double‑check the radius and the target g‑force – a simple typo can inflate the result. If the number still tops the rotor’s maximum RPM, you have two safe options: lower the desired g‑force or switch to a rotor with a larger radius. Both keep you under the safety ceiling and protect the instrument and your samples.
Is it okay to round the RPM number, and how much rounding is safe?
Yes, rounding is common because most centrifuges only accept whole numbers. A good rule of thumb is to round down to the nearest 10 or 20 RPM to stay on the safe side. For example, if the calculator shows 13 467 rpm, set the machine to 13 400 rpm. Rounding down reduces the risk of exceeding the max g‑force while still delivering enough force for most protocols.
How often should I re‑check the rpm to rcf calculation when I change protocols or tubes?
Every time you tweak a variable – whether it’s a new tube size, a different rotor, or a changed g‑force target – run the calculator again. Even a small change in radius can shift the required RPM noticeably. Keep a quick checklist: verify radius, enter the new g‑force, note the RPM, and compare it to the rotor’s max. That habit saves you from costly repeats.


