
Ever stared at a micropipette and wondered why the volumes keep drifting, even after you swear you set it correctly?
You’re not alone—lab techs in academic labs, biotech start‑ups, and even big CROs hit the same snag when the instrument loses accuracy.
That’s why a solid micropipette calibration procedure is the first line of defence against bad data, wasted reagents, and the endless re‑run nightmare.
In our experience at Shop Genomics, we’ve seen labs cut down error rates by half simply by checking the pipette every week.
So, how do you actually do it? First, grab a certified reference weight or a set of gravimetric standards—nothing fancy, just something the manufacturer trusts.
Next, zero the balance, place a clean container on it, and pipette the volume you want to test. Weigh the liquid, compare the measured mass to the theoretical mass, and note the percent error.
If the error is beyond ±1 % for volumes above 10 µL, you’ll need to adjust the pipette’s internal screw or run a full calibration routine using the manufacturer’s software.
Don’t forget to document every step—date, temperature, humidity, and the exact numbers you recorded. A quick spreadsheet makes it easy to spot trends before they become a crisis.
Why is that important? Because many labs, especially those working on PCR or next‑gen sequencing libraries, can lose an entire experiment if a single pipette is off by a few microliters.
A regular calibration routine also satisfies quality‑control audits for clinical and regulatory bodies, saving you time when inspections roll around.
Bottom line: a reliable micropipette calibration procedure keeps your data trustworthy, your budget intact, and your team stress‑free.
Ready to give your pipettes the TLC they deserve? Let’s walk through each step together and make sure every drop counts.
Remember, consistency now prevents costly repeats later, so calibrate weekly.
TL;DR
A reliable micropipette calibration procedure keeps your data trustworthy, saves reagents, and prevents costly repeats in any genomics lab. Follow our step‑by‑step guide—zero the balance, weigh a reference volume, compare mass, adjust the screw if error exceeds ±1 %, and log conditions each week—to stay audit‑ready and stress‑free for your team every day.
Step 1: Prepare the Micropipette and Workspace
Before you even think about pulling the plunger, take a moment to look at your bench. Does it feel cluttered? Is there stray dust on the balance? Those tiny distractions are the silent killers of precision.
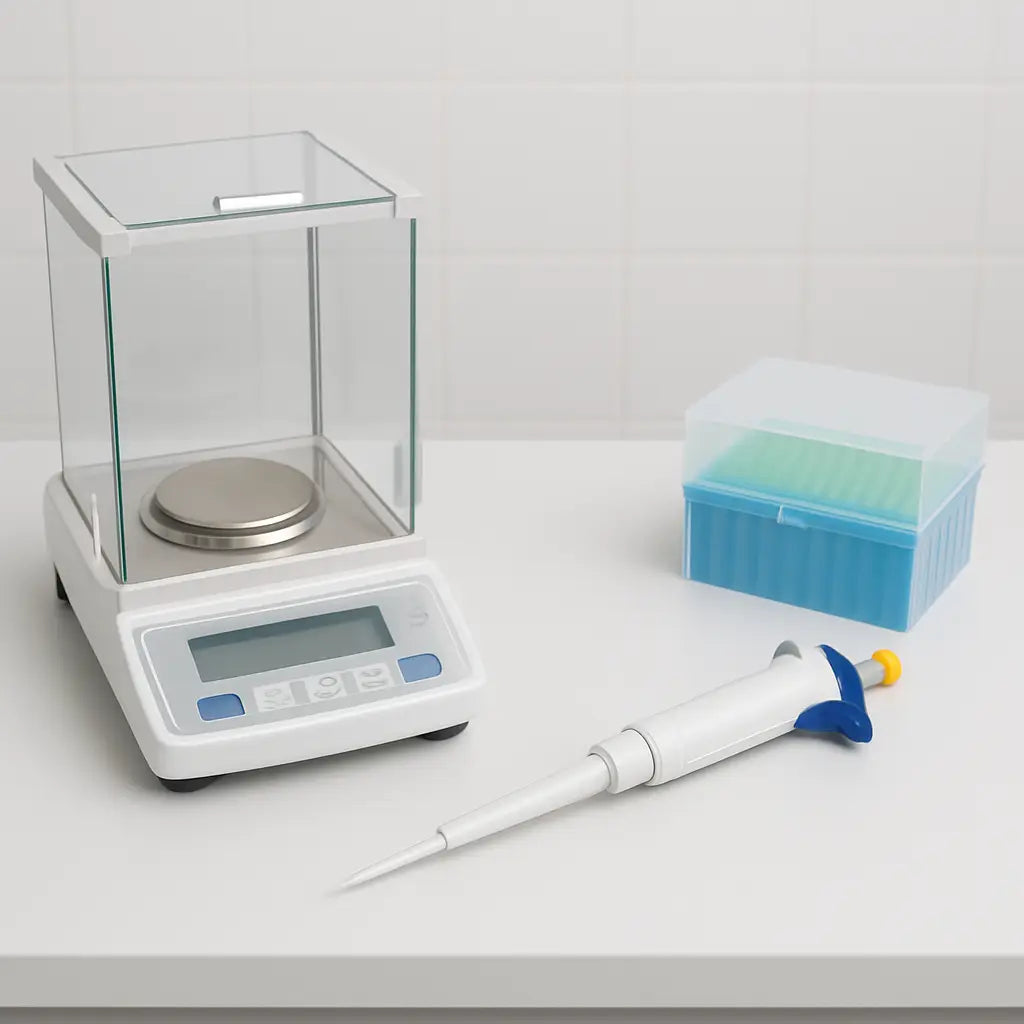
First, clear a 30 × 30 cm area on a clean, level surface. Grab a lint‑free wipe and give the pipette, tip box, and balance a quick swipe. A clean workspace reduces static and prevents stray droplets from skewing your weigh‑in.
Gather the right tools
You'll need a calibrated analytical balance (ideally one that reads to 0.01 mg), a set of certified reference weights, and the appropriate pipette tips for the volume you plan to test. If you work in a genomics core, you probably already have a stock of low‑retention tips—use those.
Tip: Keep the balance covered when not in use. Even a few minutes of exposure to lab humidity can shift the baseline.
Warm‑up the micropipette
Most piston‑driven pipettes need a short warm‑up period after being stored cold. Turn the volume dial to the target setting, then depress the plunger to the first stop and release. Do this five times. You’ll feel the resistance settle, and the internal piston reaches a stable temperature.
And if you’re wondering whether this step really matters—yes. In our experience, a pipette that skips the warm‑up can be off by up to 3 % on the first few draws.
Now, check the balance. Turn it on, let it stabilize for a minute, then press the tare button with an empty container on the pan. The display should read zero. If you see a drift, give it a few more minutes or consult the manual.
With the balance zeroed, place a clean, dry weighing boat on the pan. Make sure the boat sits flat—any tilt will introduce a systematic error.
Next, attach a fresh tip to the pipette. If you’re testing a 10 µL volume, use a low‑retention tip that matches the pipette’s range. Gently twist the tip onto the barrel until you feel a slight click. Avoid forcing it; a mis‑aligned tip can cause air bubbles that throw off the volume.
Set up your reference volume
Decide which volume you’ll calibrate today. A common choice is 10 µL for qPCR prep, but if you regularly pipette 100 µL for library prep, test that range instead. The key is to pick a volume you’ll actually use in experiments.
Now, pipette the chosen volume into the weighing boat. Press the plunger smoothly to the first stop, wait a second for the liquid to settle, then press to the second stop to expel any residual droplet. This two‑stop technique eliminates the “first‑drop” bias many technicians overlook.
Finally, record the mass displayed on the balance. You’ll convert that mass to a volume using the liquid’s density (water at 20 °C is 0.998 g/mL). This raw number is the foundation for the rest of the calibration procedure.
Take a breath. You’ve just turned a chaotic bench into a controlled environment, and you’ve captured the first data point of your micropipette calibration procedure. The next steps will compare this measured volume to the theoretical one and tell you if the screw needs tweaking.
Ready for the next phase? Keep the balance covered, label your data sheet, and move on to the error‑analysis step.
Step 2: Verify the Pipette Volume Settings
Alright, the bench is set, the balance is humming, and the tip is snug – now it’s time to make sure the pipette thinks it’s delivering the right amount.
Read the volume on the dial or digital display
First thing’s first: glance at the setting. Whether you’re using a classic air‑displacement pipette with a rotary knob or a modern electronic model with a touchscreen, the number you see is the volume the instrument will try to move. If the display shows 100 µL but you intended 50 µL, you’ve already introduced a 100 % error before you even touch the liquid.
Quick tip: lock the volume after you set it. Many users forget this tiny step, and the knob can drift when the pipette is bumped or when you switch tips.
Confirm the selected range matches your test volume
Micropipettes have a defined optimal range – usually 10–100 % of the maximum capacity. Pushing a 10 µL pipette to deliver 900 µL will give you sloppy results and wear out the piston faster. So, double‑check that the volume you entered sits comfortably inside the pipette’s recommended range.
In our experience working with academic labs and CROs, we see the same mistake over and over: a researcher grabs a 200 µL pipette for a 5 µL assay because that tip was the only one left on the bench. The result? Inconsistent quantification that could have been avoided with a quick volume‑range check.
Zero‑out any residual volume
Some electronic pipettes keep a “residue” value from the last dispense. Before you start the gravimetric test, hit the “reset” or “zero” function so the instrument starts from a clean slate. This prevents the software from adding an invisible extra microliter to every measurement.
Even mechanical pipettes benefit from a quick “pre‑dispense”: aspirate and discard a few drops of water back into the waste container. That primes the tip, wipes out air bubbles, and stabilizes the piston.
Run a quick “dry‑run” check
Place a clean tube on the balance, set the desired volume, and press dispense without any liquid. The balance should stay at zero (or within 0.01 mg of zero). If you see a dip, the tip might be leaking or the piston is not fully returning.
Ask yourself: does the pipette feel smooth, or is there a gritty resistance? A sticky piston often means the seal needs cleaning or the piston oil is drying out – both common in busy labs that run the instrument round‑the‑clock.
Document the setting
Write the exact volume you entered, the date, and the ambient temperature in your calibration log. It sounds old‑school, but when you’re troubleshooting a discrepancy weeks later, that little note can save you hours of head‑scratching.
For labs that run multiple pipettes side by side, colour‑code the log entries or use a simple spreadsheet column for “Volume Setting.” This habit makes it easy to spot if a particular model is consistently set outside its sweet spot.
What if the volume is off?
If you notice the displayed number doesn’t match what you intended, don’t panic. Most manufacturers include a small adjustment screw or a software calibration routine. Tighten the screw a notch at a time, re‑check the display, and repeat the verification steps until the numbers line up.
Remember: a pipette that’s “close enough” today can drift further tomorrow. Regularly revisiting the volume‑verification step – ideally once a week – keeps the error within the ±1 % range that genomics workflows demand.
Now that you’ve confirmed the pipette is set to the right volume, you’re ready to move on to the actual dispensing and mass‑recording step. Keep the momentum going, and those downstream PCR or sequencing runs will thank you.
Step 3: Perform the Gravimetric Calibration
Alright, you’ve set the volume on the pipette and double‑checked the balance. What’s next? It’s time to actually weigh that liquid and see if the numbers line up.
Gravimetric calibration is basically the gold standard for pipette accuracy. You measure the mass of the water you dispense, convert that mass to volume using the density of water, and compare it to the target volume. If the error is beyond the ±1 % tolerance most labs use, you’ll need to adjust the pipette before you ever touch a sample.
Gather everything you need
- A calibrated analytical balance (readable to 0.01 mg).
- A clean, dry weighing vessel (a 1 mL polypropylene tube works for most volumes).
- Distilled or deionized water – it has a known density at a given temperature.
- A thermometer or a temperature‑controlled room so you can record the water temperature.
Do you remember the last time you let a stray droplet sit on the balance pan? Those tiny residues can add up and skew your numbers. A quick wipe with a lint‑free tissue before each weigh‑in saves you headaches later.
Zero the balance and record the environment
Place the empty vessel on the balance, press “zero” (or “tare”), and watch the display settle. Note the temperature – at 20 °C water density is 0.9982 g mL⁻¹, but a 2 °C swing changes the density enough to affect the calculation.
Why bother? Because the math is simple: volume = mass / density. If you feed an inaccurate density into that equation, the whole calibration is off.
Dispense and weigh the test volume
Now the fun part. Aspirate the target volume (say, 100 µL) and dispense it directly into the vessel. No extra steps – no rinsing, no blowing, just a clean transfer.
Immediately record the mass. The balance will usually give you a reading like 0.0998 g. That’s your raw data point.
Convert mass to volume
Take the measured mass and divide by the water density at the recorded temperature. For example, 0.0998 g ÷ 0.9982 g mL⁻¹ ≈ 100.0 µL. Compare that to the set volume. The percent error is calculated as (measured – target) ÷ target × 100.
If the error is 0.8 %, you’re good to go. If it’s 2 % or higher, it’s time to tweak the pipette.
Adjust the pipette
Most electronic pipettes have a built‑in calibration routine: navigate to the “Calibration” menu, follow the prompts, and let the software adjust the internal screw. Mechanical pipettes? Turn the fine‑adjustment screw a notch at a time, re‑weigh, and repeat until you’re within spec.
Does it feel like a lot of back‑and‑forth? Think of it as a mini‑audit. One precise adjustment now prevents weeks of wasted reagents and failed experiments later.
Document every step
Write down: date, temperature, target volume, measured mass, calculated volume, and percent error. A simple spreadsheet with columns for each of these values makes trend‑spotting a breeze.
Ever wonder why some labs keep a “calibration log” on a whiteboard? It’s because the log instantly shows when a pipette starts drifting – a red flag before the next experiment.
Quick reference table
| Step | Action | Tip / Common Pitfall |
|---|---|---|
| 1. Zero balance | Place empty vessel, tare the balance. | Make sure the vessel is dry; residual moisture adds mass. |
| 2. Dispense water | Aspirate target volume, dispense into vessel. | Avoid splashes – hold the tip steady and release slowly. |
| 3. Calculate error | Convert mass to volume using temperature‑corrected density, compute % error. | Record temperature; use NIST gravimetric calibration guidelines for accurate density values. |
Need a solid reference for the density values and the official procedure? The NIST gravimetric calibration guidelines lay out the exact steps many regulatory labs follow.
So, what’s the bottom line? If your gravimetric check lands within ±1 % you can trust the pipette for downstream PCR, sequencing, or any quantitative assay. If not, tweak, re‑measure, and log the result. Consistency now prevents costly repeats later, and your data stays rock‑solid.
Step 4: Adjust and Document the Calibration Results
You've just weighed that drop of water and the percent error is staring back at you. If it’s within the ±1 % sweet spot, you can breathe easy. If it isn’t, it’s time to roll up your sleeves and tweak the pipette.
Fine‑tune the adjustment
First, locate the tiny calibration screw on the back of the pipette. Turn it a half‑turn clockwise if the measured volume was low, or counter‑clockwise if it was high. After each tiny adjustment, dispense the test volume again and re‑weigh.
Does it feel like you’re chasing a moving target? That’s normal – the piston can settle after a few cycles. Aim for three consecutive weigh‑ins that land within the ±1 % window.
For electronic models, pull up the built‑in calibration menu. Most manufacturers let you enter the measured mass, and the firmware automatically recalculates the correction factor. It’s quicker, but double‑check the firmware version – older software can misinterpret the density value.
Record every detail
Now grab your lab notebook or, better yet, a spreadsheet. Log the date, room temperature, humidity, target volume, measured mass, calculated volume, and the final percent error. Include a note about the screw position or the software correction value you applied.
Why bother with all that minutiae? A few weeks later, when an audit asks for a calibration certificate, you’ll have a paper trail that shows the pipette never drifted beyond tolerance.
Create a calibration log
Many labs stick a whiteboard near the bench and scribble the latest numbers. It works, but a digital log lets you chart trends. Plot the error percentage over time; a gradual upward slope is a red flag that the pipette’s seals might be wearing out.
In a biotech startup we helped, the log revealed a slow 0.3 % drift each month. The team scheduled a preventive service before the error crossed the 1 % threshold, saving them a costly repeat of a critical qPCR run.
Real‑world example
Imagine a clinical lab processing patient DNA extracts. Their 10 µL pipette showed a 1.8 % low bias during the weekly gravimetric check. After a few screw adjustments, the error dropped to 0.4 %. That tiny correction meant every downstream library prep used the correct amount of enzyme, keeping the assay within the validated range for patient reporting.
Another story comes from an academic genomics core where a multi‑channel pipette was consistently over‑delivering by 2 % on the outer channels. The tech discovered the issue was an uneven tip seating – a simple tip‑fit check solved it, and the log captured the before‑and‑after numbers.
Tips for consistency
• Use the same batch of distilled water for every calibration – density changes with impurities.
• Let the balance warm up for at least 15 minutes before the first weigh‑in.
• Avoid drafts; even a gentle airflow can jiggle a 0.01 mg reading.
And here’s a quick habit: after each adjustment, write a one‑sentence “adjustment note” – something like “tightened screw 2 clicks clockwise; error now –0.3 %”. Those notes become gold when you’re troubleshooting months later.
Need a printable template for your calibration log? Check out custom lab labels from JiffyPrintOnline – they offer sticker sheets that stick right onto your bench‑side log board.
For a deeper dive on how to set up your pipette before you even start the gravimetric test, see our How to Use a Micropipette: A Simple Step‑by‑Step Guide. It walks you through priming, tip selection, and the little tricks that keep your volume settings spot‑on.

Bottom line: adjustment isn’t a one‑off fix; it’s part of a loop – measure, tweak, re‑measure, and document. Keep that loop tight, and your downstream experiments – whether PCR, sequencing, or ELISA – will stay reliable, reproducible, and audit‑ready.
Step 5: Validate Accuracy and Maintain the Pipette
Okay, you’ve just weighed that test dispense – what’s next? You need to turn those numbers into a decision.
First, write down the target volume, the mass you recorded, and the temperature of the water. Convert the mass to volume using the density for that temperature (about 0.9982 g mL⁻¹ at 20 °C). Then calculate the percent error: (measured – target) ÷ target × 100.
If the error sits inside your lab’s tolerance – typically ±1 % for volumes above 10 µL – you’re good to go. If it’s outside, it’s time to tweak.
Fine‑tune the pipette
Most mechanical pipettes have a tiny calibration screw on the back. Turn it a half‑turn clockwise if the volume is low, or counter‑clockwise if it’s high. For electronic models, fire up the built‑in calibration routine, enter the measured mass, and let the software adjust the correction factor.
After each tiny adjustment, repeat the gravimetric check. I like to do three consecutive weigh‑ins and only move on when all three land within ±1 %.
Does this sound like a lot of back‑and‑forth? Trust me, the piston can settle after a few cycles, so the extra repeats save you from chasing a moving target later.
Document everything
Grab a lab notebook or a spreadsheet and log the date, ambient temperature, target volume, measured mass, calculated volume, percent error, and the exact screw position or software value you entered.
Why bother? When an audit comes knocking, that paper trail proves you didn’t just guess – you followed a solid micropipette calibration procedure.
Tip: Use a color‑coded column for “in‑spec” vs. “out‑of‑spec” so you can spot trends at a glance.
Routine maintenance checklist
- Wipe the barrel with a lint‑free cloth; avoid solvents that could damage seals.
- Check the tip‑fit – a loose tip adds a few microliters of dead‑space.
- Lubricate the piston (if your model permits) with a manufacturer‑approved oil.
- Run a quick “dry‑run” dispense without liquid to verify the plunger returns smoothly.
Even a small amount of residue or a sticky piston can throw off accuracy by 0.2 % or more.
Ever wondered why a brand‑new pipette still feels a bit off after weeks of use? In many academic cores, the culprit is temperature swing on the bench. Keep the pipette and the balance in a draft‑free zone, and let them equilibrate for at least 15 minutes before testing.
Real‑world example
At a university genetics core, a 10 µL pipette used for qPCR library prep started delivering 1.8 % less volume after three months. The resulting libraries showed uneven amplification, and the lab burned through an extra 30 % of reagents.
After a quick fine‑tune and a new maintenance schedule – cleaning the piston weekly and logging each adjustment – the error dropped to 0.3 %. The next run produced consistent Ct values, and the team saved both time and money.
Does that resonate with your lab? Small drifts add up fast, especially when you’re dealing with low‑volume, high‑impact assays.
Pro tips to keep drift at bay
• Use the same batch of distilled water for every gravimetric check; impurities change density.
• Record the exact humidity; high humidity can add a thin film of moisture to the tip.
• Schedule a full calibration check every month for high‑use pipettes, and every six months for those used only occasionally.
For a deeper dive into the science behind accuracy and precision, see rainin’s detailed guide rainin's guide on pipette accuracy and precision. If you ever need professional help, Eppendorf pipette calibration services offer on‑site adjustments and preventive maintenance.
Bottom line: validation isn’t a one‑off test; it’s a habit. Keep measuring, tweaking, and logging, and your pipette will stay reliable day after day.
FAQ
What is a micropipette calibration procedure and why does it matter?
A micropipette calibration procedure is a systematic set of steps that verifies the volume a pipette actually delivers matches the setting on the dial or display. It matters because even a 2 % error can throw off PCR quantification, waste costly reagents, and trigger audit failures. By checking accuracy regularly you keep data trustworthy, protect your budget, and avoid the frustration of a failed experiment that could have been caught earlier.
How often should I run a calibration check in a busy genomics lab?
In high‑throughput environments—like academic cores, CROs, or biotech start‑ups—we recommend a weekly gravimetric check for any pipette used for volumes under 100 µL. For larger, less‑frequent instruments, a monthly check is sufficient. The key is consistency: schedule the same day each week, log the results, and look for trends. If you notice a drift of more than 0.3 % over two weeks, tighten the schedule to twice a week until the error stabilises.
What tools do I need to perform an accurate calibration?
You’ll need a calibrated analytical balance that reads to 0.01 mg, a clean low‑retention tip that matches the pipette’s range, a small weighing vessel (a 1 mL polypropylene tube works well), and distilled water with a known density at your lab temperature. A thermometer or a temperature‑controlled room is essential because water density shifts about 0.2 % for every 2 °C change. A simple spreadsheet or lab notebook to capture date, temperature, target volume, measured mass, and percent error rounds out the toolkit.
How do I calculate percent error without a calculator?
First, record the mass of the dispensed water (in grams). Convert that mass to volume by dividing by the water density at the measured temperature (for example, 0.9982 g/mL at 20 °C). Then use the formula: (measured – target) ÷ target × 100. Most scientists keep a quick reference sheet on the bench, so you can do the math in under a minute and immediately see if the pipette is in spec.
What should I do if the error is outside the ±1 % tolerance?
Start by performing a “dry‑run” dispense to check for leaks or tip‑fit issues. If the hardware looks fine, adjust the fine‑tune screw on a mechanical pipette a half‑turn at a time, or run the built‑in calibration routine on an electronic model. After each tiny adjustment, repeat the gravimetric test until three consecutive measurements fall within ±1 %. Document every tweak; that trail becomes invaluable during audits or when troubleshooting downstream assays.
Can temperature fluctuations really affect calibration results?
Absolutely. A 2 °C swing can change the density of water enough to shift calculated volume by roughly 0.2 %. In a lab where the HVAC cycles between 20 °C and 24 °C, you’ll see this show up as a small but consistent bias. To minimise the effect, let the balance and the weighing vessel equilibrate for 10–15 minutes after any temperature change, and always record the temperature alongside your mass reading.
Do I need professional service for routine calibration?
For most academic and small‑to‑medium labs, the gravimetric method described here is reliable and cost‑effective. However, if you run a clinical diagnostic service or a GMP‑regulated environment, an external calibration service can provide a certified report that satisfies regulatory bodies. In those cases, schedule an on‑site visit every six months, but keep the weekly in‑house checks to catch drift before the formal audit.
Conclusion
So you've walked through every step of the micropipette calibration procedure – from prepping the bench to tweaking the fine‑adjust screw.
If you ever wondered whether all that effort really matters, think about the last time a bad pipette ruined a PCR run.
A single microliter off can waste reagents, delay results, and raise questions during an audit – something none of us want.
That's why keeping a tidy log, re‑checking temperature, and doing three consecutive weigh‑ins inside ±1 % is worth the few extra minutes each week.
In academic labs or CROs, that consistency translates to reproducible data; in clinical settings, it can mean the difference between a reliable diagnosis and a retest.
Remember, calibration isn’t a one‑off chore – it’s a habit that catches drift before it becomes a costly problem.
So next time you set up a new experiment, take a minute to glance at your log, confirm the temperature, and give that pipette a quick gravimetric check.
You’ll walk away feeling confident that every drop you dispense is as accurate as the instrument promises, and your downstream results will thank you.
Got a question about a specific model or need a reminder template? Drop us a note – we love helping labs keep their data solid.
Keep calibrating, keep recording, and let your experiments run smoother than ever.


